Manali Highway Bikepacking Guide
Contents
- Preamble
- Route
- Transport
- Time of Year and Weather
- Phone Signal and Electronics
- Costs and Expenses
- Equipment Considerations
- Gear List
- Day 1) Manali to Mardhi
- Day 2) Mardhi to Sissu via Rohtang La
- Day 3) Sissu to Jispa
- Day 4) Jispa to Zing Zing Bar
- Day 5) Zing Zing Bar to Sarchu via Baralacha La
- Day 6) Sarchu to Whiskey Nala via Nakee La
- Day 7) Whiskey Nala to Debring via Lachung La
- Day 8) Debring to Upshii / Lato via Tanglang La
- Day 9) Upshii to Leh
- Day 10) Khardung La
Preamble
Contents
- Preamble
- Route
- Transport
- Time of Year and Weather
- Phone Signal and Electronics
- Costs and Expenses
- Equipment Considerations
- Gear List
- Day 1) Manali to Mardhi
- Day 2) Mardhi to Sissu via Rohtang La
- Day 3) Sissu to Jispa
- Day 4) Jispa to Zing Zing Bar
- Day 5) Zing Zing Bar to Sarchu via Baralacha La
- Day 6) Sarchu to Whiskey Nala via Nakee La
- Day 7) Whiskey Nala to Debring via Lachung La
- Day 8) Debring to Upshii / Lato via Tanglang La
- Day 9) Upshii to Leh
- Day 10) Khardung La
This guide is written to provide assistance to anyone attempting to cycle the Manali Highway. I am writing it to present information that would have been useful to me for my trip in June 2023, in order to save everyone else from trawling through outdated blogs and Reddit posts.
The guide assumes familiarity with bike packing / cycle touring and with general outdoor skills. I would not cycle the Manali highway as a first unsupported cycle touring trip due to its remoteness and lack of bike / gear repair options, however it is appropriate for a first venture to high altitude. My personal experience includes 5 months previously spent in the Indian and Nepalese Himalayas over many trips and years, and about 4 months spent road cycle touring in New Zealand, Europe and Australia.
The management of altitude sickness is its own topic and beyond the scope of this guide. Good resources for understanding altitude sickness include the textbook Mountaineering Freedom of the Hills, or any number of online guides such as here: https://www.princeton.edu/~oa/safety/altitude.html
The Indian government is currently building at least 1 additional tunnel, which will alter the route when it is open. This guide is accurate to June 2023 and the conditions and route will be changed over time. Older guides suggest that there are many river crossings and rough terrain; bridges and infrastructure have since been significantly developed and as of 2023 I was able to complete the route with my feet only getting wet once.
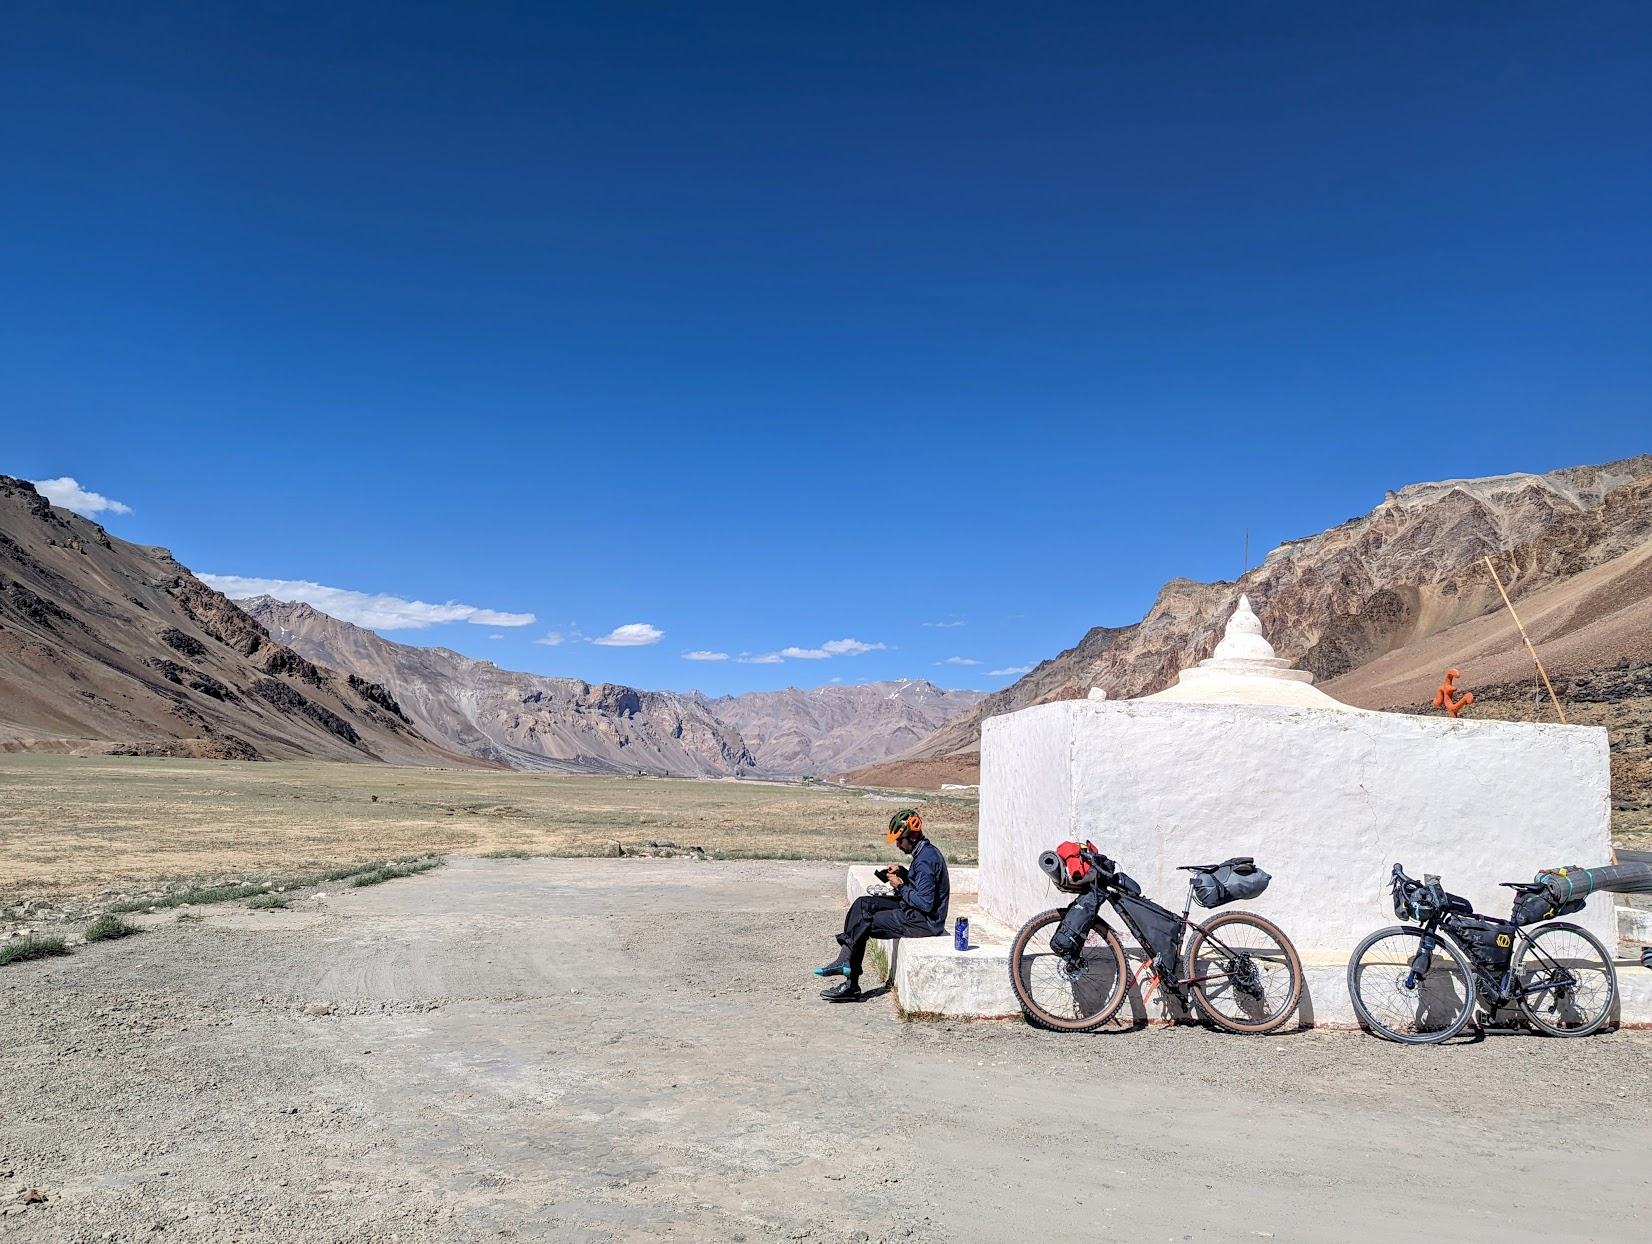
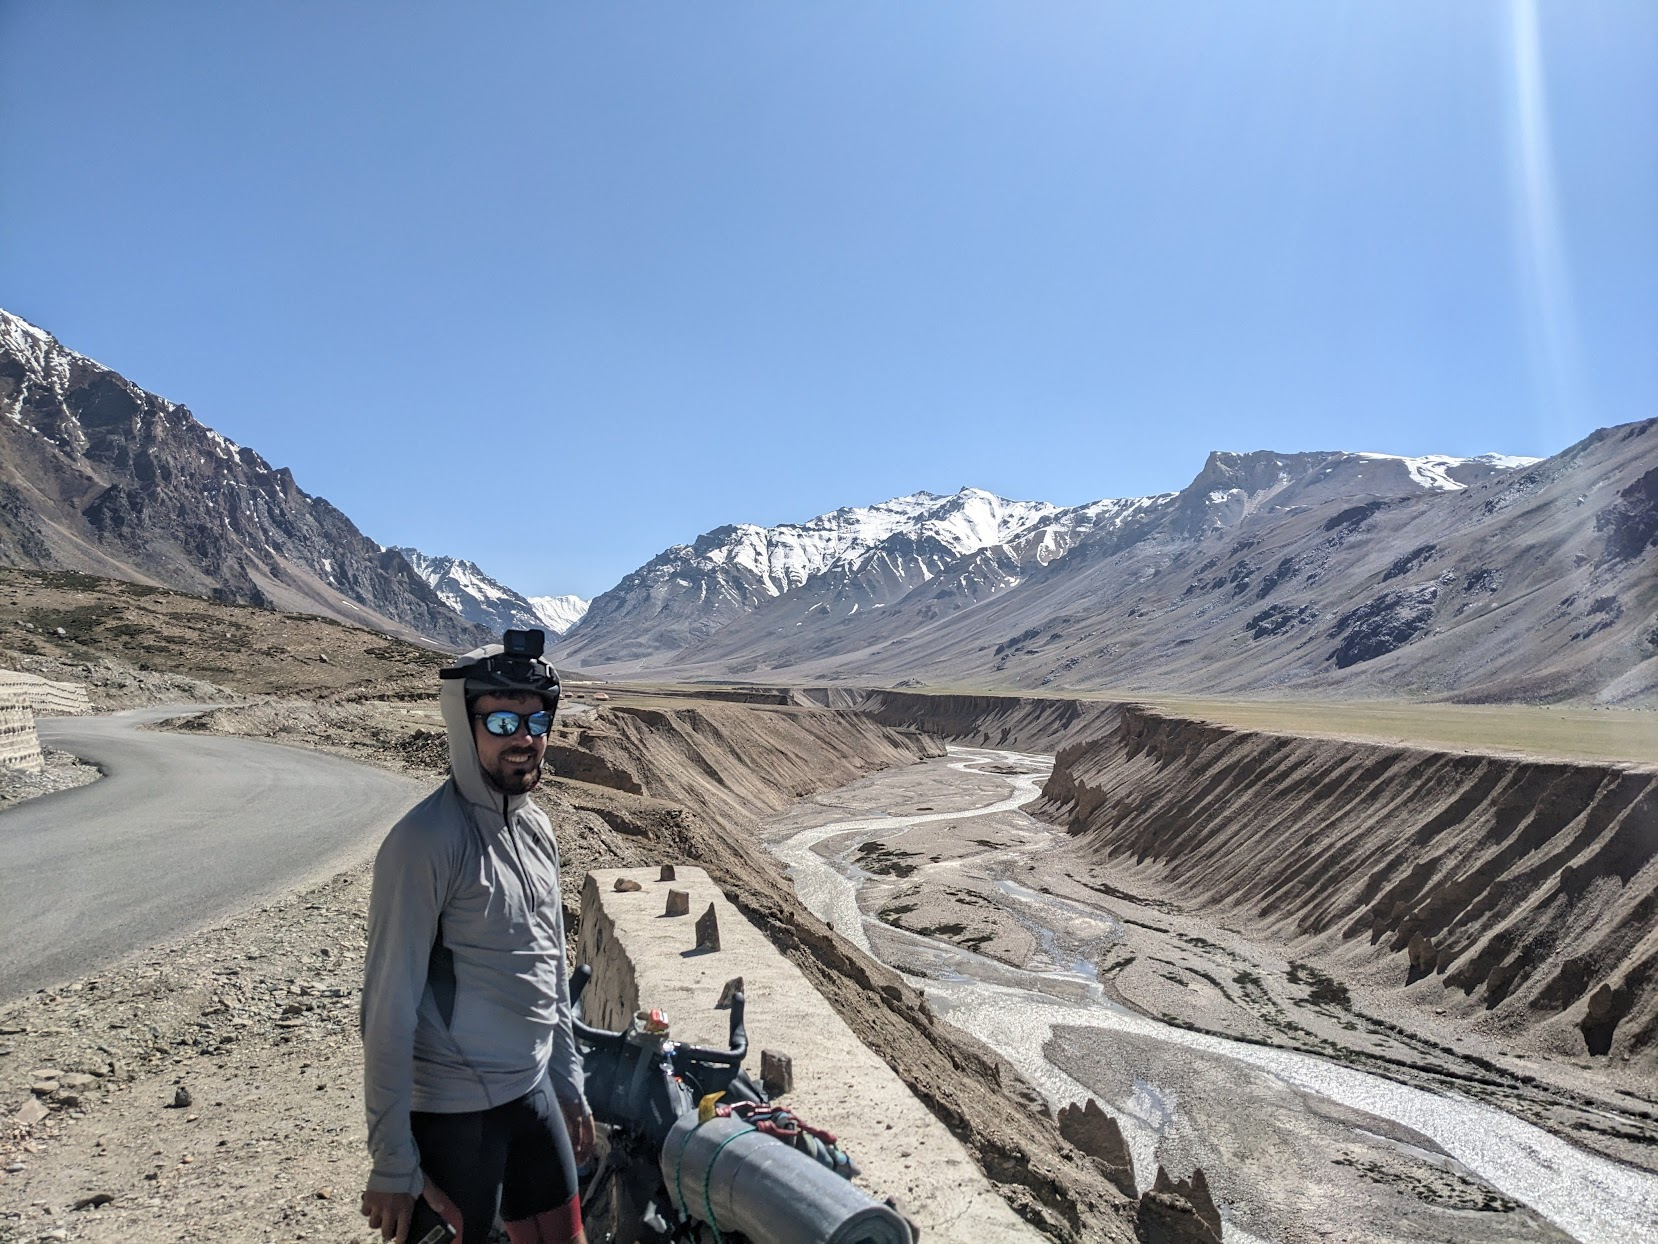
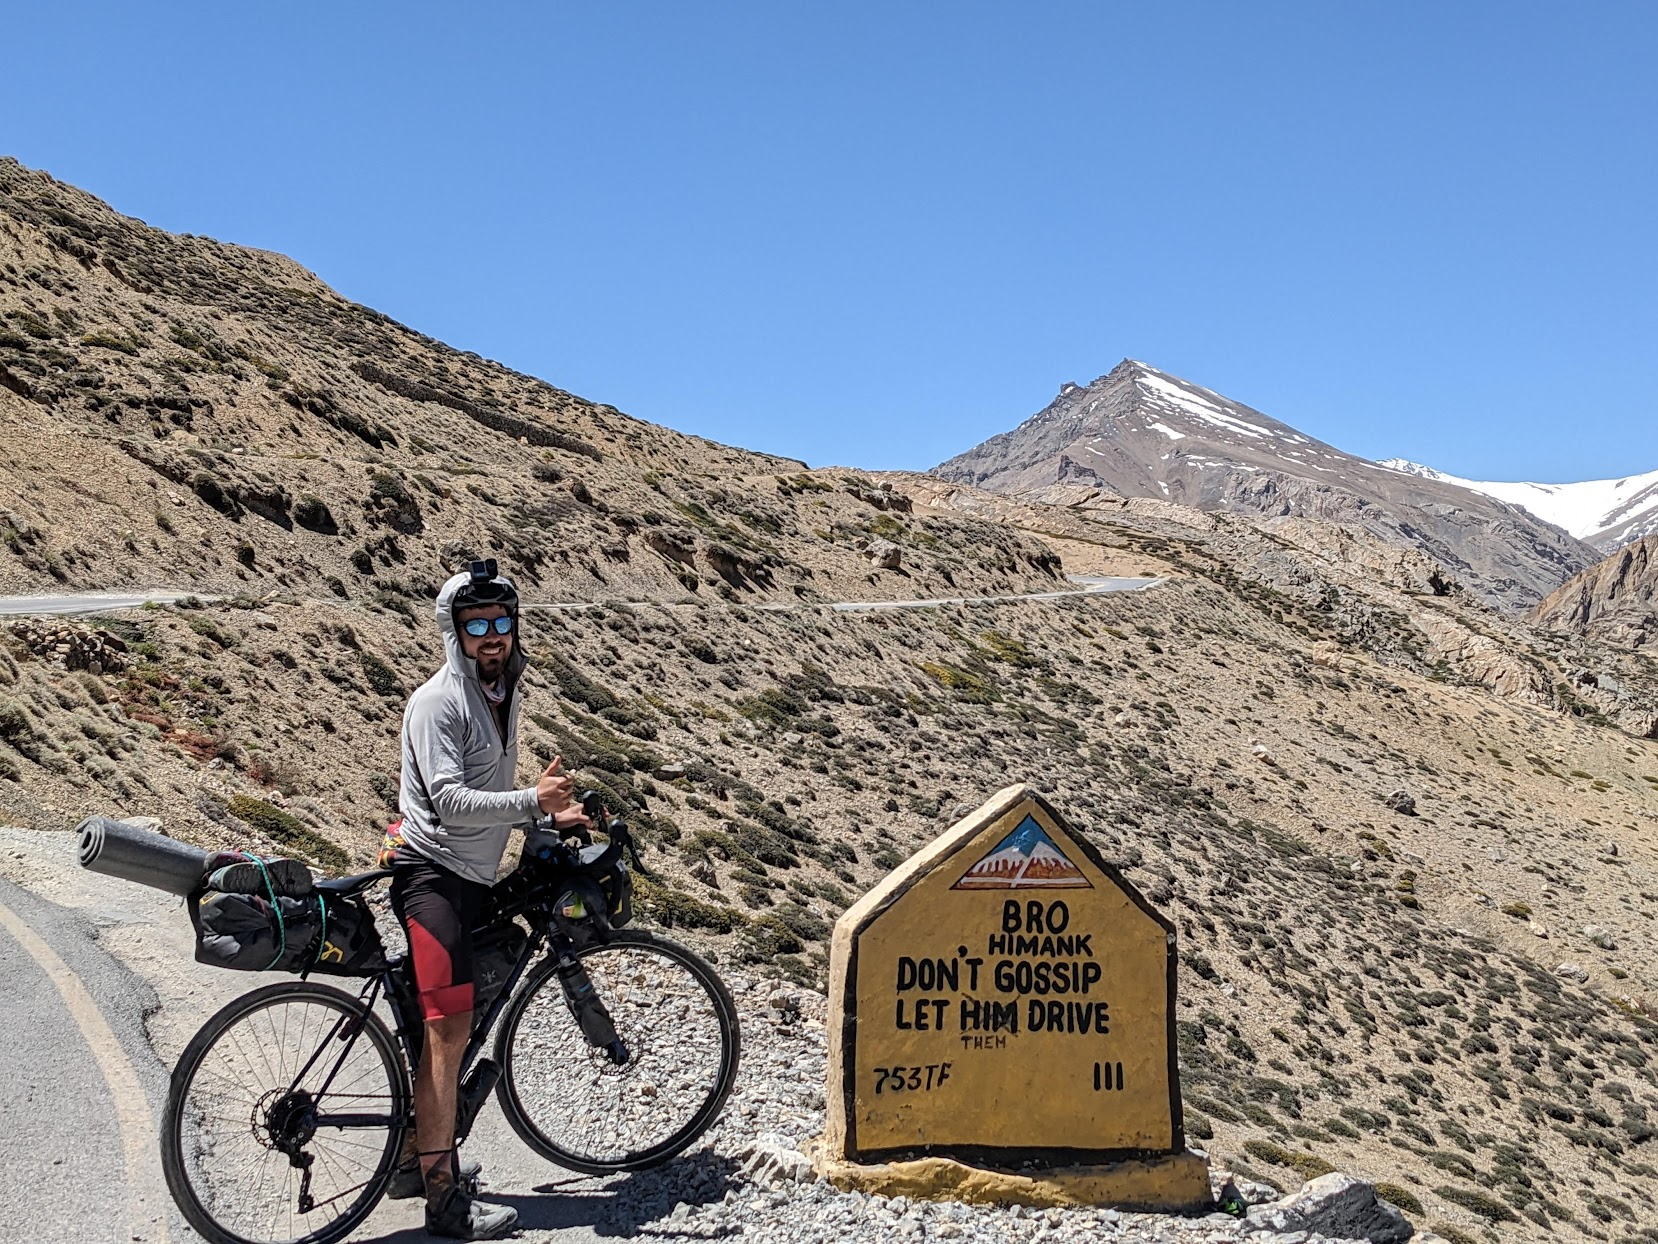
Fixing a cleat in the valley between Zing Zing Bar and Sarchu
Route
The Manali Highway joins the town of Manali to the town of Leh, running from Himachal Pradesh through to the Ladakh region of Jammu and Kashmir. Jammu and Kashmir is a semi-autonomous state of India, and borders both Pakistan and China. Both countries contest the location of the border, resulting in regular armed conflict and war. As such, Jammu and Kashmir is regarded as the most militarised zone in the world. There are frequent military bases and vehicles along the Manali highway representing a strong armed presence. This presence represents a development of infrastructure, as the military requires these roads to be trafficable at all times. This works out great for cyclists.
Ladakh is the highest plateau in India with most of it being over 3000 m elevation, extending from the Himalayas to the Kunlun mountain range. It is a high altitude desert, experiencing little rainfall. The local culture is similar to Tibetan culture, and the local language is Ladakhi, which is similar to Tibetan. The region is known for its beautiful and remote Buddhist monasteries. The Indus river, after which India is named, flows down through Ladakh.
The 9 day cycling route begins at Manali (1800 m) and ends at Leh (3500 m). It covers ~520 km and ~10 km of climbing with 4 x ~ 5000 m passes and a high point of 5300 m. The route increases in altitude gently, and with good management and fitness should not require any acclimatisation days. However, I would recommend planning for at least 2 acclimatisation / weather days to manage fatigue and misadventure. We planned for 4 spare days and needed 3 extra; 1 day due to delayed transport to the start, 1 day for food poisoning recovery, and 1 day for fatigue.
The route splits naturally into 9 days, which allows you to avoid doing multiple 5000 m passes in 1 day, to stop at the major towns with the most amenity, and to achieve a good acclimatisation schedule. It is possible to do the route in fewer days, but would require less acclimatisation, and may require combining high passes. Additionally, you could take more days, but it may be hard to divide the route well. If you want to take more than 9 days of riding, I would consider using the same 9 day schedule, but just taking more rest days.
|
Day |
Segment |
Distance (km) |
Ascent (m) |
Descent (m) |
Start Elevation (m) |
Peak Elevation (m) |
End Elevation (m) |
|
1 |
Manali to Marhi |
40.25 |
1487 |
111 |
1892 |
3267 |
3267 |
|
2 |
Marhi to Sissu |
52.54 |
846 |
1054 |
3345 |
3920 |
3138 |
|
3 |
Sissu to Jispa |
50.92 |
897 |
741 |
3085 |
3370 |
3235 |
|
4 |
Jispa to Zing Zing Bar |
37.46 |
1174 |
184 |
3224 |
4214 |
4214 |
|
5 |
Zing Zing Bar to Sarchu |
40.33 |
644 |
549 |
4214 |
4850 |
4400 |
|
6 |
Sarchu to Whisky Nala |
48.73 |
927 |
491 |
4296 |
4893 |
4732 |
|
7 |
Whisky Nala to Debring |
76.24 |
834 |
887 |
4742 |
5030 |
4664 |
|
8 |
Debring to Lato |
59.42 |
682 |
1242 |
4624 |
5335 |
3984 |
|
9 |
Lato to Leh |
72.49 |
560 |
995 |
4034 |
4034 |
3602 |
|
10 |
Leh to Khardung La |
38.67 |
1719 |
50 |
3602 |
5114 |
5114 |
Route Data Sheet - Numbers from OpenStreetMap / Gaia GPS
There are some blogs which suggest going the opposite direction from Leh to Manali. Do not do this if you are not acclimatised; the acclimatisation schedule from Leh to Manali is dangerous. You would start at 3500 m and rise to the high point of 5300 m on your second or third day, which is a bad altitude sickness risk. The Leh to Manali direction would require multiple rest days at Leh and taking higher elevation walks to achieve acceptable acclimatisation.
The Manali Highway route could be combined with the Spiti Valley Loop, or with continuing west past Leh to Srinagar, or continuing north to the Siachen glacier. We met cyclists who were doing each of these routes along with the Manali Highway. Given more time, I would have loved to explore these destinations.
The Manali Highway consists of only 1 road and it is impossible to get lost. Navigation is not an issue.
There is roadside accommodation at each point marked on the itinerary, with some consisting of nice hotels and others being temporary camps. Food and bottled water are available along the route at accommodation, and at roadside stops along the way.
The road is primarily asphalt of varying quality, however it has an extended unpaved section from Zing Zing Bar to Pang. The entire road is doable in a 2wd vehicle with low clearance and is completed easily with a gravel bike. I used 38 mm Marathon Schwalbe tires and had no difficulty.
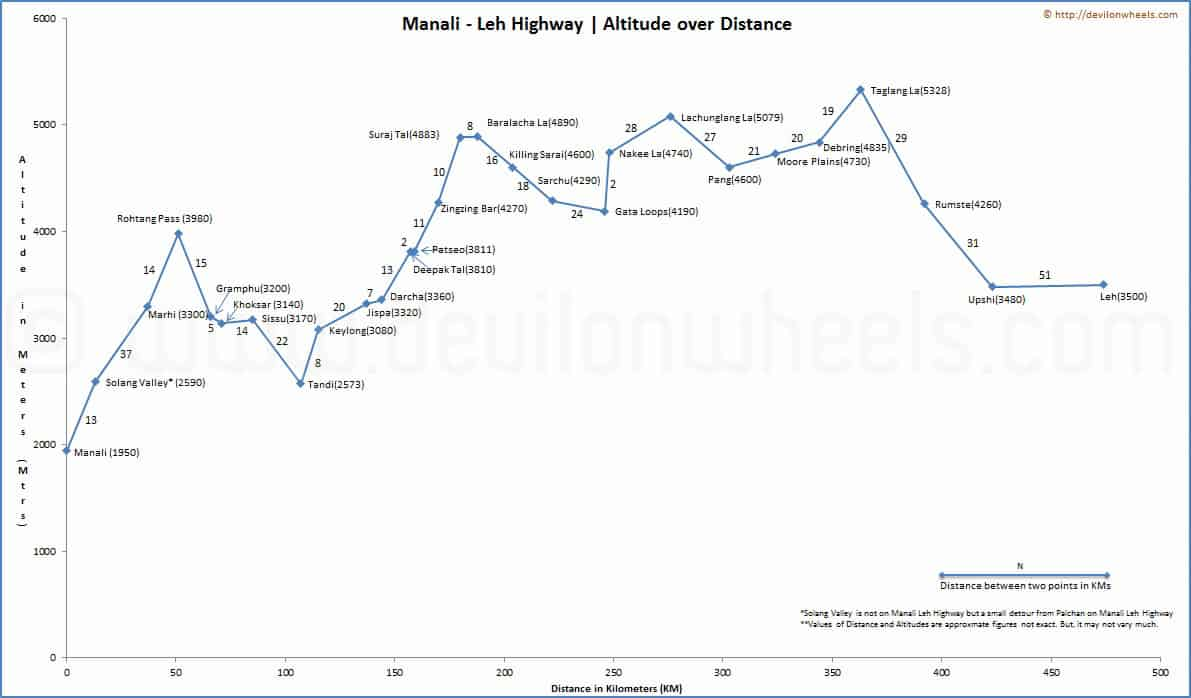
Elevation Profile of the Manali Highway (devilonwheels.com)
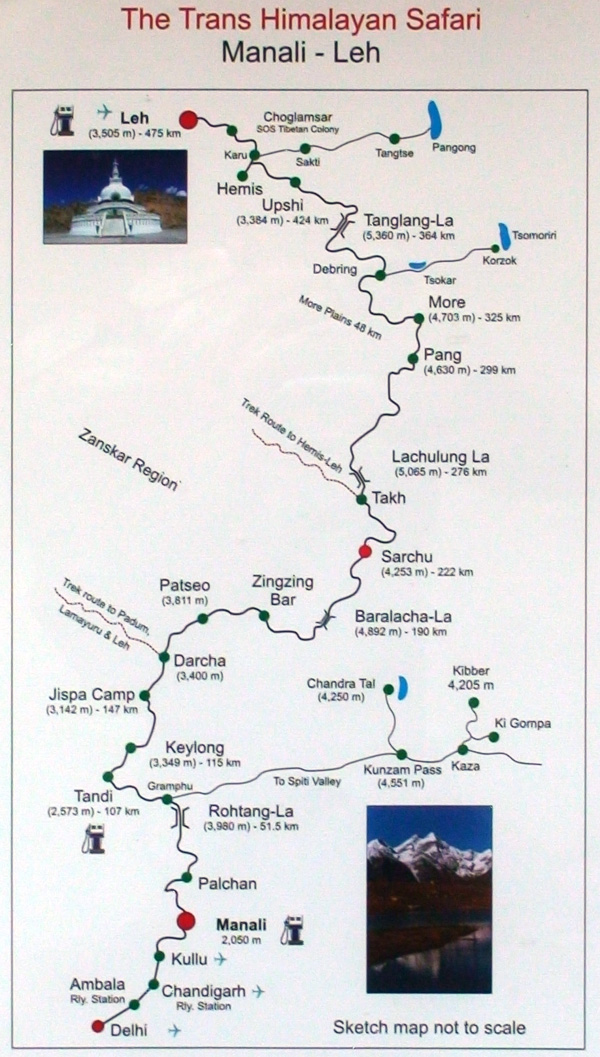
Map view of the Manali Highway (realworldadventures.com)
Transport
Land transport is required as the closest airport to Manali is small and does not do commercial flights. If you are a local you may be able to work out how to book a flight here, but as far as I am aware it isn’t possible.
The highway from Delhi to Manali is long and subject to many delays. We booked a private taxi and expected it to take 12 hours. However, due to farmer protests blocking the highway and changing our route, a detour due to road works, and then torrential rain that was so heavy we had to pull over, after 14 hours we were still nowhere near Manali, and pulled into a town earlier to sleep. Ultimately it took 17 hours of driving over 1.5 days.
Our taxi for 2 people cost us 30000 INR or ~400 USD. This was extremely expensive, and was organised through a contact so I didn’t compare or haggle prices. I am sure it would be easy to find a taxi in Delhi for much cheaper than this. That being said, I would still pay that price again, as I have caught public transport in the Himalayas many times and I have always found the chaos and delays to outweigh the cost saving.
From Delhi to Manali there is a public bus available. This bus is cheap and is supposed to take about 14 hours. If you choose to take the bus, allow at least 1 extra day due to delays and cancellations.
To finish the trip, either fly out of Leh or organise land transport back to Delhi. I would recommend flying out. There is a mountain bike store in Leh where you can get a bike box. They will even clean and pack the bikes for a fee.
Visit Naveen at Himalayan Bike Bar in Manali before starting the trip. He is a local legend and has great beta on the route and can help with anything.
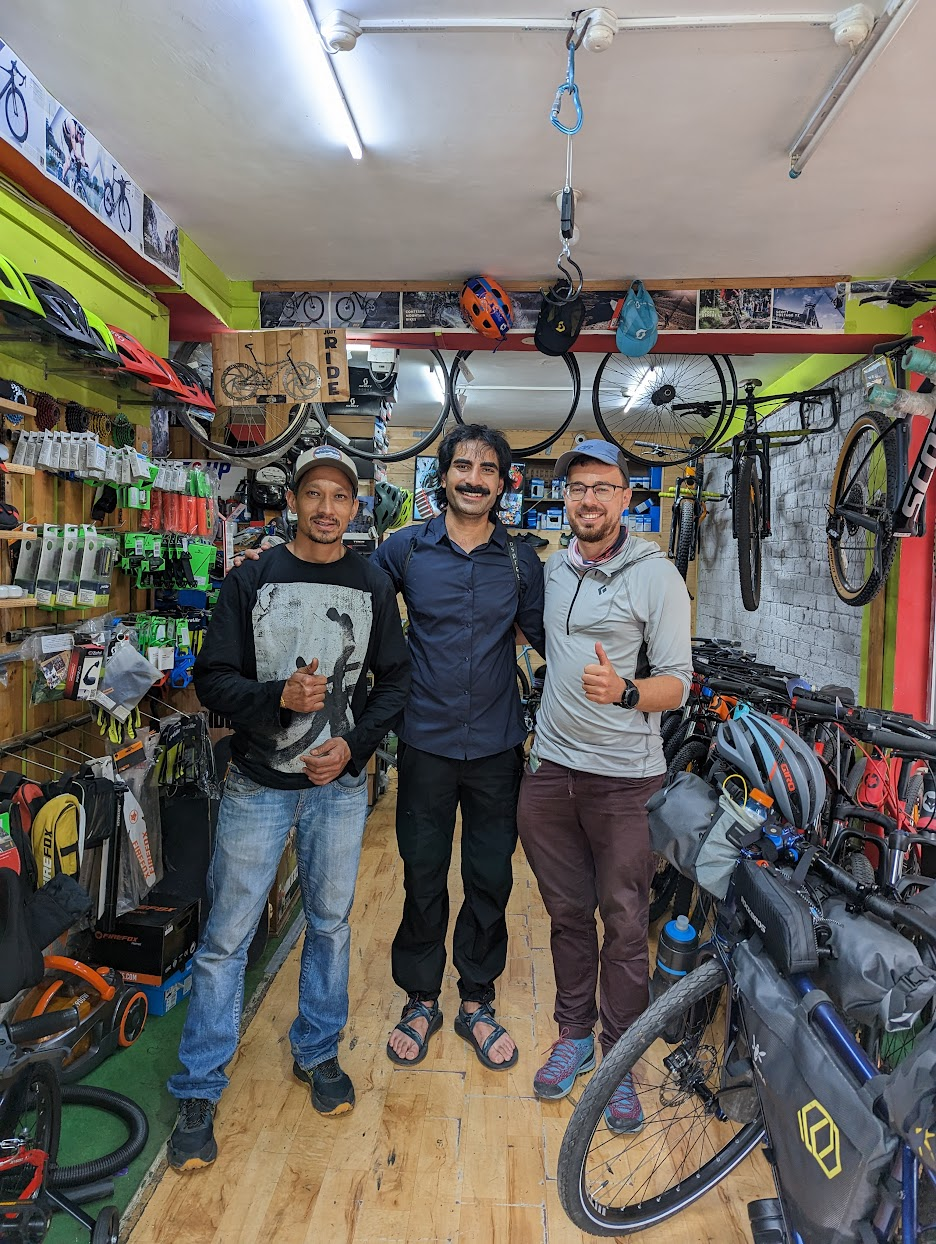
Naveen at the Himalayan Bike Bar
Time of Year and Weather
The Manali Highway is not open year round. The road usually opens on the first week of May, but can be delayed by weather. In 2023, the road opened early, but then had to be closed due to snowfall. The season typically ends in October due to snowfall, which will not be cleared for 6 months.
Rohtang Pass does not open until later in the year, and will need to be bypassed with the tunnel if you are too early. In 2023 it opened June 14. Before the tunnel was built, the pass would be cleared when the road was opened, but now it takes an extra month before work is complete. Older blogs mention that Rohtang pass opens at the same time as the Manali Highway, but this is no longer true.
On my trip, the weather was extremely hot during the day, and quite cold at night. On the uphills, I would ride in a long sleeve shirt (for sun protection) and shorts, and be very hot. On long downhills, if the sun was out I would stay in the long sleeve shirt, but if it was cloudy or raining I would put on additional layers as required. At the coldest point when descending through the rain, I was wearing my shirt, a wool thermal, a heavy down jacket and my rain jacket. I never ascended in anything more than a long sleeve shirt.
Ladakh is a desert and experiences very little rainfall. There are freak rain events, and your preparation should consider this, but it is unlikely you will cycle in heavy rain during the dry season.
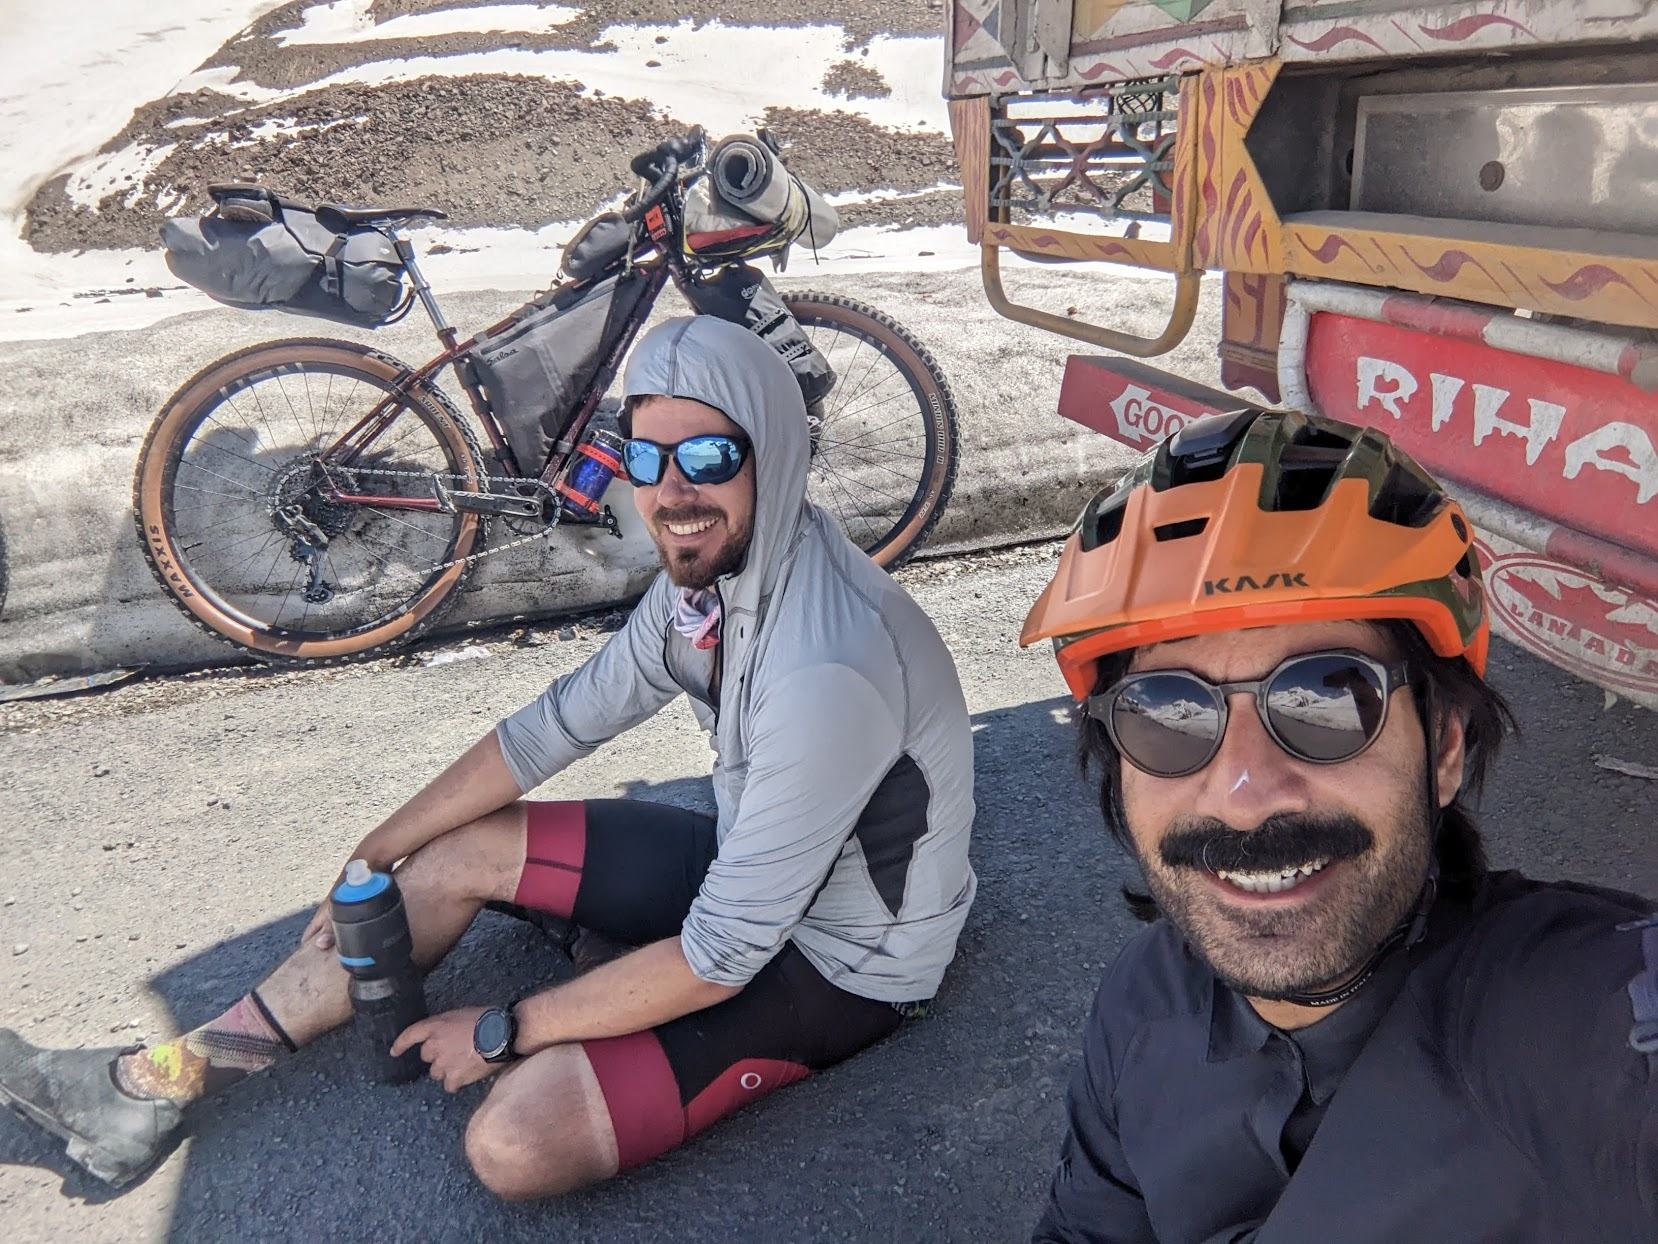
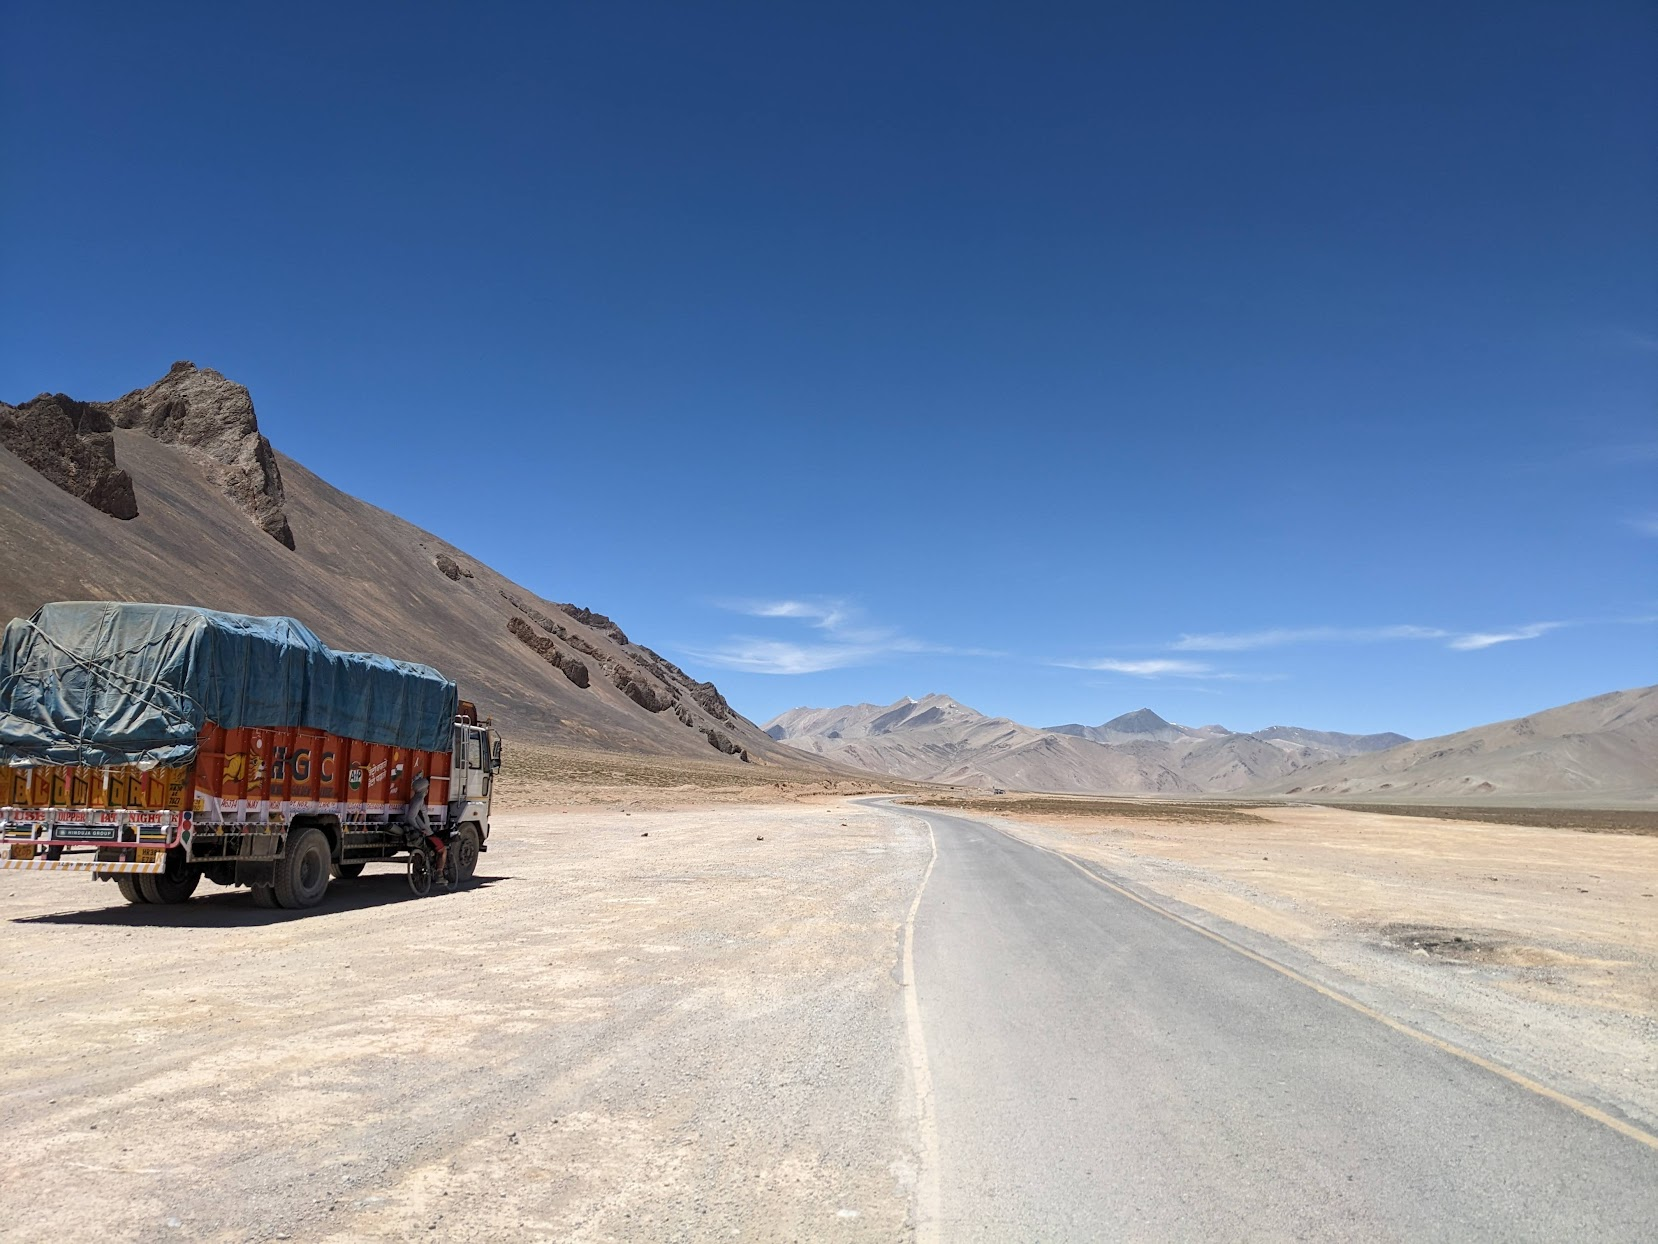
The weather is so hot and unprotected that we would often stop and rest in the shade from parked trucks
Phone Signal and Electronics
The main Indian prepaid network providers will work until Jispa (day 3). From here, there is no signal for any prepaid provider. Post paid SIM cards are only available to Indian citizens, however we knew of some foreigners who managed to get one in Leh. We were unable to buy a post paid SIM card in Delhi or Manali and were left without reception for the last 7 days of the trip. Do not rely on phone signal from Jispa to Leh.
Wifi is not available between Jispa and Leh. 2026 UPDATE: Satellite phones are illegal in India, and will likely be confiscated at the airport. On a recent flight through India, the airport security tried to confiscate my Garmin Inreach. Drones are also illegal but we saw a few people flying them around. I wouldn’t bring a drone as they’re much more conspicuous than a satellite phone.
Mains power is unavailable from Jispa. There are generally 12 V solar systems that have been rigged up and can be used to charge phones or devices, but you will have to pay for them.
Costs and Expenses
The trip is not expensive, and costs vary significantly depending on personal preference. The cheapest way to do the trip would be to camp and to cook your own food. I never cooked, and tried to stay in decent accommodation where possible, and still found the trip to be cheap.
Meals would cost 150-500 INR depending on location. Accommodation costs varied with quality and remoteness, and we spent between 500 and 1500 INR per person per night. Snacks were more expensive the further from town you were, but were still Indian prices.
Food options are typically simple and catered to Indian domestic tourists. There is no refrigeration available for most of the route, and therefore not much meat. You can always get tea, rice and curry, roti and momos.
Transport costs were my most significant expense. Taxi from Delhi to Manali: 200 USD. Flight from Leh to Delhi: 315 USD. There aren’t many flights so I would recommend booking early.
There are no card payment facilities on the route at all; everything is paid with cash.
There are no ATMs from Jispa (day 3) to Leh. I would not rely on any ATM to be functional outside of Manali or Leh. You need to carry all the cash you will spend for the trip which should be withdrawn in Manali.
I brought enough cash to spend 4000 INR per day accounting for the possibility of an emergency. It was way too much, and I ended up spending closer to 2000 INR per day. I was not careful about my spending and you could easily spend less if you stick to a budget.

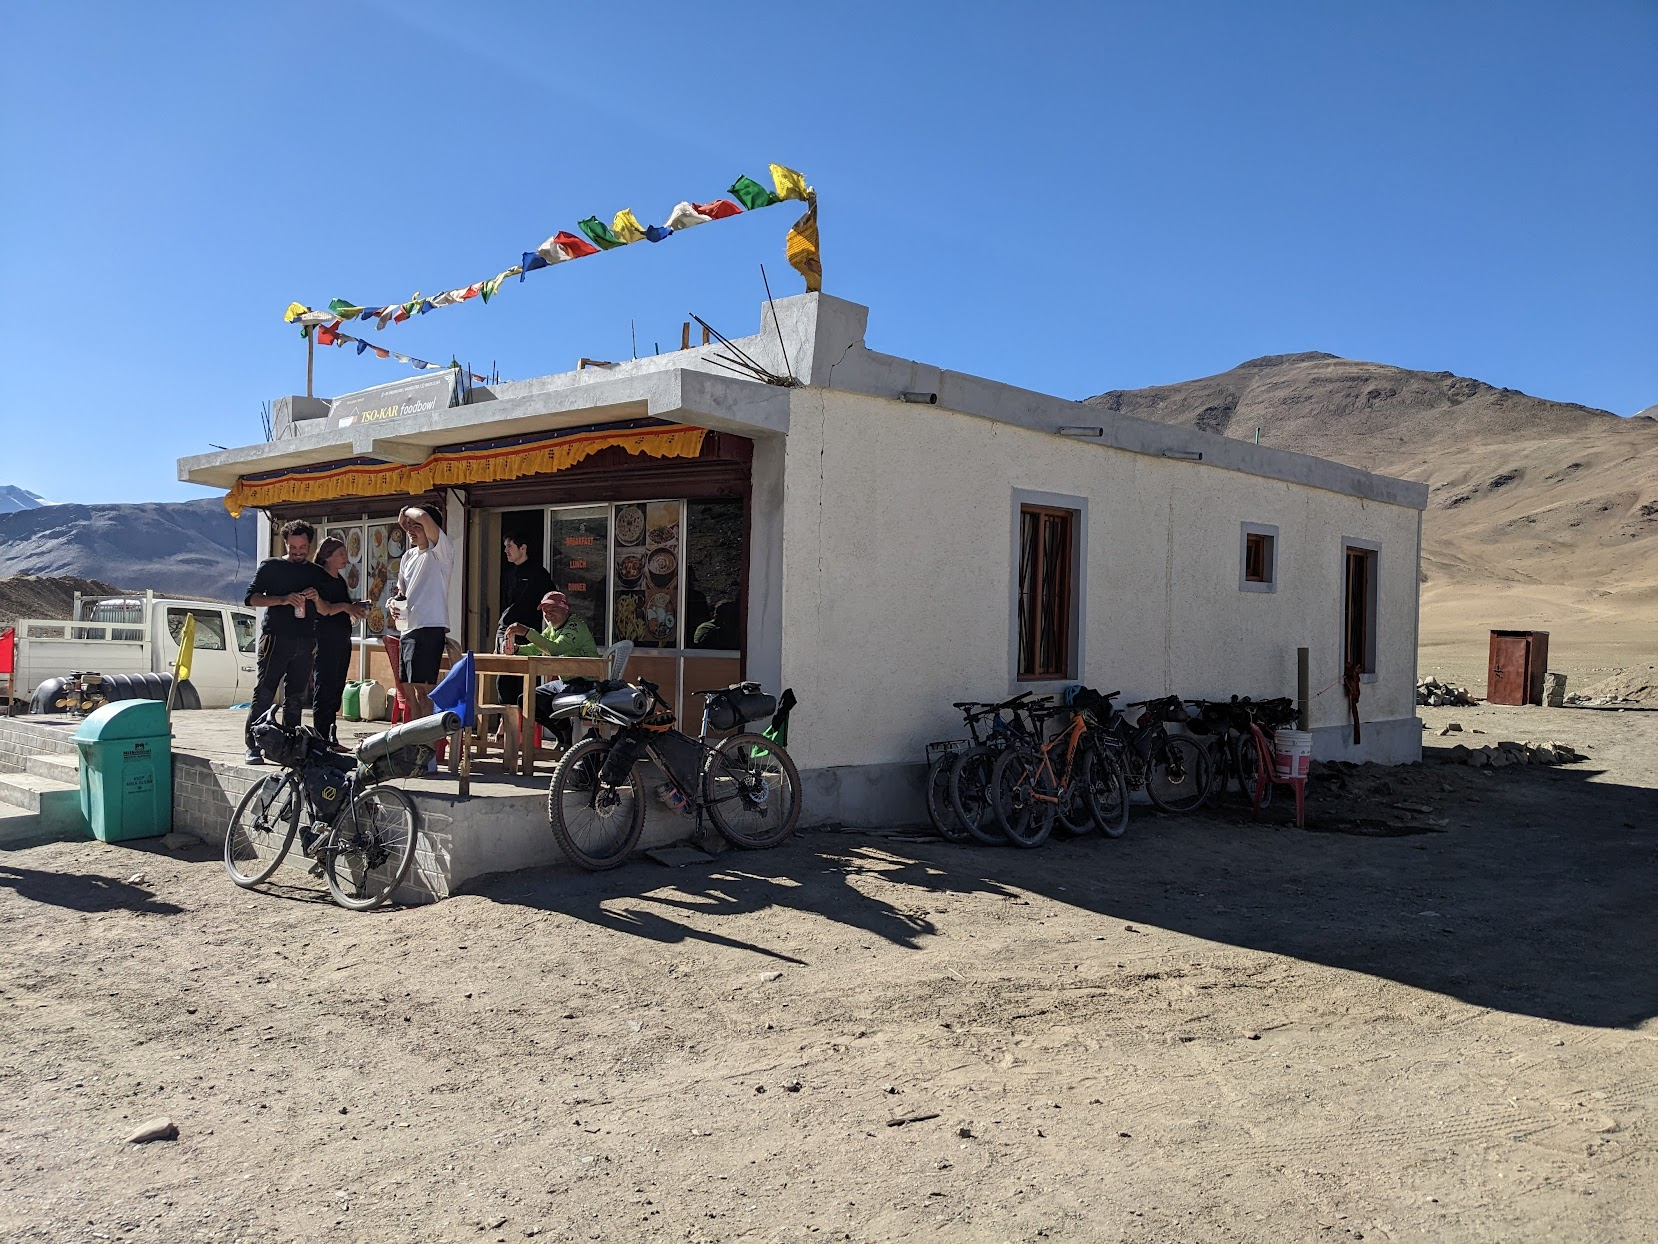
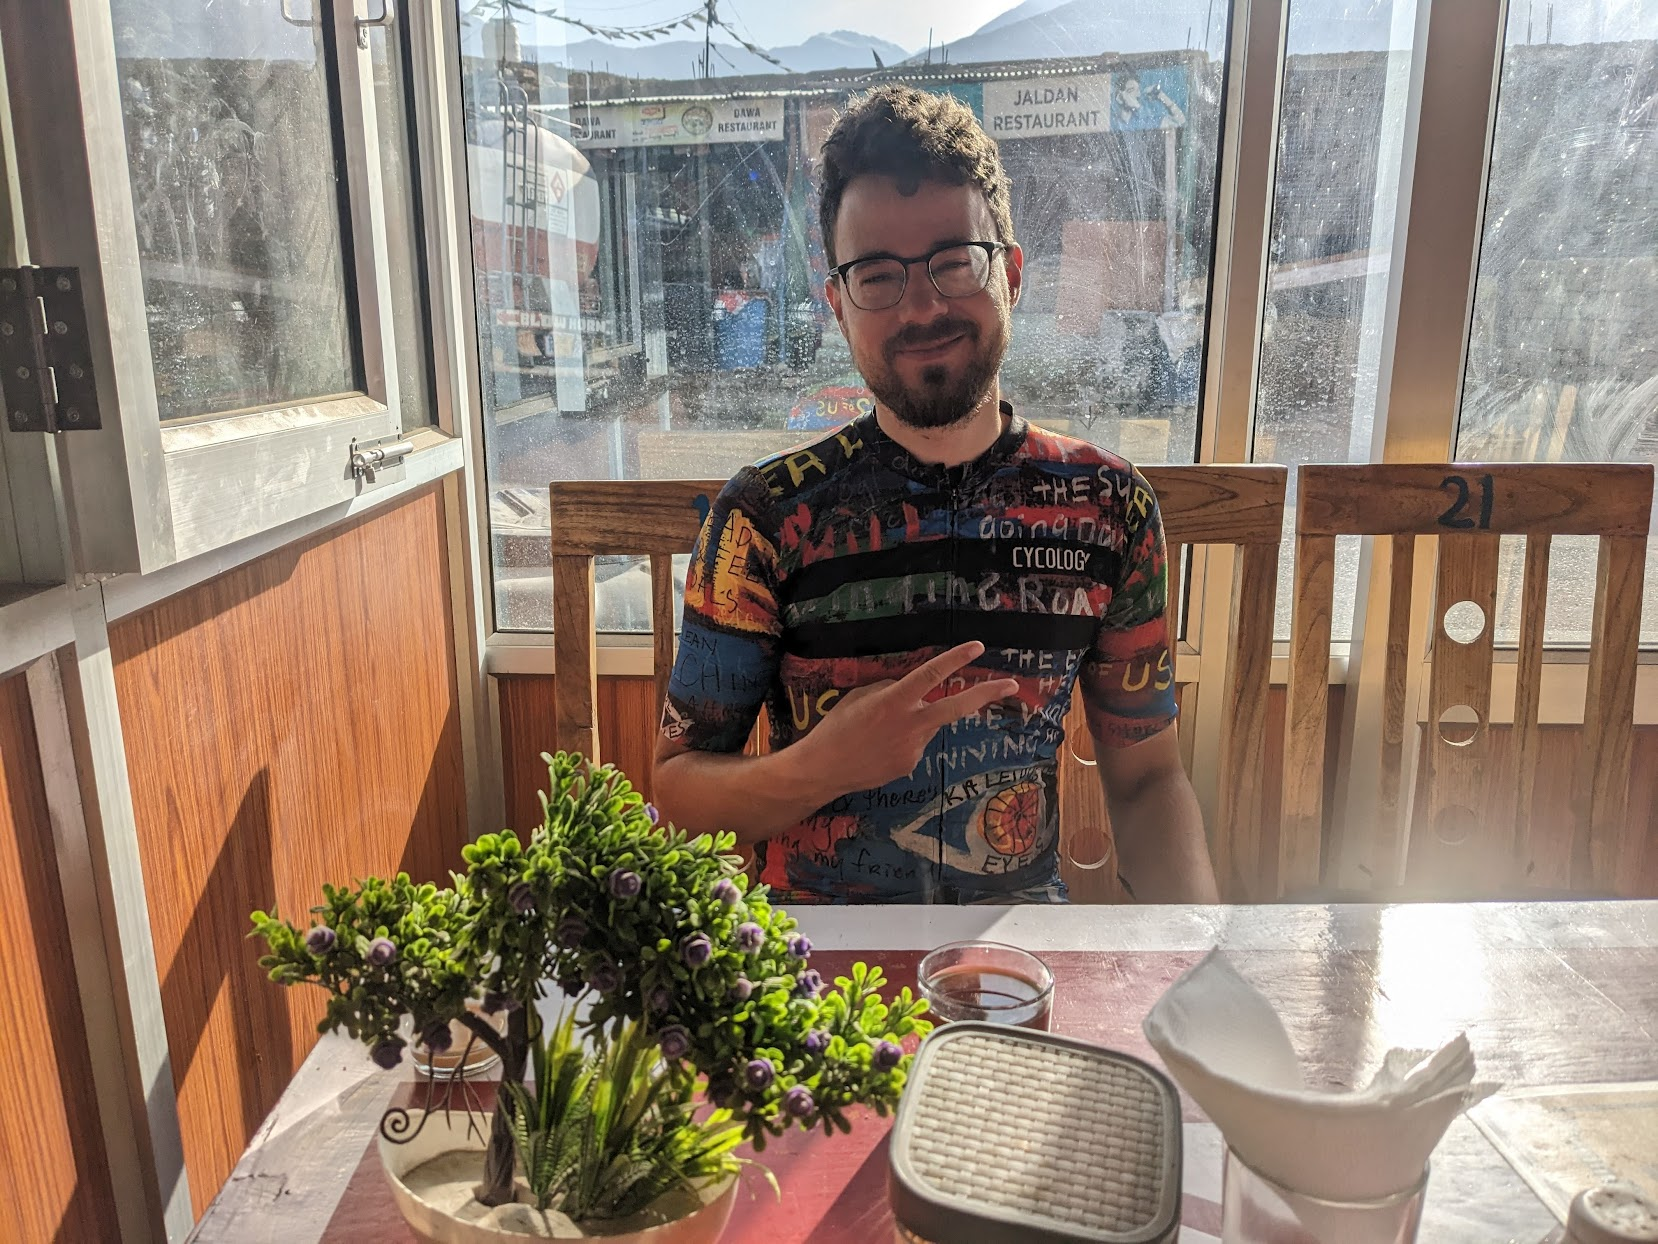
Our group of cyclists at a nice restaurant
Equipment Considerations
There are varying bikepacking gear schools of thought. I believe in being as minimal as possible, and doubly so when in the Himalayas due to the extreme amounts of elevation and difficulties at altitude. Any equipment that is not absolutely required to complete the journey will make you more likely to fail due to the energy exerted in carrying it. However, there were cyclists with many different schools of thought on the trail, most of whom brought more gear than me, and a handful who were able to bring less. My gear list represents my own opinion on the optimal way to complete the route, and it was successful for me.
There are a few unique bikepacking considerations for the Manali Highway compared to other cycling routes. We had to specifically consider:
- Weight. Cycling at altitude is harder than hiking because you need to keep up a minimum pace to not fall over. Any excess weight affects your performance at altitude moreso than on normal mountains.
- Descents. The longest continuous descent was for 1800 m over a few hours. With this much continuous descending, you get very cold. In other places, you rarely descend for so long and can warm up by climbing a hill, but that doesn’t work here.
- UV and heat. The UV is stronger at higher altitudes and will cause you to burn quicker. Riding through snow causes further reflected light. Sunburn and dehydration are major considerations
Equipment choices
We brought a tent and sleeping bag for an emergency situation, however if I was to repeat the trip I would not bring these. There are regular vehicles passing through, and we carried a satellite communicator to call for help if we needed it. It is difficult to imagine a situation when we would become so stranded as to need to sleep. Others brought tents with the intention of sleeping in them to save accommodation costs, but I preferred access to a bed.
Others brought a stove and cooked along the way. I did not feel this was necessary or very worthwhile as I enjoyed the local food. Food was cheap and regularly available and I never felt hungry. I was able to stock up on snacks at Dhabas to eat while riding.
I brought 2 L of water capacity, however if possible I would have brought more. Some days were incredibly hot and I ended up dehydrated. My bike did not have capacity for more water storage, however if I was better at managing pace I could have avoided running out. I would recommend most people bring at least 3 L capacity.
I brought a water filter but I never used it. I preferred to drink tea and buy bottled water. This is bad for the environment, but the risk of illness is catastrophic for the trip. Many of the destinations had very little flowing water, and being in proximity to the road and farm animals meant that I did not trust the cleanliness of the water.
The sun was scorching, and I was very happy to have my long sleeve sun hoodie for sun protection. You need as much sun protection as possible; the high altitude, combined with the sun reflecting off the snow at high passes, will burn you to a crisp. My friend did not bring good quality sunglasses and found his eyes becoming fatigued through the snowy sections. Lots of sunscreen is also necessary. I used Oakley Plazma sunglasses with the deep water solo lens (approx 8 % VLT) and had no issues with my vision. Bring a hat.
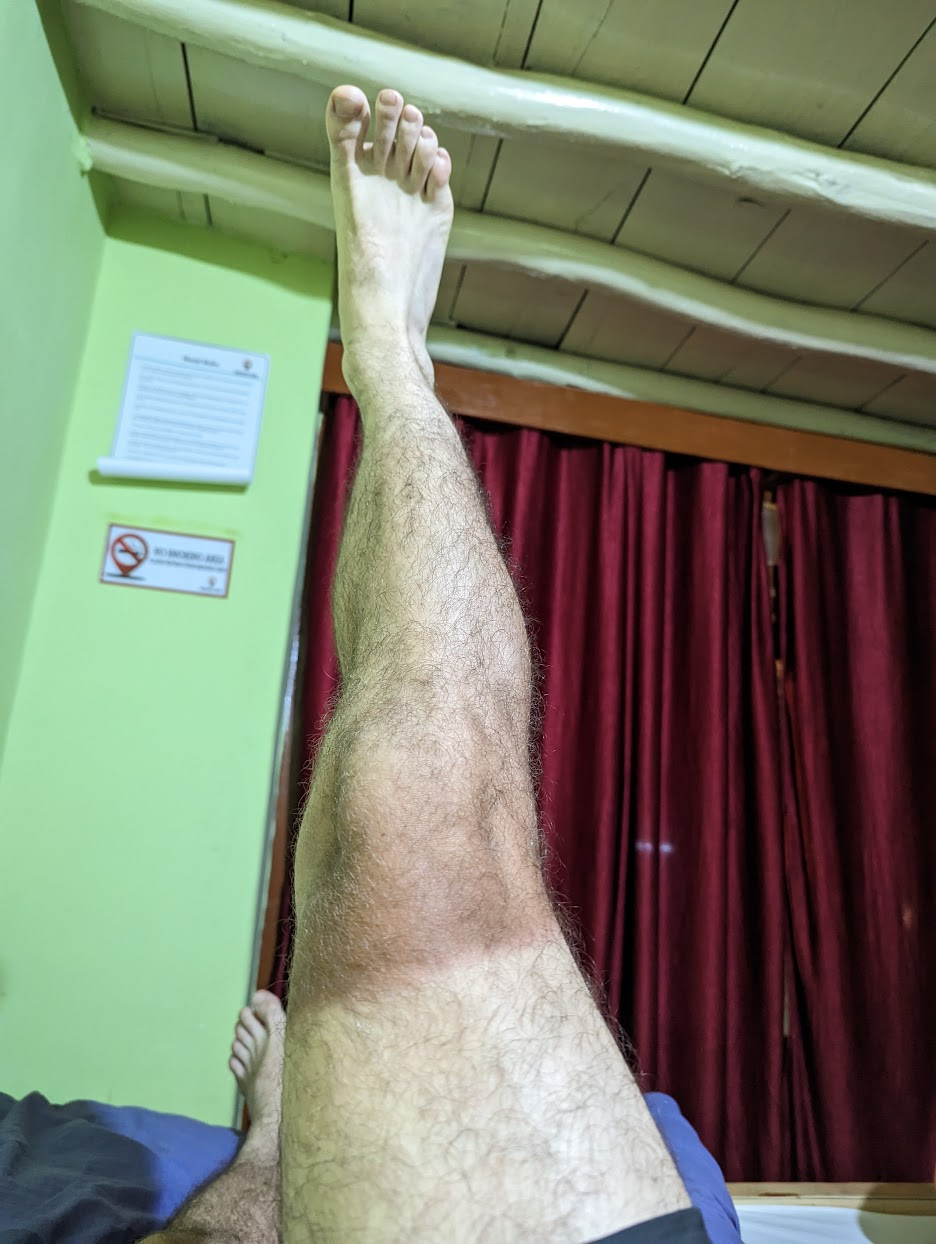
A photo of my leg tan line after the trip
I wore a buff over my mouth to manage the sun, and to manage dust. It was typically too hot and steep to wear the buff when climbing, but it was useful when a truck came past and would blast us with exhaust fumes, or kick up some dust into the air. Buffs are standard fare for dusty and high altitude environments.
We used Showa 282 waterproof gloves. I would highly recommend these gloves or similar. The long continuous descents resulted in very cold hands, and conventional bike gloves would have become saturated from rain and then chilled by the wind. Even something like dishwashing gloves would have been good, as long as they’re impermeable.
In the evenings, I was warm in my cotton pants, my thin wool thermal and my heavy down jacket. If you run cold, or do not have a heavy 800+ down jacket, I would bring an extra layer for the night. I wore thin wool socks.
We brought Diamox but did not take it. I would recommend everyone to bring Diamox in case they experience altitude sickness or symptoms. I bought it over the counter in Delhi, and it would likely be available in Manali.
Bike Choices
I used a mostly stock Norco Search XR S2 with a 30/36 gear ratio. It is a steel gravel/adventure bike, with 38 mm Schwalbe Marathon Touring tires. I used the Apidura bikepacking frame bags and the stock saddle. I used clipless pedals and wore a helmet. You can complete this route with almost any bike.
I was very happy to have hydraulic disc brakes. I find the force required for mechanical disc brakes to give my hands fatigue on long descents. The hydraulic brakes require much less force to actuate, and I never lost grip strength. There were many long descents where I am sure I would have fatigued with mechanical disc brakes.
I brought 38 mm Schwalbe Marathon Touring tires and was extremely happy with them. I would have been happy down to 32 mm touring tires, however I would not want to go thinner. I had no punctures. My friend brought his 52 mm tubeless MTB tires, which proved to be significantly overkill, and made all the climbs and rolling terrain more difficult. He also had 2 punctures, which we were able to quickly repair. The route would be doable with a road bike with 25 mm tires, however the descents would be slow due to low road quality, and I would not enjoy this.
There are no bike repair points on the route, however if something can be rigged together there will be savvy locals who could help out. You will not be able to buy any bike specific spares, such as a tube or a chain, so you need to bring everything that you might need. In the event of a total bike breakdown, you could likely ask someone for a lift to the nearest town and would not be completely stranded.
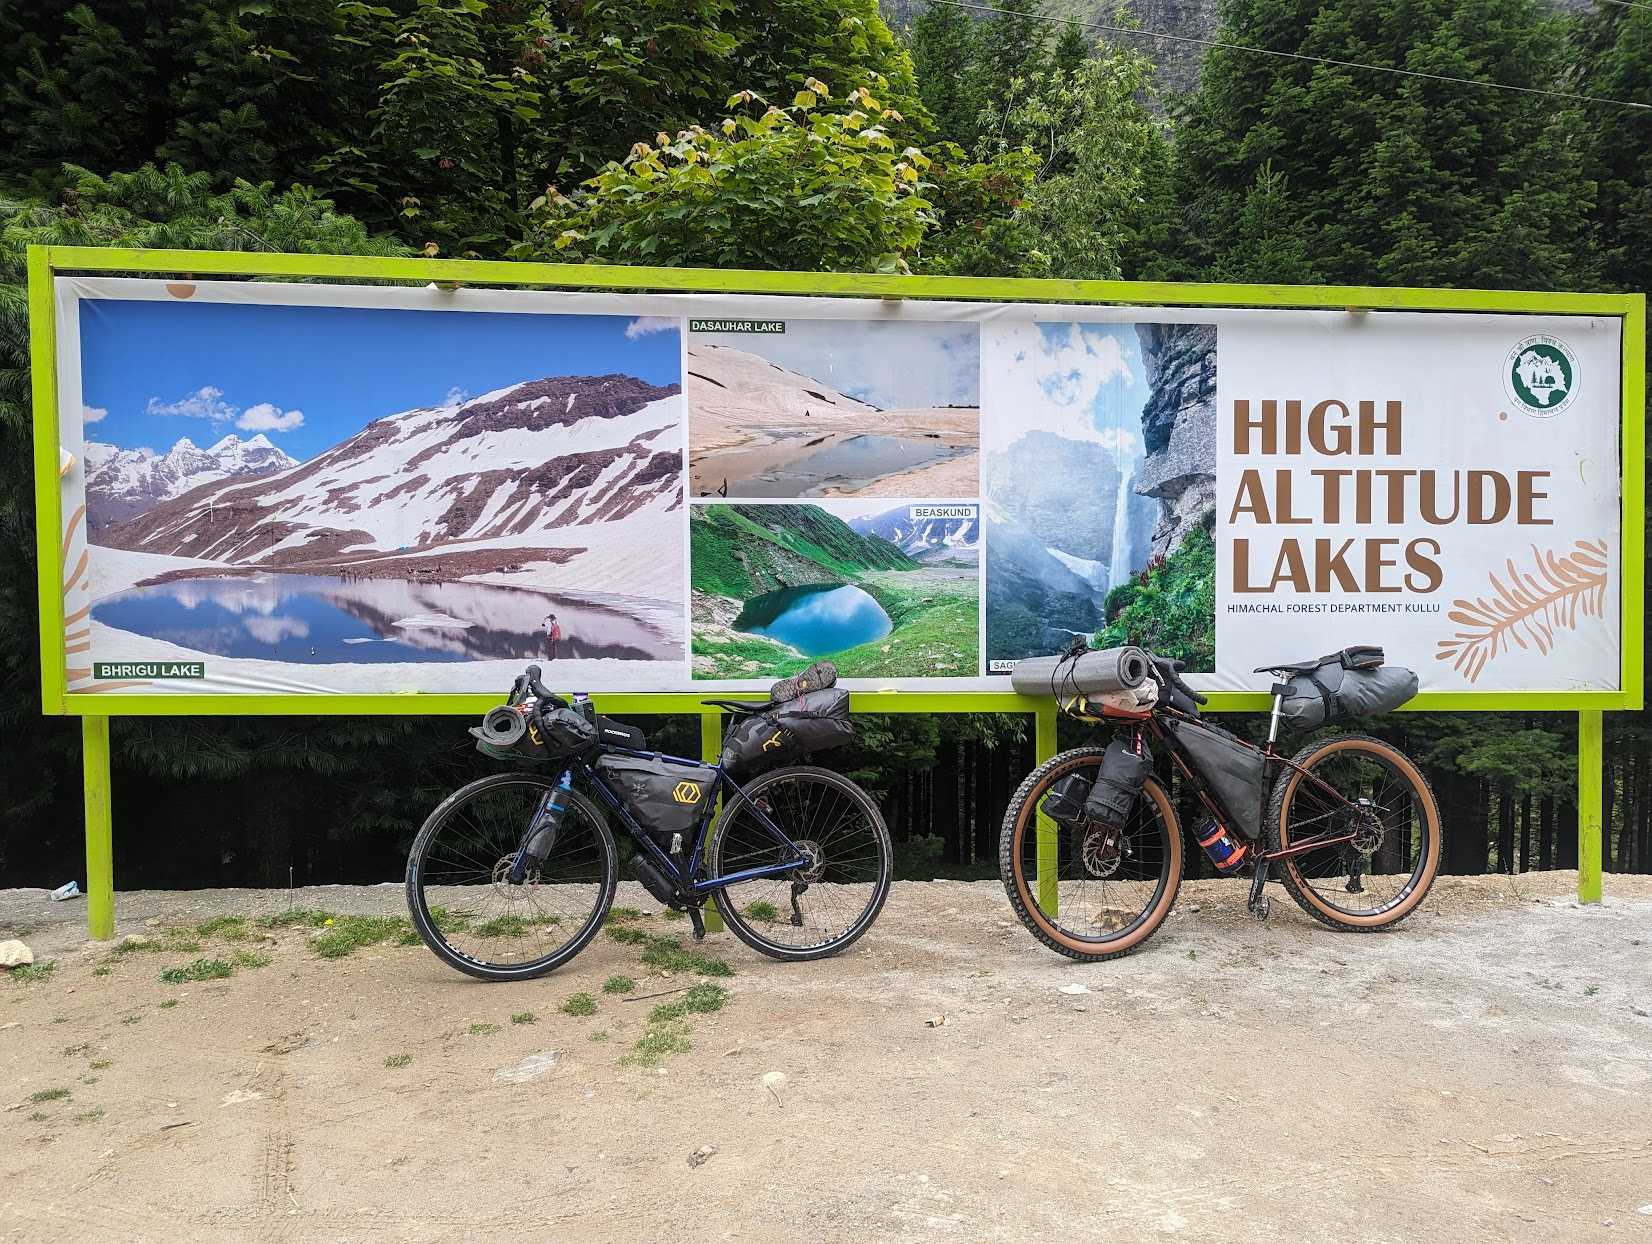
My loaded gear setup (left) and my friend’s (right)
Gear List
Every item I brought is listed below. My total gear weight was about 9 kg.
|
Item |
Type |
# |
Weight per (g) |
|
Pack |
|||
|
Seat Bag |
Apidura |
1 |
405 |
|
Frame Bag |
Apidura |
1 |
290 |
|
Handlebar Bag |
Apidura |
1 |
235 |
|
Accessory bag |
Amazon |
1 |
|
|
Food Bag |
Apidura |
1 |
63 |
|
STS Dry Bag |
15 L |
1 |
55 |
|
|
|
|
|
|
Tent |
|||
|
Tent |
Duomid |
1 |
765 |
|
Stakes |
Including bag |
1 |
133 |
|
|
|
|
|
|
Sleeping |
|||
|
Sleeping Bag |
STS spark 2 |
1 |
600 |
|
|
|
|
|
|
Cooking |
|||
|
Spork |
STS Delta spork |
1 |
10 |
|
Soap leaves |
STS wilderness wash leaves |
2 |
12 |
|
|
|
|
|
|
Water |
|||
|
Bottle |
1 L Zefal |
2 |
120 |
|
Bladder |
2 L hydrapak seeker |
1 |
83 |
|
Sawyer Squeeze |
|
1 |
100 |
|
Sawyer Bag |
|
1 |
28 |
|
|
|
|
|
|
Clothes |
|||
|
Sunglasses |
With case |
1 |
92 |
|
Cycling Shirt |
Cycology |
1 |
135 |
|
Cycling Bib |
Oakley |
1 |
188 |
|
Walking pants |
Black Diamond |
1 |
457 |
|
Hat |
Blue OR |
1 |
55 |
|
Socks |
Smartwool Socks |
2 |
|
|
Underpants |
|
2 |
63 |
|
Shell gloves |
Showa 282 |
1 |
120 |
|
Buff |
|
1 |
32 |
|
Down Jacket |
Montbell frost line |
1 |
582 |
|
Shell Jacket |
Marmot minimalist |
1 |
410 |
|
Afternoon Shirt |
|
1 |
|
|
Night Shirt |
Icebreaker wool |
1 |
122 |
|
Day shirt |
Sun Hoodie |
1 |
|
|
Fleece pants |
|
|
|
|
Thermal |
RAB Wool |
1 |
233 |
|
Sun Sleeves |
Outdoor Research |
1 |
50 |
|
|
|
|
|
|
Walking |
|||
|
Cycling Shoes |
Shimano XC300 |
1 |
0 |
|
Approach Shoes |
La Sportiva TX2 |
1 |
0 |
|
|
|
|
|
|
First aid gear |
|||
|
Sunscreen |
|
1 |
45 |
|
Imodium |
|
30 |
0.5 |
|
Allergy medication |
|
10 |
0.2 |
|
Hydrocortisone |
|
1 |
20 |
|
Climbing tape |
|
1 |
15 |
|
Bandaids |
|
10 |
1 |
|
Snake bandage |
|
1 |
85 |
|
Wound dressing |
|
1 |
15 |
|
Tweezers |
|
1 |
15 |
|
Pointy item bag |
|
1 |
10 |
|
First aid scissors |
|
1 |
22 |
|
Antiseptic |
|
1 |
15 |
|
Tenacious Tape |
|
1 |
5 |
|
Nail Clippers |
|
1 |
15 |
|
Inflatable Patch Kit |
|
1 |
4 |
|
Bobby Pins |
|
1 |
0 |
|
|
|
|
|
|
Camp Gear |
|||
|
Headtorch |
Nu25 |
1 |
55 |
|
Ear plugs |
|
4 |
0 |
|
Lighter |
|
1 |
11 |
|
Flint |
|
1 |
10 |
|
Matches |
|
1 |
9 |
|
Towel |
|
1 |
50 |
|
|
|
|
|
|
Electronics |
|||
|
Phone |
|
1 |
273 |
|
Watch |
|
1 |
0 |
|
Battery pack |
20000mah Anker |
1 |
355 |
|
Garmin Inreach |
|
1 |
112 |
|
Kindle |
|
1 |
185 |
|
Micro Usb cable |
|
1 |
16 |
|
USB C cable |
|
2 |
20 |
|
Watch charger |
|
1 |
23 |
|
Tripod |
|
1 |
|
|
Passport |
|
1 |
|
|
Wall charger |
|
1 |
|
|
|
|
|
|
|
Camera |
|||
|
Gopro 11 |
|
1 |
|
|
Gopro chest mount |
|
1 |
|
|
Gopro tripod |
|
1 |
|
|
SD cards |
|
1 |
|
|
Gopro 11 spare battery |
|
1 |
|
|
Gopro charger |
|
1 |
|
|
Gopro helmet strap |
|
1 |
|
|
|
|
|
|
|
Toiletries |
|||
|
Toothbrush |
|
1 |
8 |
|
Toothpaste |
|
1 |
30 |
|
Hand Sanitiser |
|
1 |
55 |
|
Toilet paper |
|
1 |
110 |
|
Bidet |
|
1 |
65 |
|
Shampoo |
|
1 |
|
|
Soap |
|
1 |
|
|
|
|
|
|
|
Bike Gear |
|||
|
Bike Front Light |
|
1 |
227 |
|
Bike Rear Light |
|
1 |
62 |
|
Bike Pump |
|
1 |
106 |
|
Helmet |
|
1 |
310 |
|
Pedal Wrench |
|
1 |
88 |
|
Multitool |
|
1 |
90 |
|
Spare tube |
|
1 |
164 |
|
Patch Kit |
|
1 |
18 |
|
Lubricant |
|
1 |
125 |
|
Tire Levers |
|
1 |
28 |
|
Derailleur Cable |
|
2 |
17 |
|
Zip Ties |
|
10 |
0 |
|
Leatherman |
|
1 |
236 |
|
Duct Tape |
|
1 |
20 |
|
Ocky strap |
|
2 |
28 |
|
Small Voile Straps |
|
2 |
11 |
|
Rag |
|
1 |
|
|
Tool Cage |
|
1 |
82 |
|
Presta Schrader Converter |
|
1 |
0 |
|
Brake spacers |
|
1 |
0 |
|
Lock |
|
1 |
258 |
Itinerary
I have included the duration of the day according to my records. This duration includes lunch stops, photos, and rests, so it’s not perfectly indicative of the route difficulty or length.
Day 1) Manali to Mardhi
https://www.strava.com/activities/9275335914
|
Distance |
34 km |
|
Ascent |
1500 m |
|
High Point |
3300 m |
|
End Point |
3300 m |
|
My Time |
6 hours |

Route Data and Elevation Profile
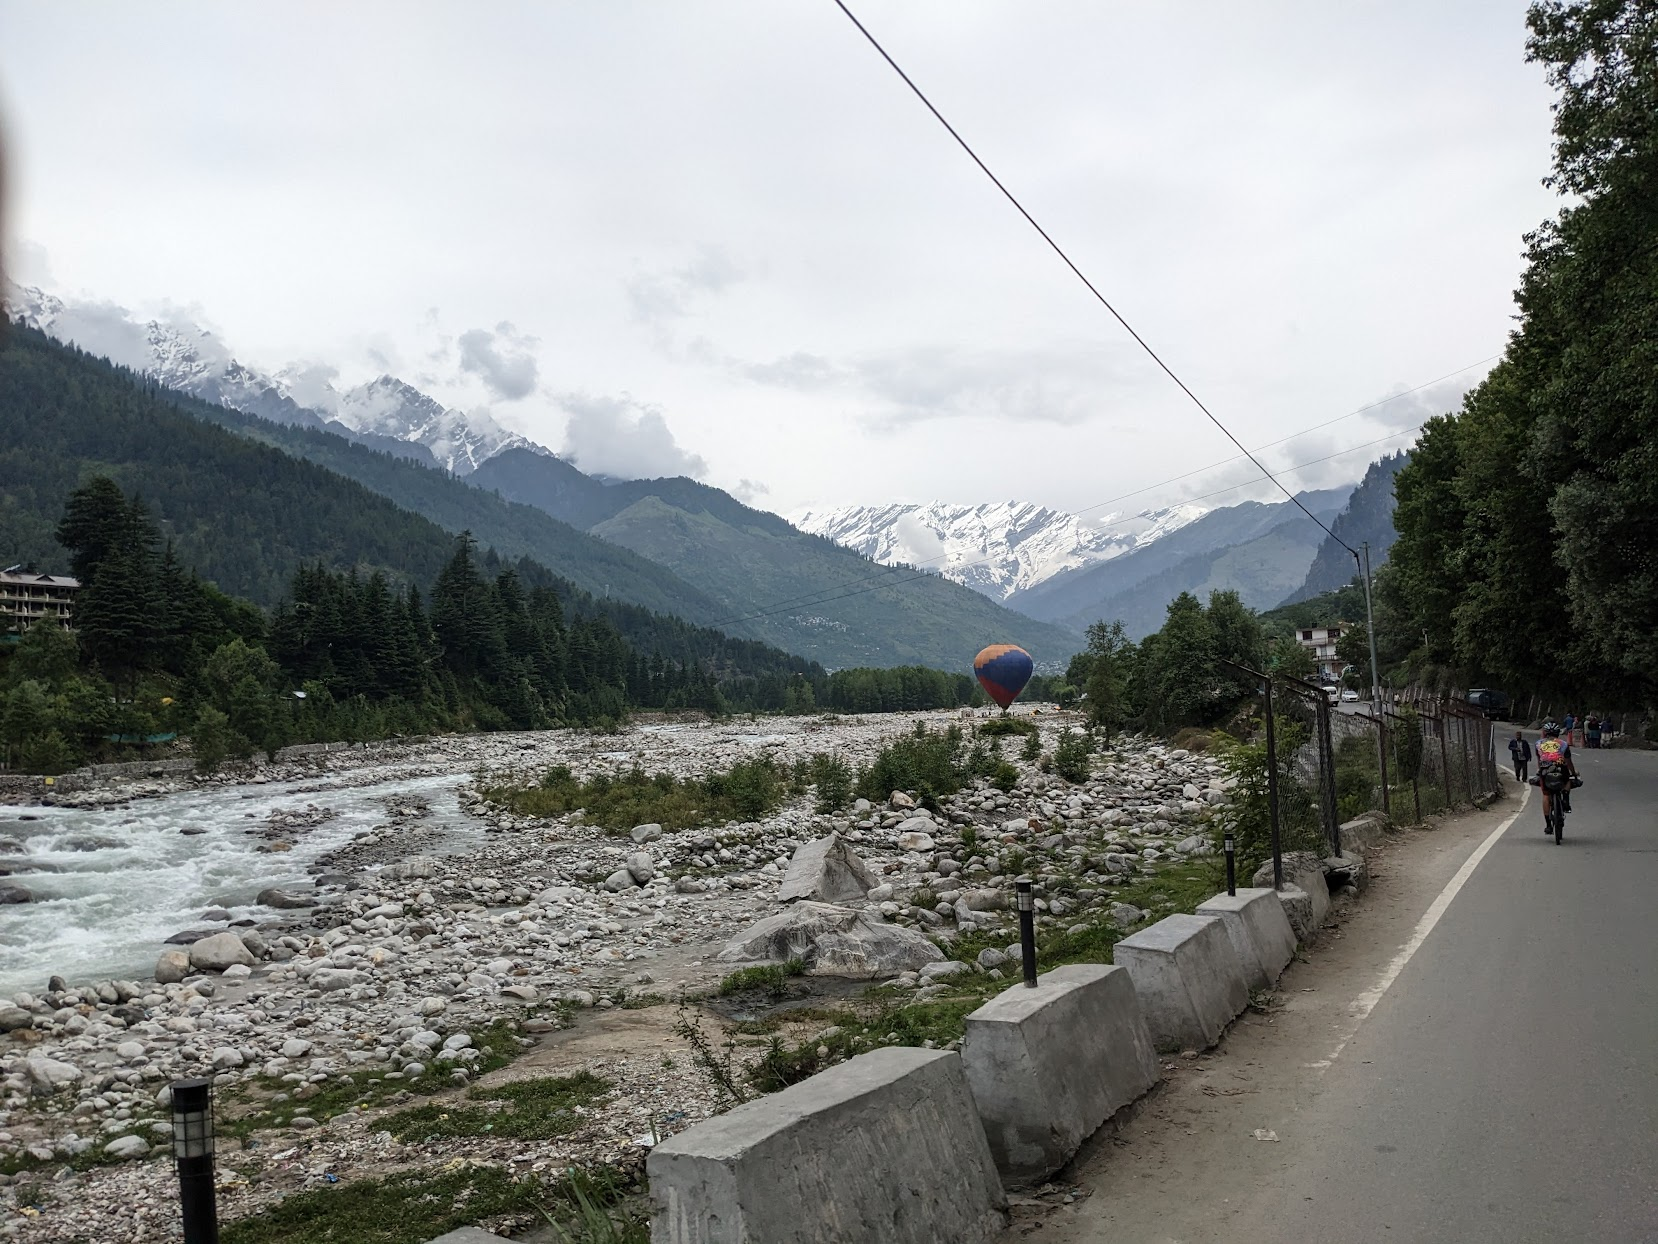
Leaving Manali
Before leaving, ensure that Rohtang Pass is open and has been cleared. Since opening the Atal Tunnel in 2020, this road is only used by tourists going to see the snow, and is not cleared until much later in the season. Old blogs and internet resources will suggest Rohtang Pass opens in May, but this information is out of date. It opened on 14 June in 2023 when we were there. For information we called the local bike shop.
If Rohtang Pass is not yet opened, the alternative is through the Atal Tunnel. People have cycled it, but it is not something I would do. Better to find a lift through the tunnel to avoid the smog and traffic.
The route leaves Manali via the main road. This road is quite busy, but is generally slow moving. Once you reach the turn off at Palchan, there will be no more shops until reaching Mardhi. The road from Palchan to Mardhi is quieter, but will have tourist traffic in the morning and evening from people travelling to the pass.
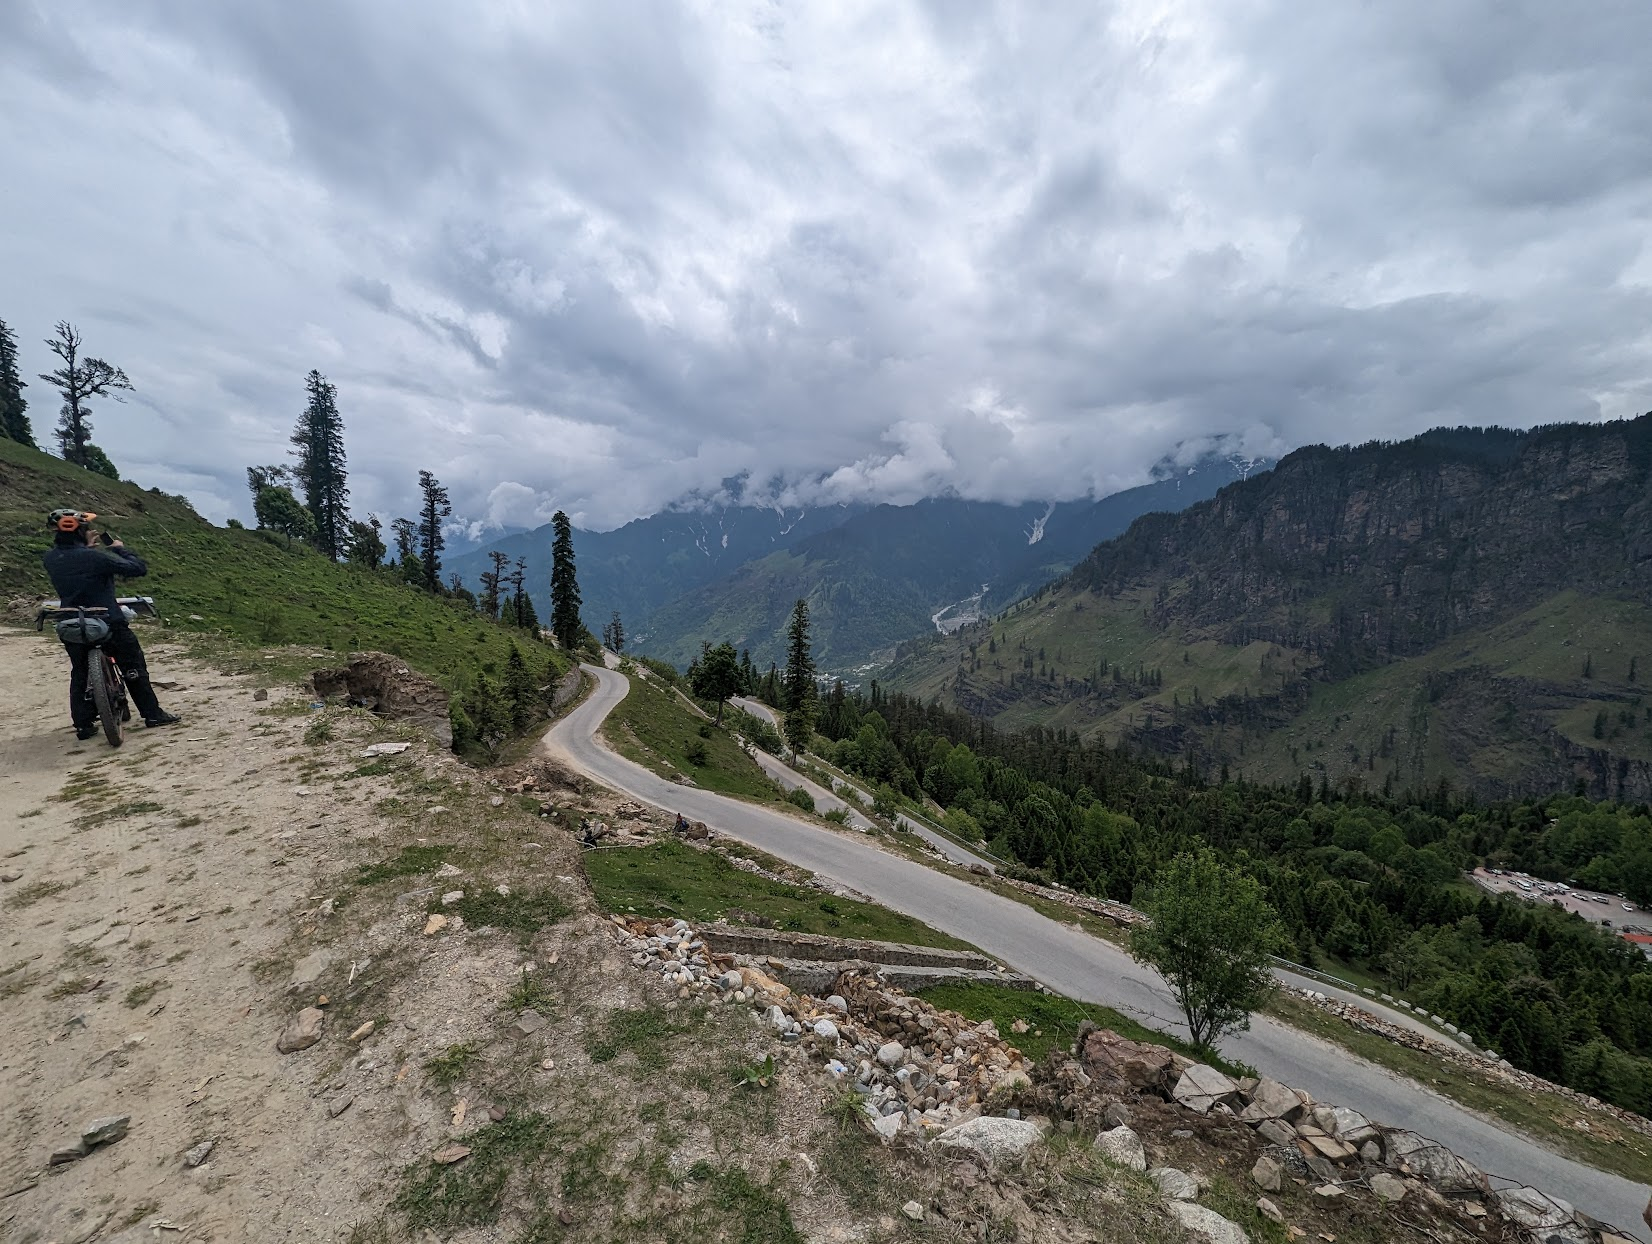
Looking down towards Palchan
There is a checkpoint but we were able to cycle through. Tourists in cars / buses need permits to get to Rohtang Pass but if you’re on a bike they should just let you through. We had no trouble here.
Mardhi is a small tourist stop with Dhabas serving lunch and dinner. There is no advertised accommodation, but as a cycle tourist someone will let you stay. We received information that the Dhabas were not opened because the pass had just been cleared, but this was not correct. The Dhabas will be open as soon as traffic is allowed through.
We used our military contacts to stay at the army base, so I can’t comment on the quality of the Dhabas. However, it looked fine and the food was good.
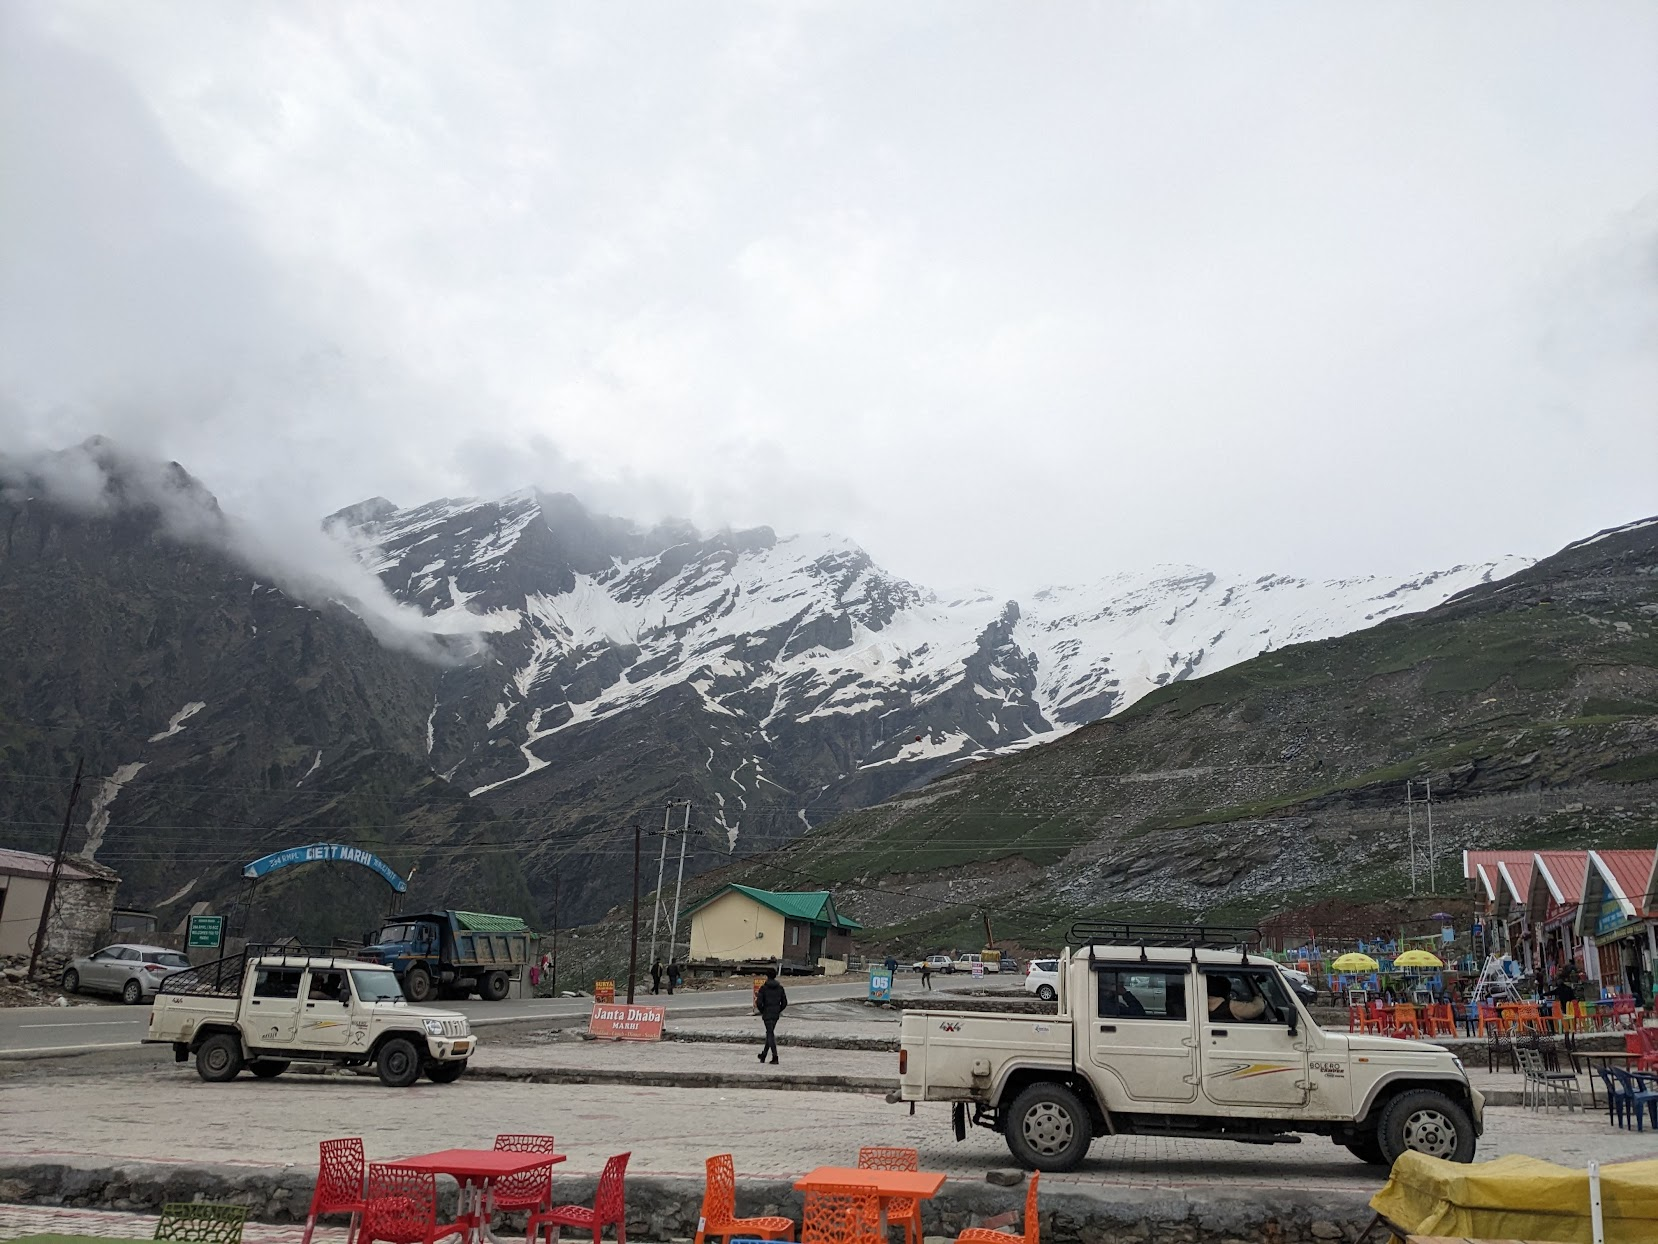
The Dhabas at Mardhi, looking up to Rohtang Pass

End of the first day
Day 2) Mardhi to Sissu via Rohtang La
https://www.strava.com/activities/9275338961/overview
|
Distance |
50 km |
|
Ascent |
900 m |
|
High Point |
4000 m |
|
End Point |
3000 m |
|
My Time |
6 hours |

Route Data and Elevation Profile
If you leave early, it may be possible to beat the tourist traffic at the pass. We left at about 9am and found the traffic annoying, but it wasn’t difficult or dangerous.
Continue from Mardhi up a ~800 m climb to Rohtang Pass. The altitude should really start to kick in here and you will feel short of breath on the way up. Make sure to rest and to eat and stay hydrated. Towards the top there should be roadside shelters selling tea and juice and biscuits.
The road quality becomes worse as you get higher. There are some chokepoints which can cause traffic to back up a long way. It is easy to go around all the cars on the bike and avoid the traffic. Near the top, the road becomes a carpark as everyone pulls over to walk around the snow and ice. There was nowhere to buy food up here.
View looking over Rohtang Pass

Rohtang Pass
The descent from the pass drops about 800 m over 15 km. It gets very cold to descend that quickly for so long, and moreso if it rains. There is food available at Dhabas at the bottom of the descent.
Once in the valley, normal roads continue past the Altai tunnel exit. There were several vehicle checkpoints but we were able to just ride through them.
We stopped at the Zostel at Sissu, but there were many accommodation options and towns along the way. The next day will be to the base of the Baralacha Pass climb, so any distance completed today means less tomorrow.
We took a rest day here due to illness.
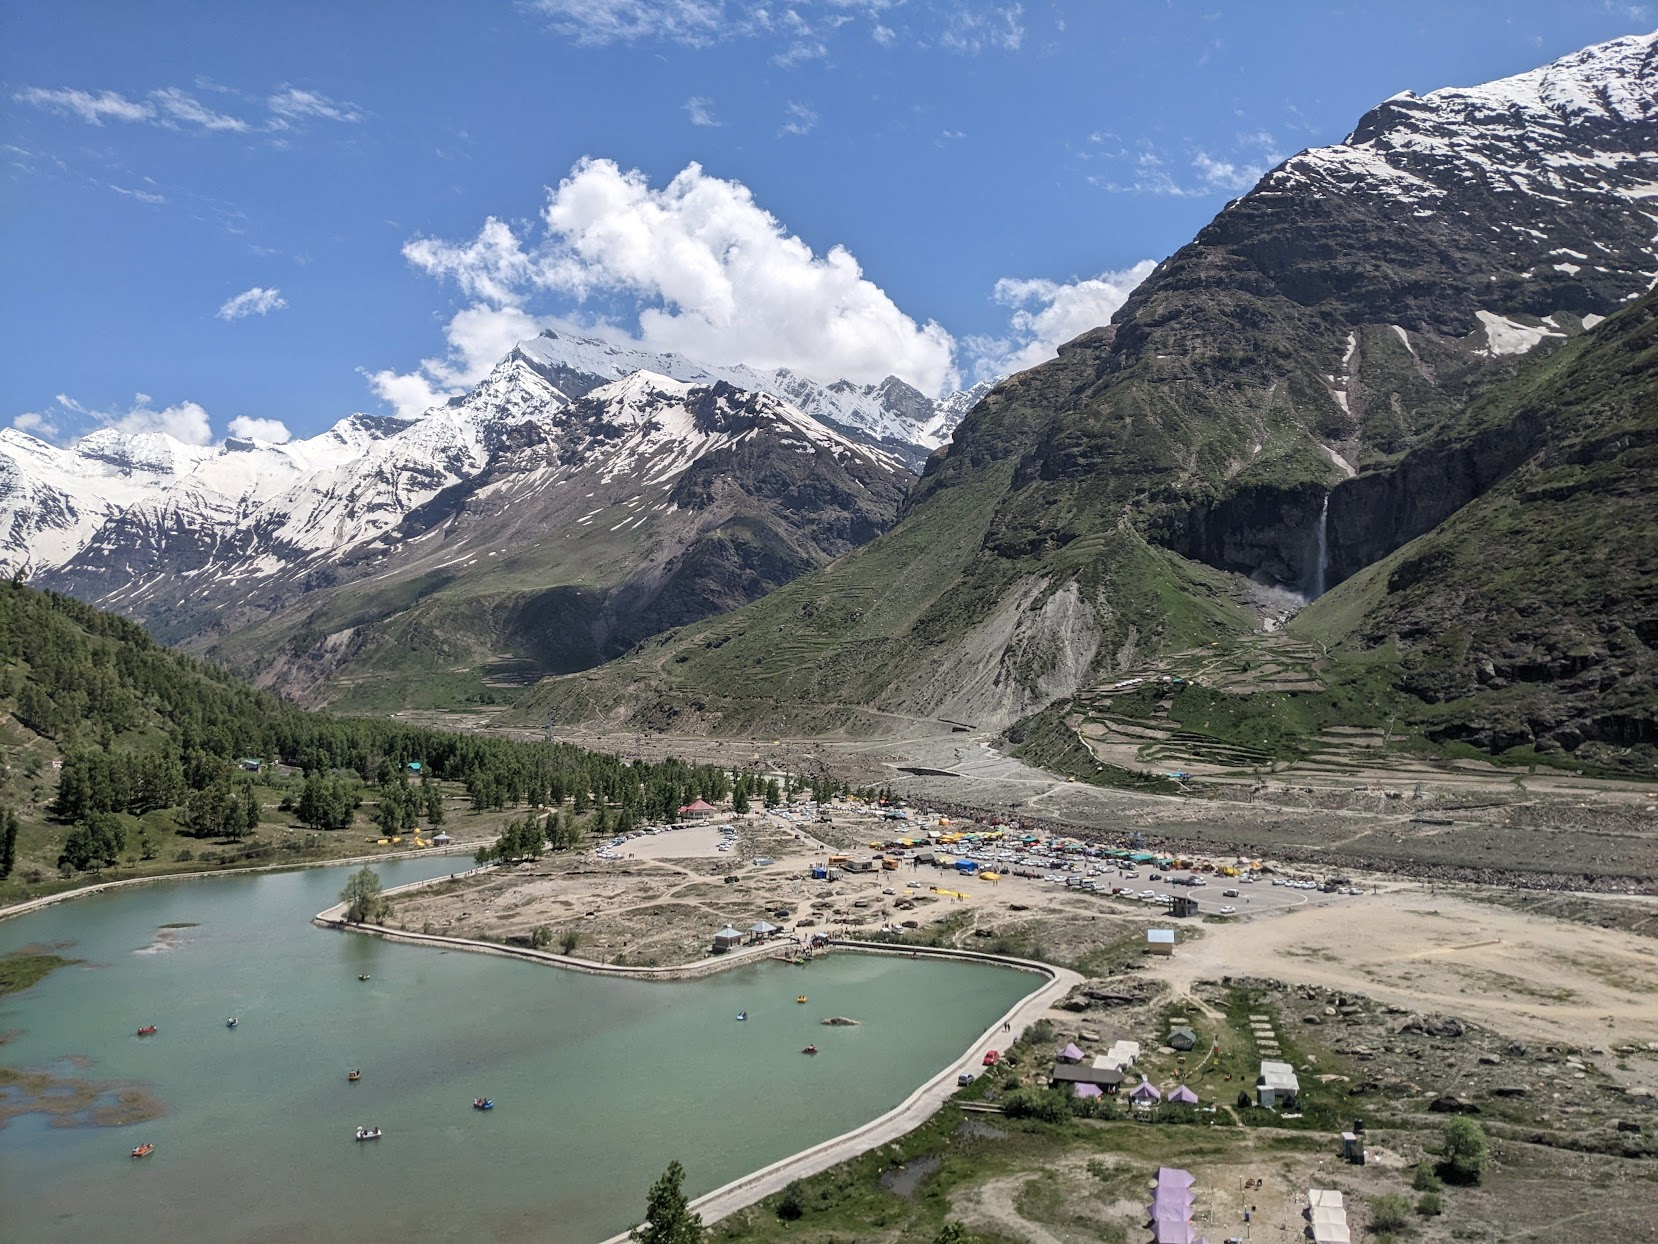
View from Sissu
Day 3) Sissu to Jispa
https://www.strava.com/activities/9350031906
|
Distance |
53 km |
|
Ascent |
1000 m |
|
High Point |
3400 m |
|
End Point |
3300 m |
|
My Time |
7 hours |

Route Data and Elevation Profile
This section is along high quality well trafficked roads with good amenities. There are many hotels and towns along the way. The road is busy with tourists, but not enough to have major traffic. This is an easy day.
It is possible to stop earlier at Keylang, a large town with many hotels and cafes. We decided to continue to Jispa, as it is the last town before the Baralacha La climb, and we wanted to cover as much distance as possible today.
Jispa will be the last town with electricity and phone signal.
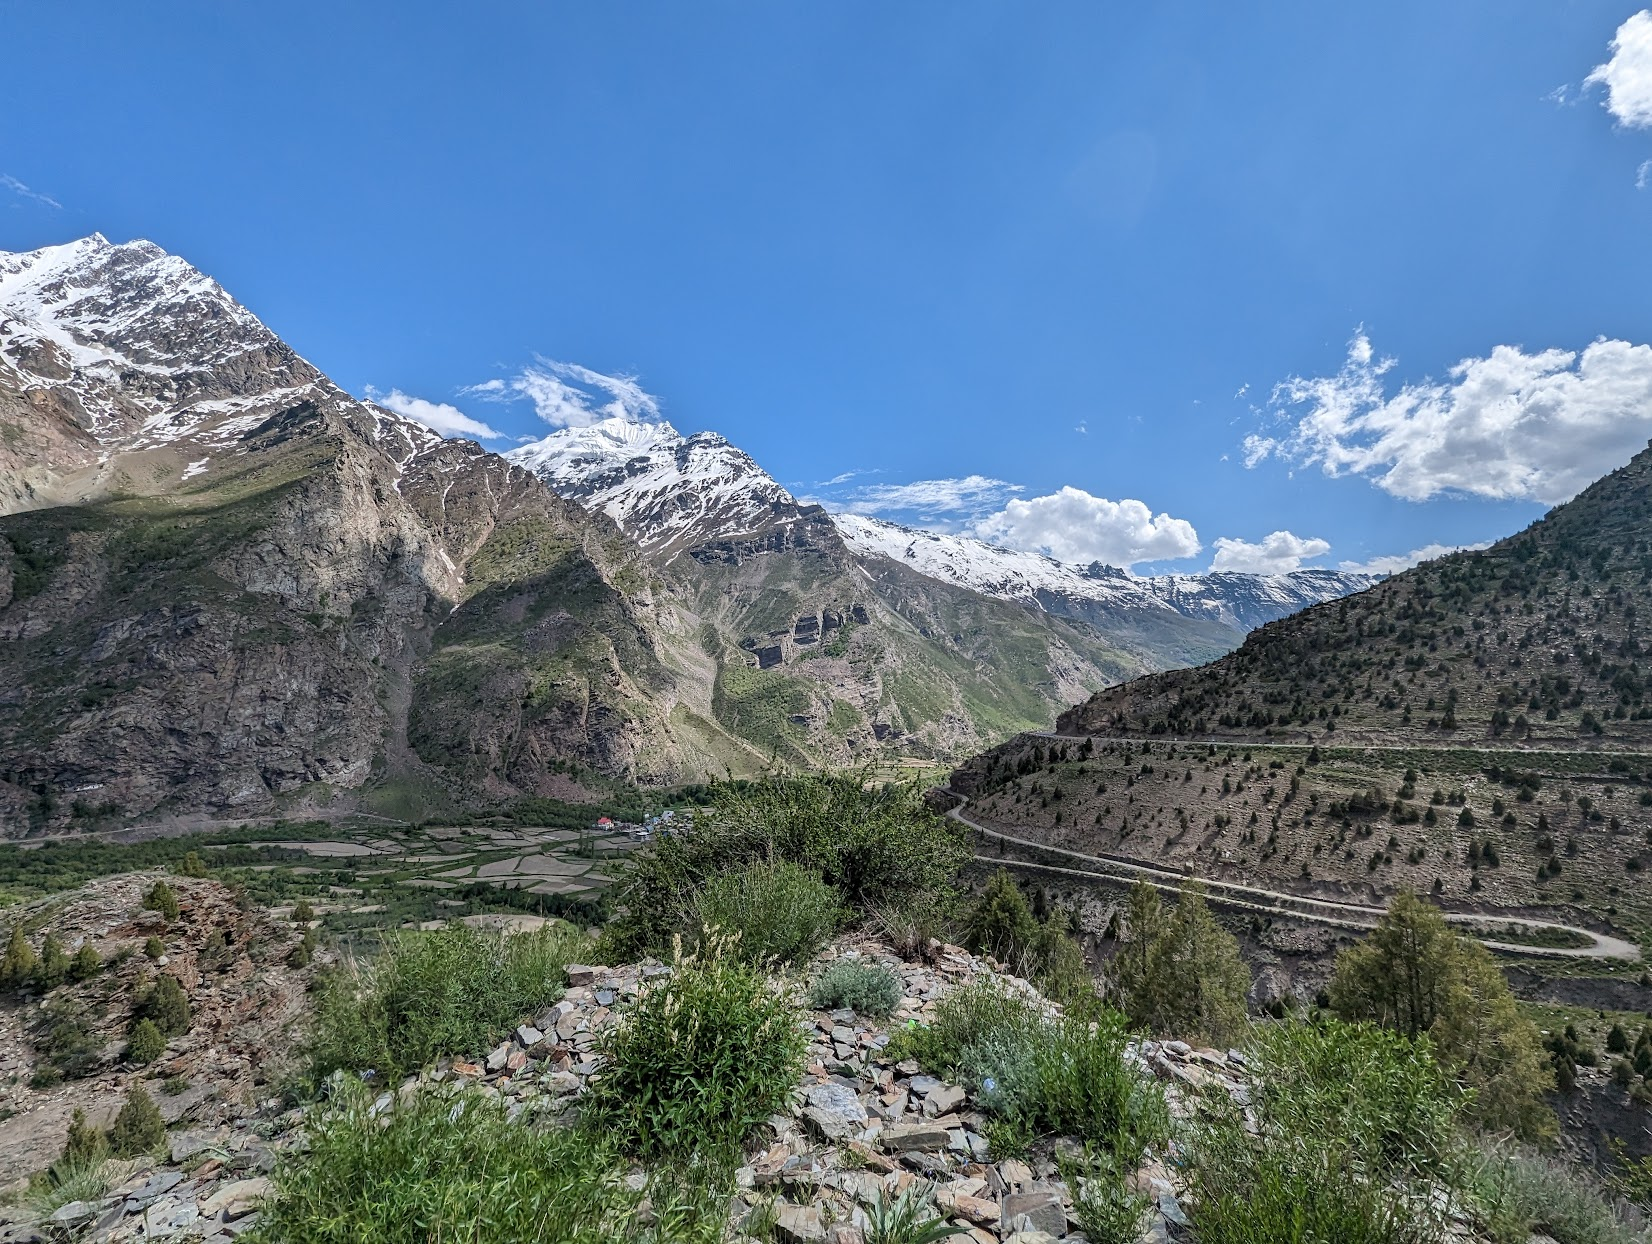
View from the road heading to Jispa
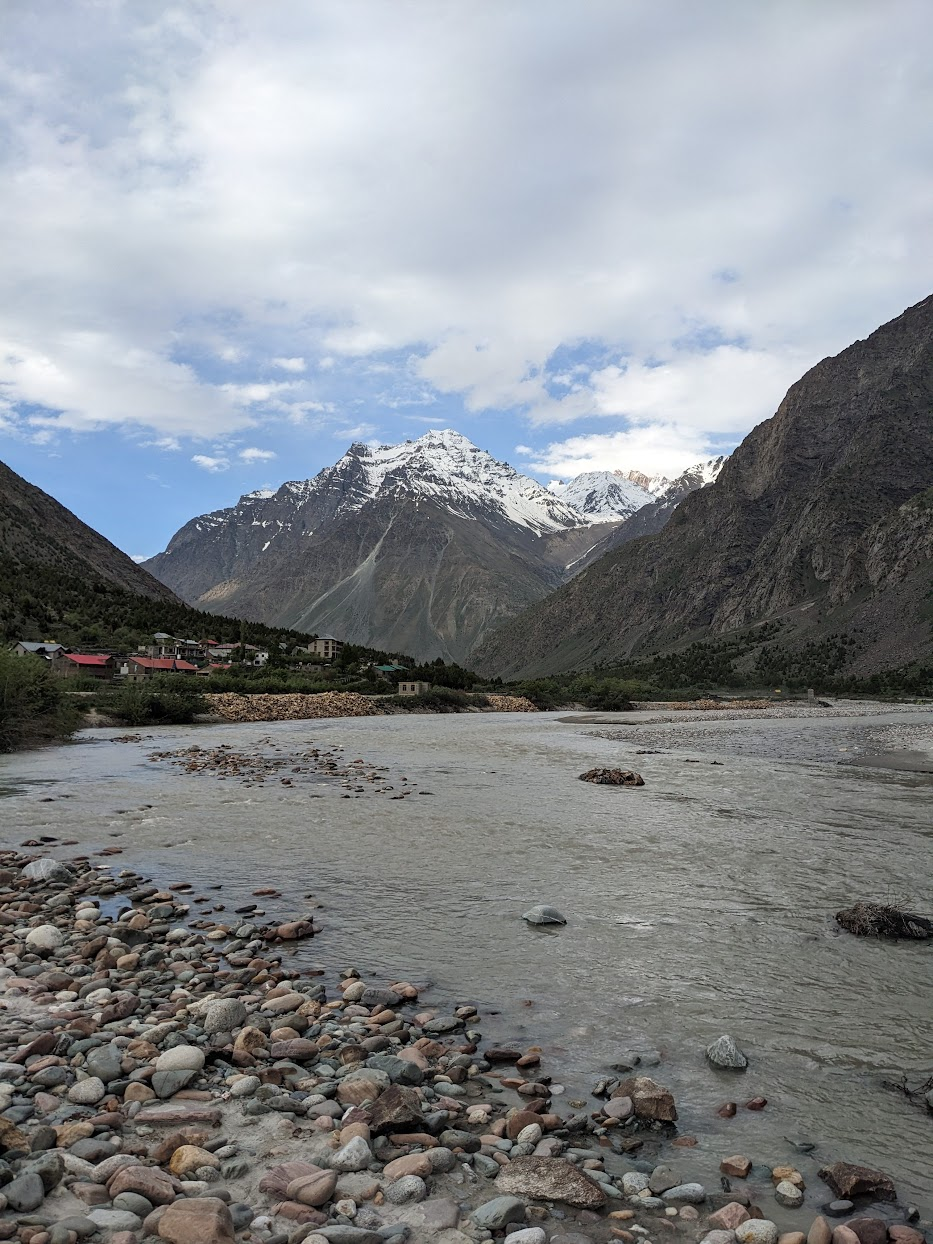
Looking towards Zing Zing Bar from our hotel
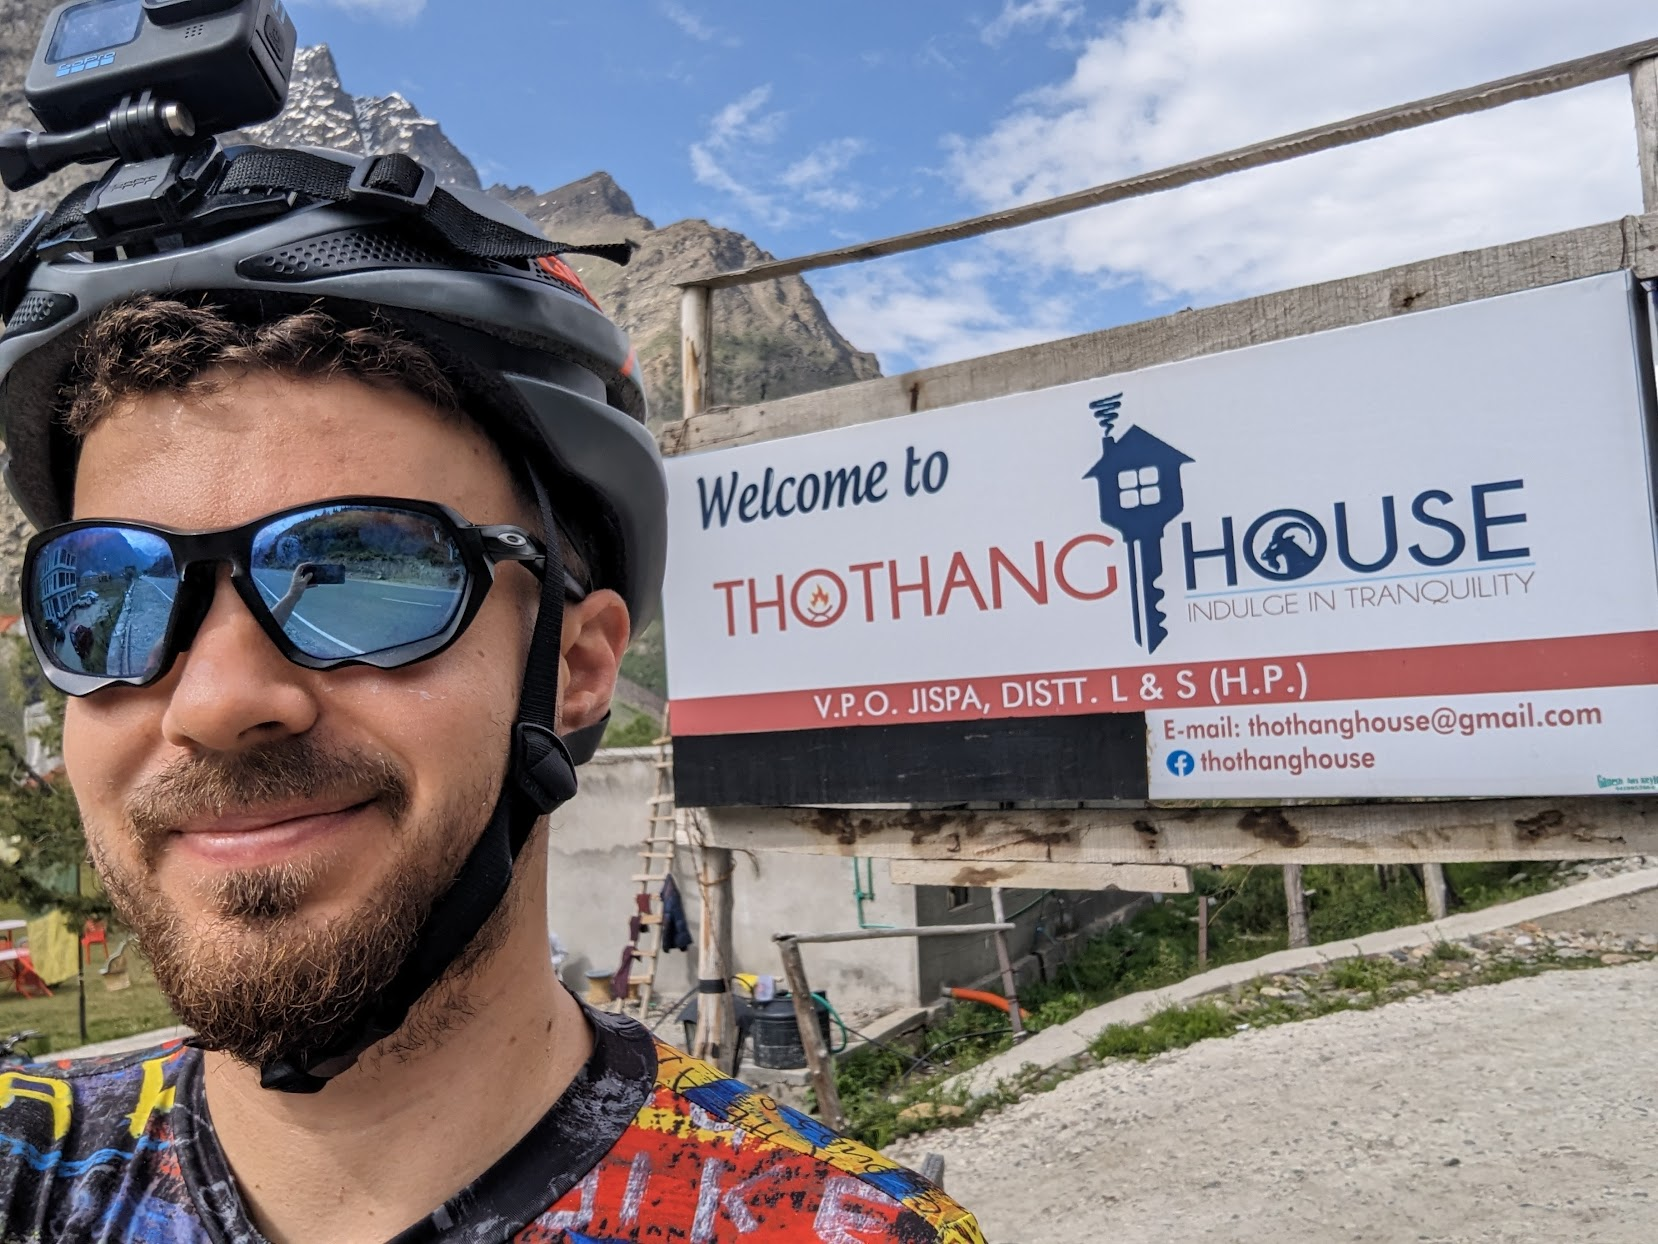
The best hotel name
Day 4) Jispa to Zing Zing Bar
https://www.strava.com/activities/9350038173
|
Distance |
36 km |
|
Ascent |
1250 m |
|
High Point |
4300 m |
|
End Point |
4300 m |
|
My Time |
7 hours |

Route Data and Elevation Profile
Riding out of Jispa you reach a well built bridge crossing the Jankar Nala. From here it is a consistent upwards climb for the next 1.5 days.
Eventually you reach Patseo, a small town with some roadside Dhabas that makes a good lunch spot.
From Patseo, the road follows the valley floor, passing a military base, then begins a slow ascent. In 2023, there were several sections where the road had been washed away and was being rebuilt. This was the only point on the ride that I had to get my feet wet as we pushed the bikes through the water. The road continues upwards through several work camps who are building infrastructure.
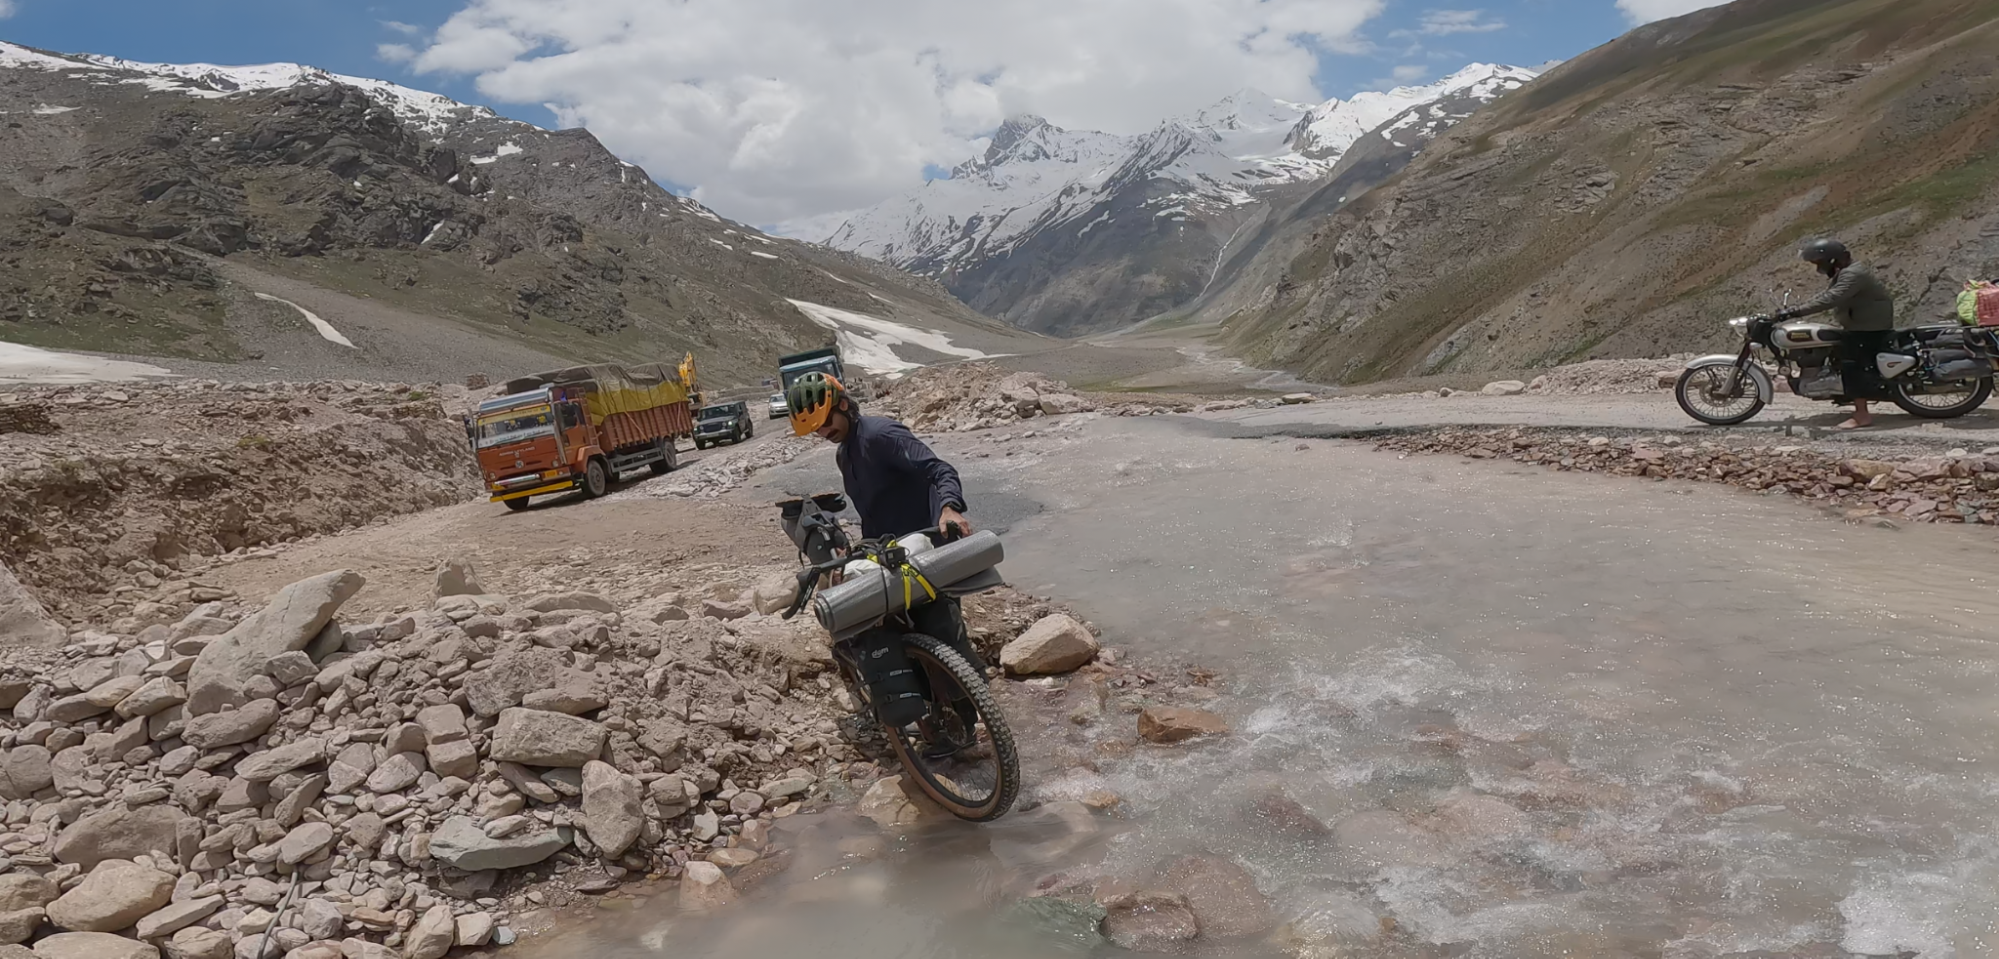
The only river crossing of the trip
Eventually you reach a town marked by signs as Zing Zing Bar, consisting of a military base and a small Dhaba. Don’t stop here, the actual Zing Zing Bar is further along up the hill.
The real Zing Zing Bar has several stone buildings and temporary tents setup. There are several accommodation options and more are being built.
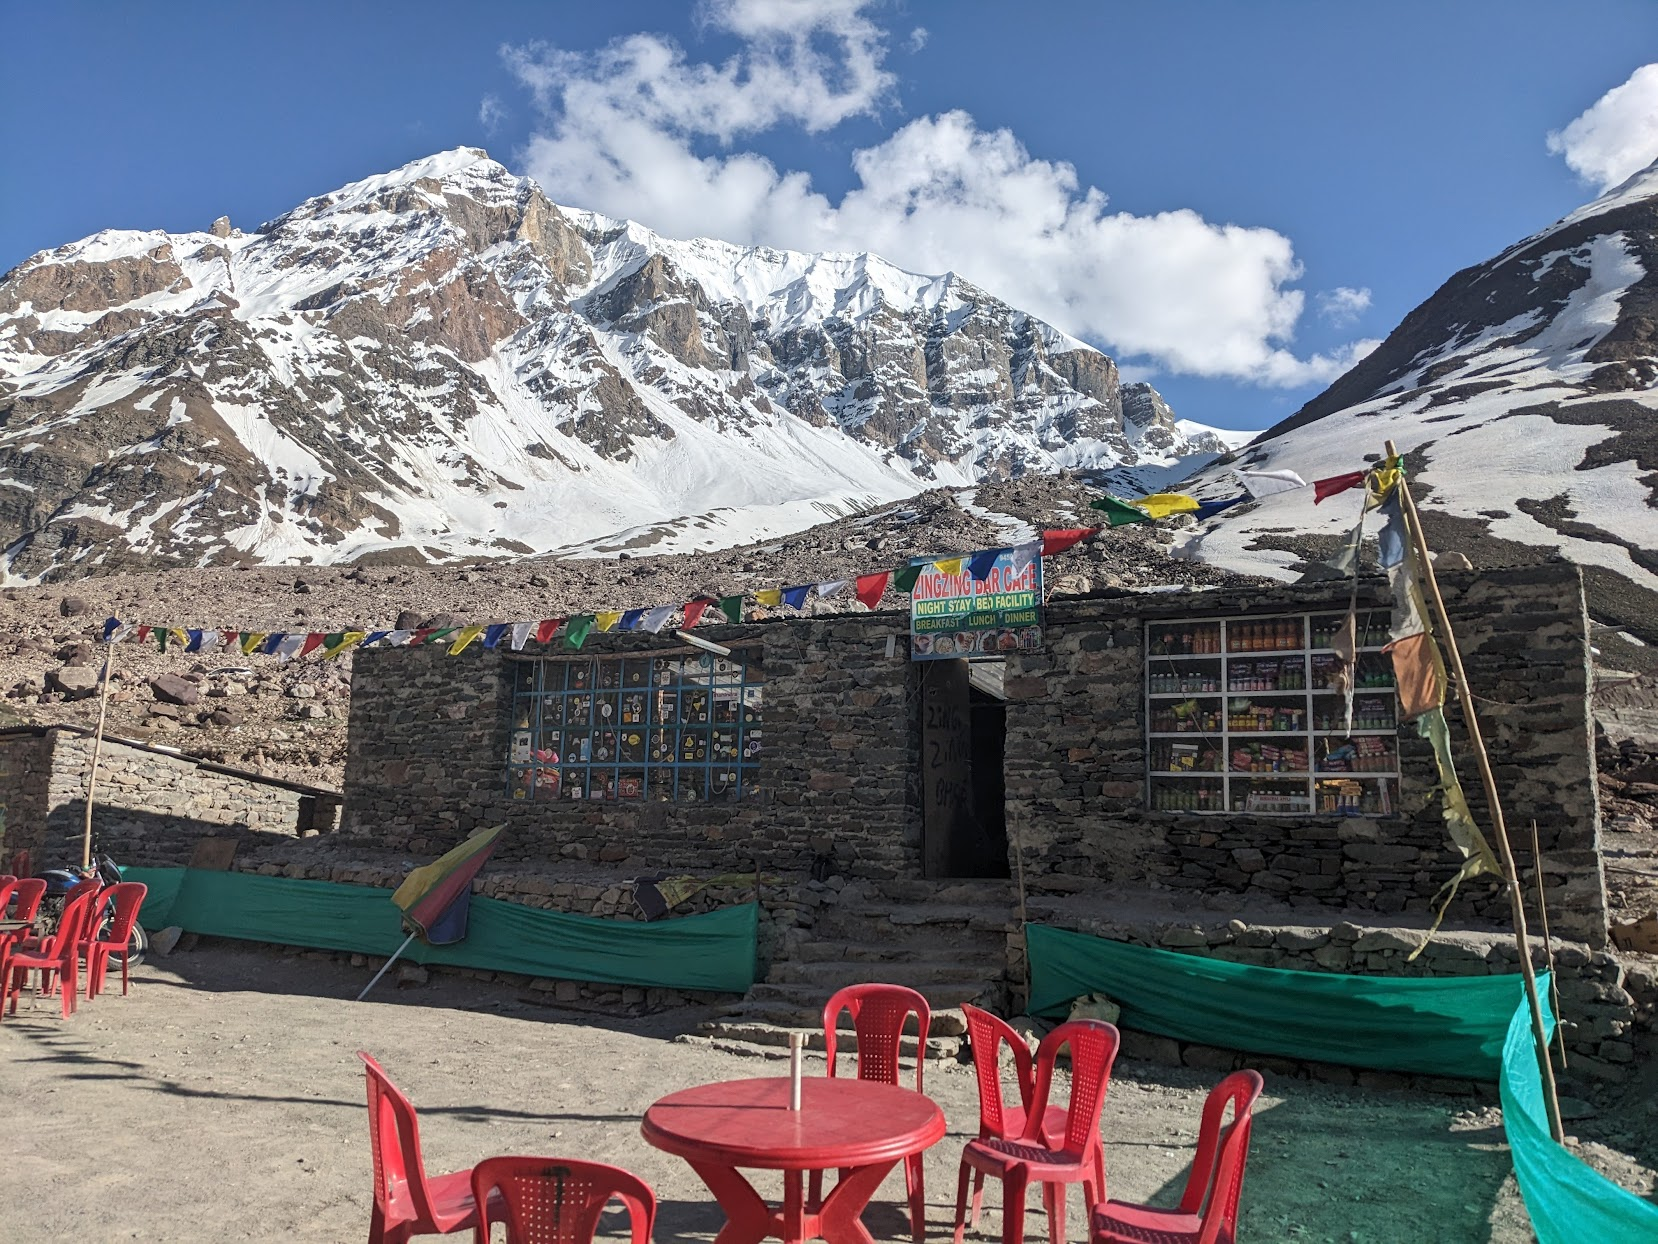
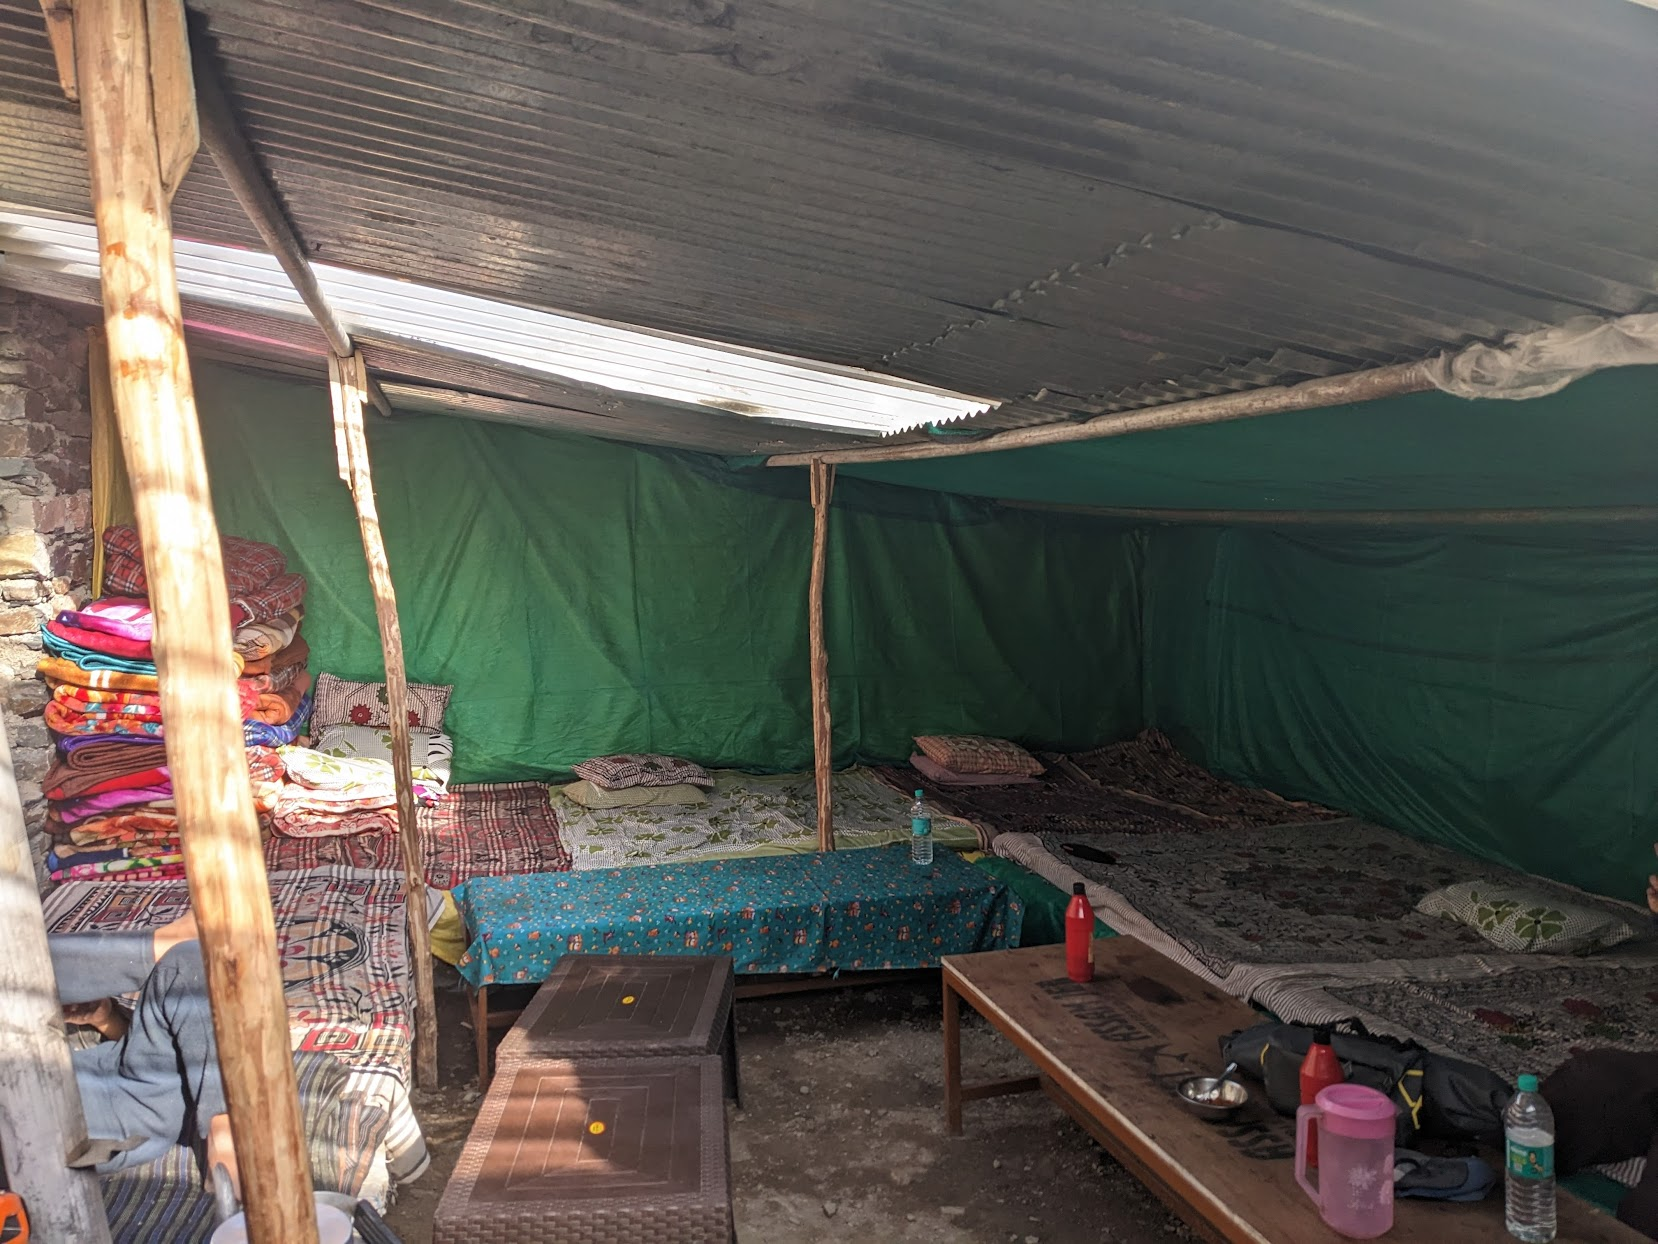
Zing Zing Bar Accommodation
Day 5) Zing Zing Bar to Sarchu via Baralacha La
https://www.strava.com/activities/9350044653
|
Distance |
48 km |
|
Ascent |
714 m |
|
High Point |
4900 m |
|
End Point |
4300 m |
|
My Time |
7 hours |

Route Data and Elevation Profile
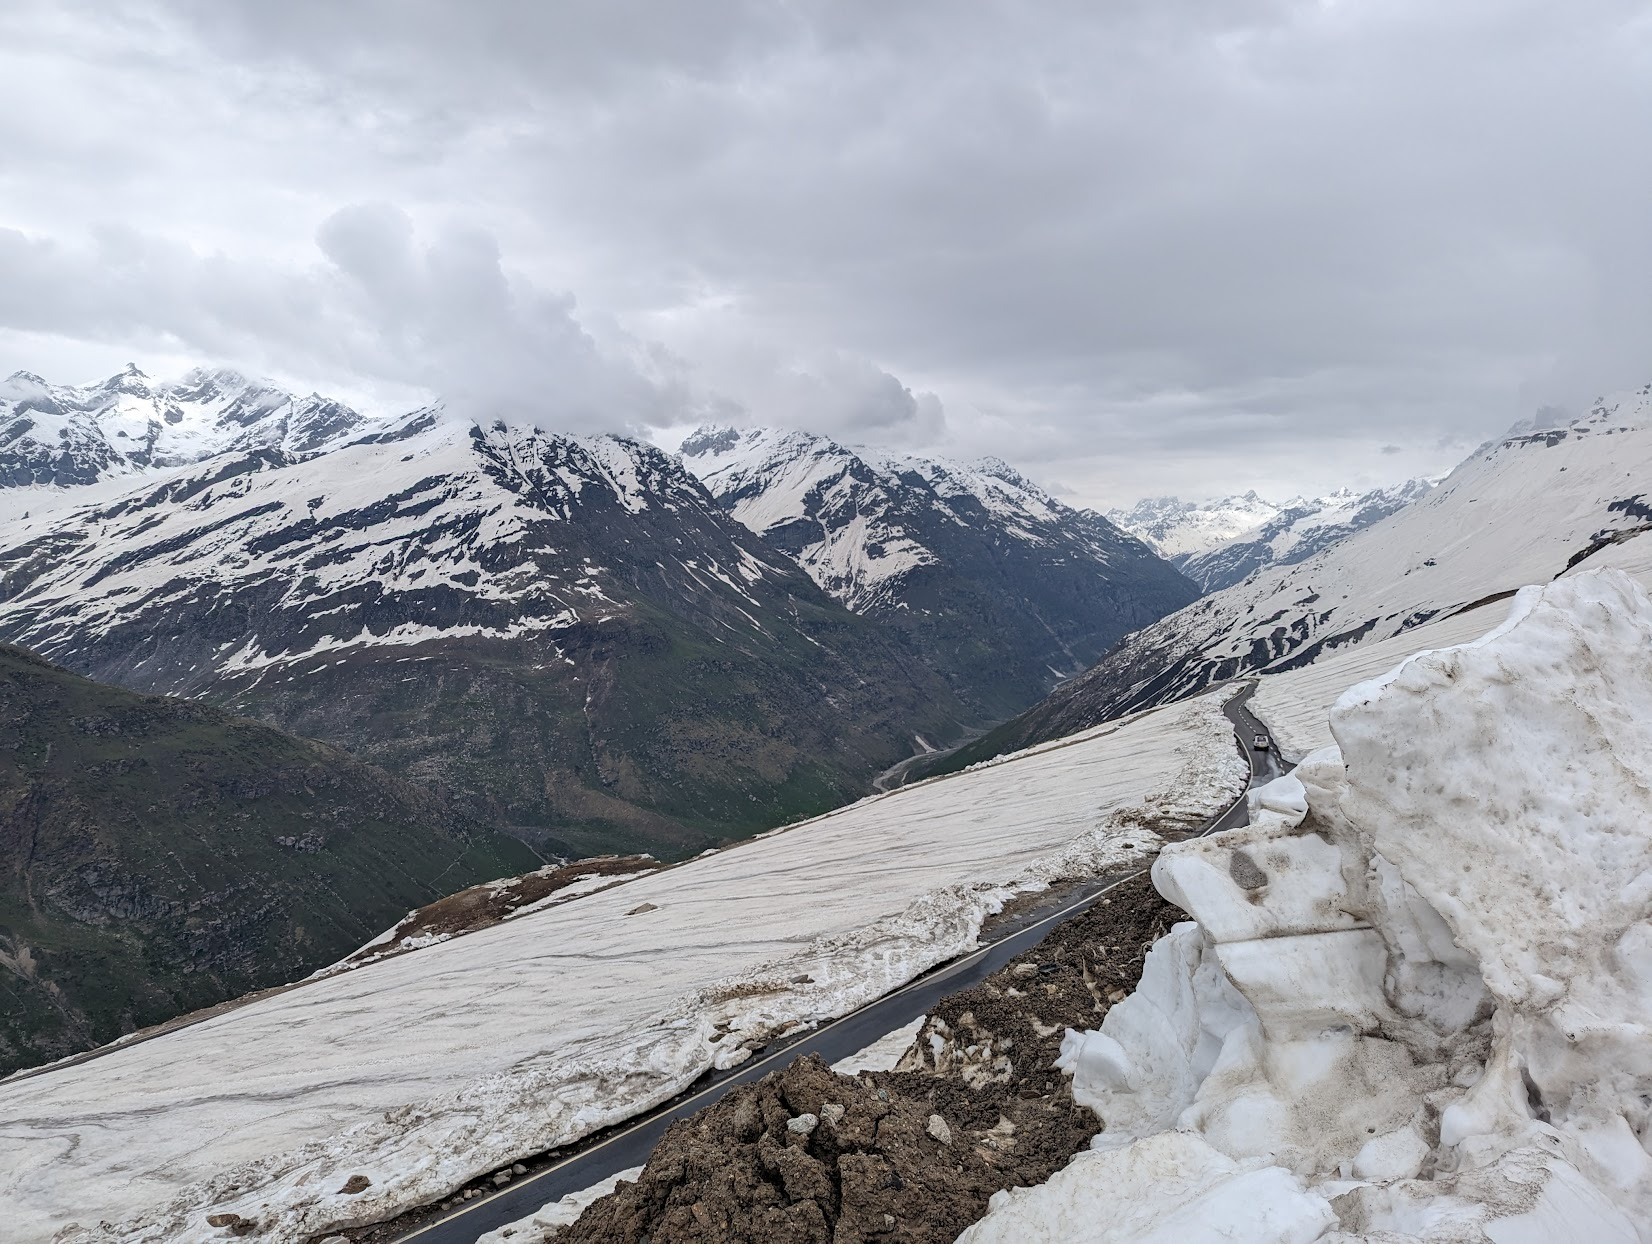
The route starts with the 700 m climb to Baralacha La. Shortly after leaving Zing Zing Bar, you reach the snow line. If the sun is out, this area is scorching. Ensure you have adequate sunscreen and sun protecting clothing on this section. The road quality deteriorates as you get higher, with some sections having avalanche and rock fall risk. You should move quickly through avalanche and rock fall terrain, and ride away from the cliff face.
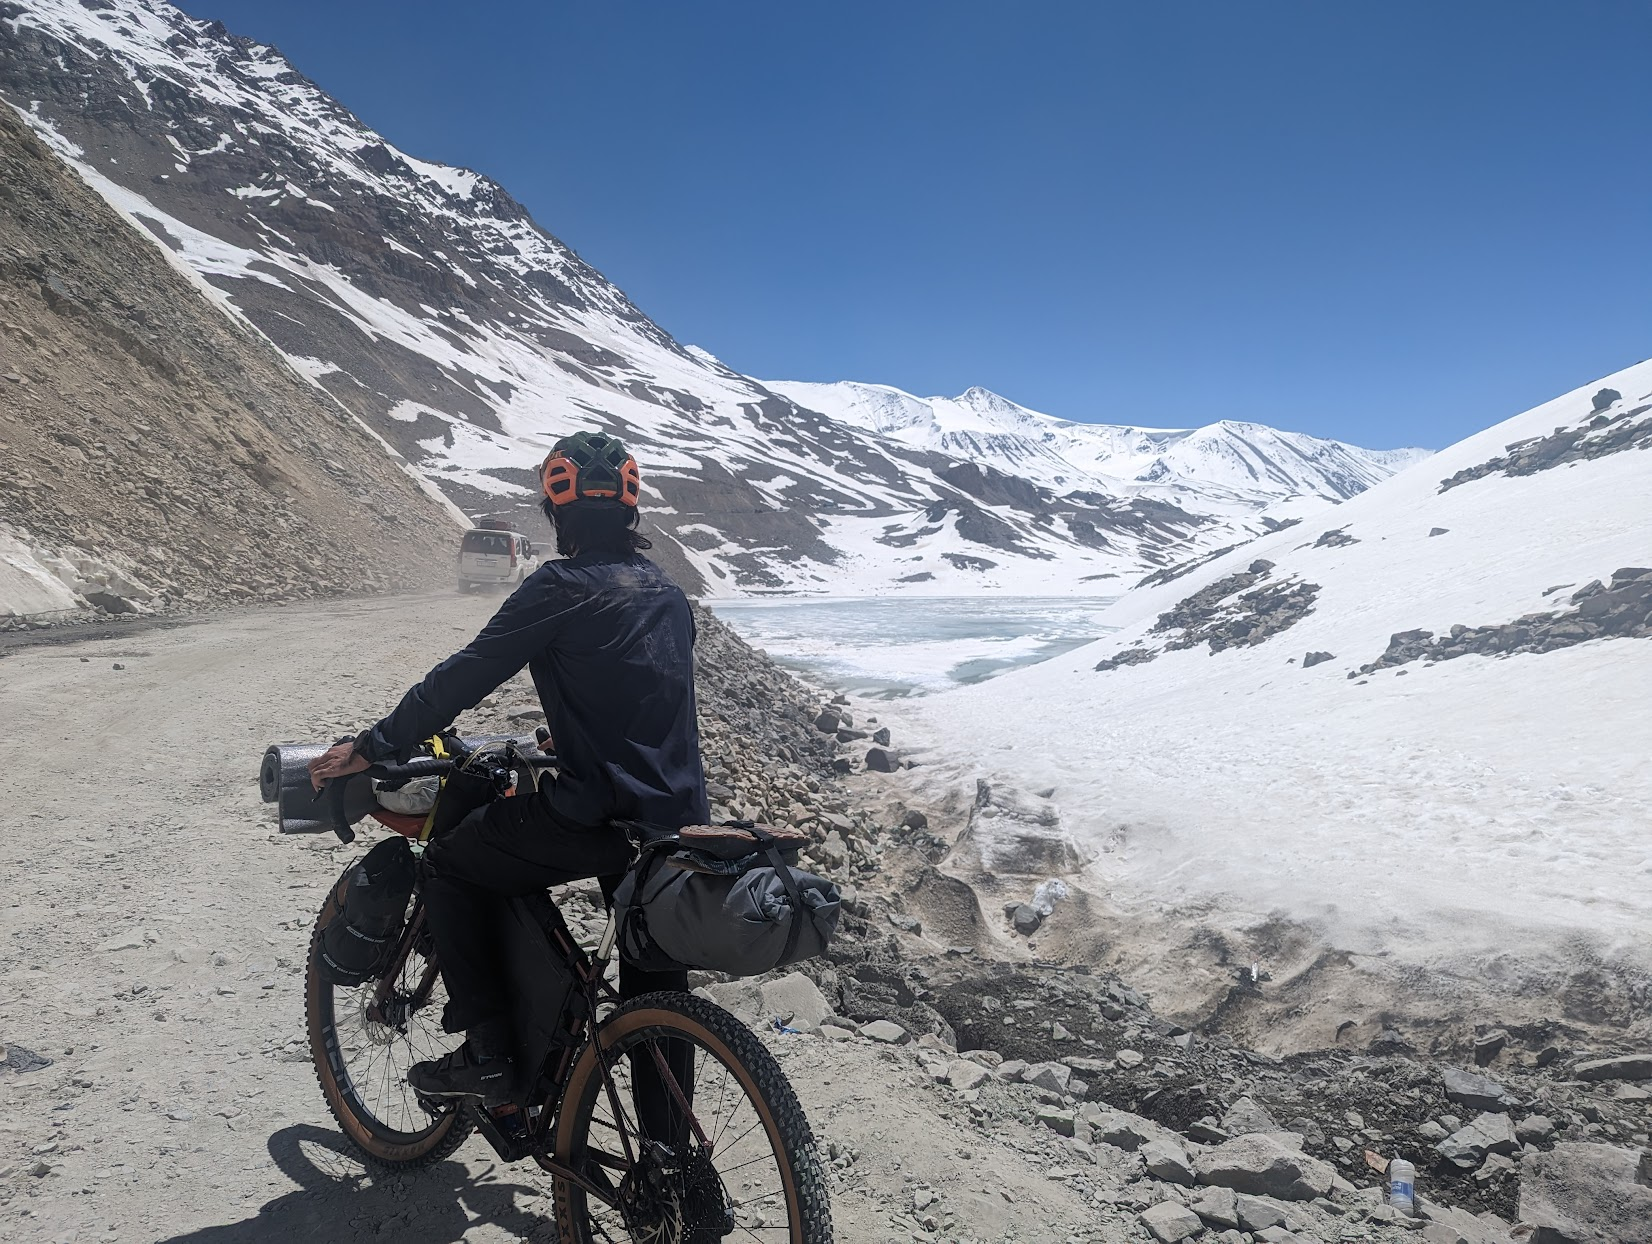
Rock fall and snow burn
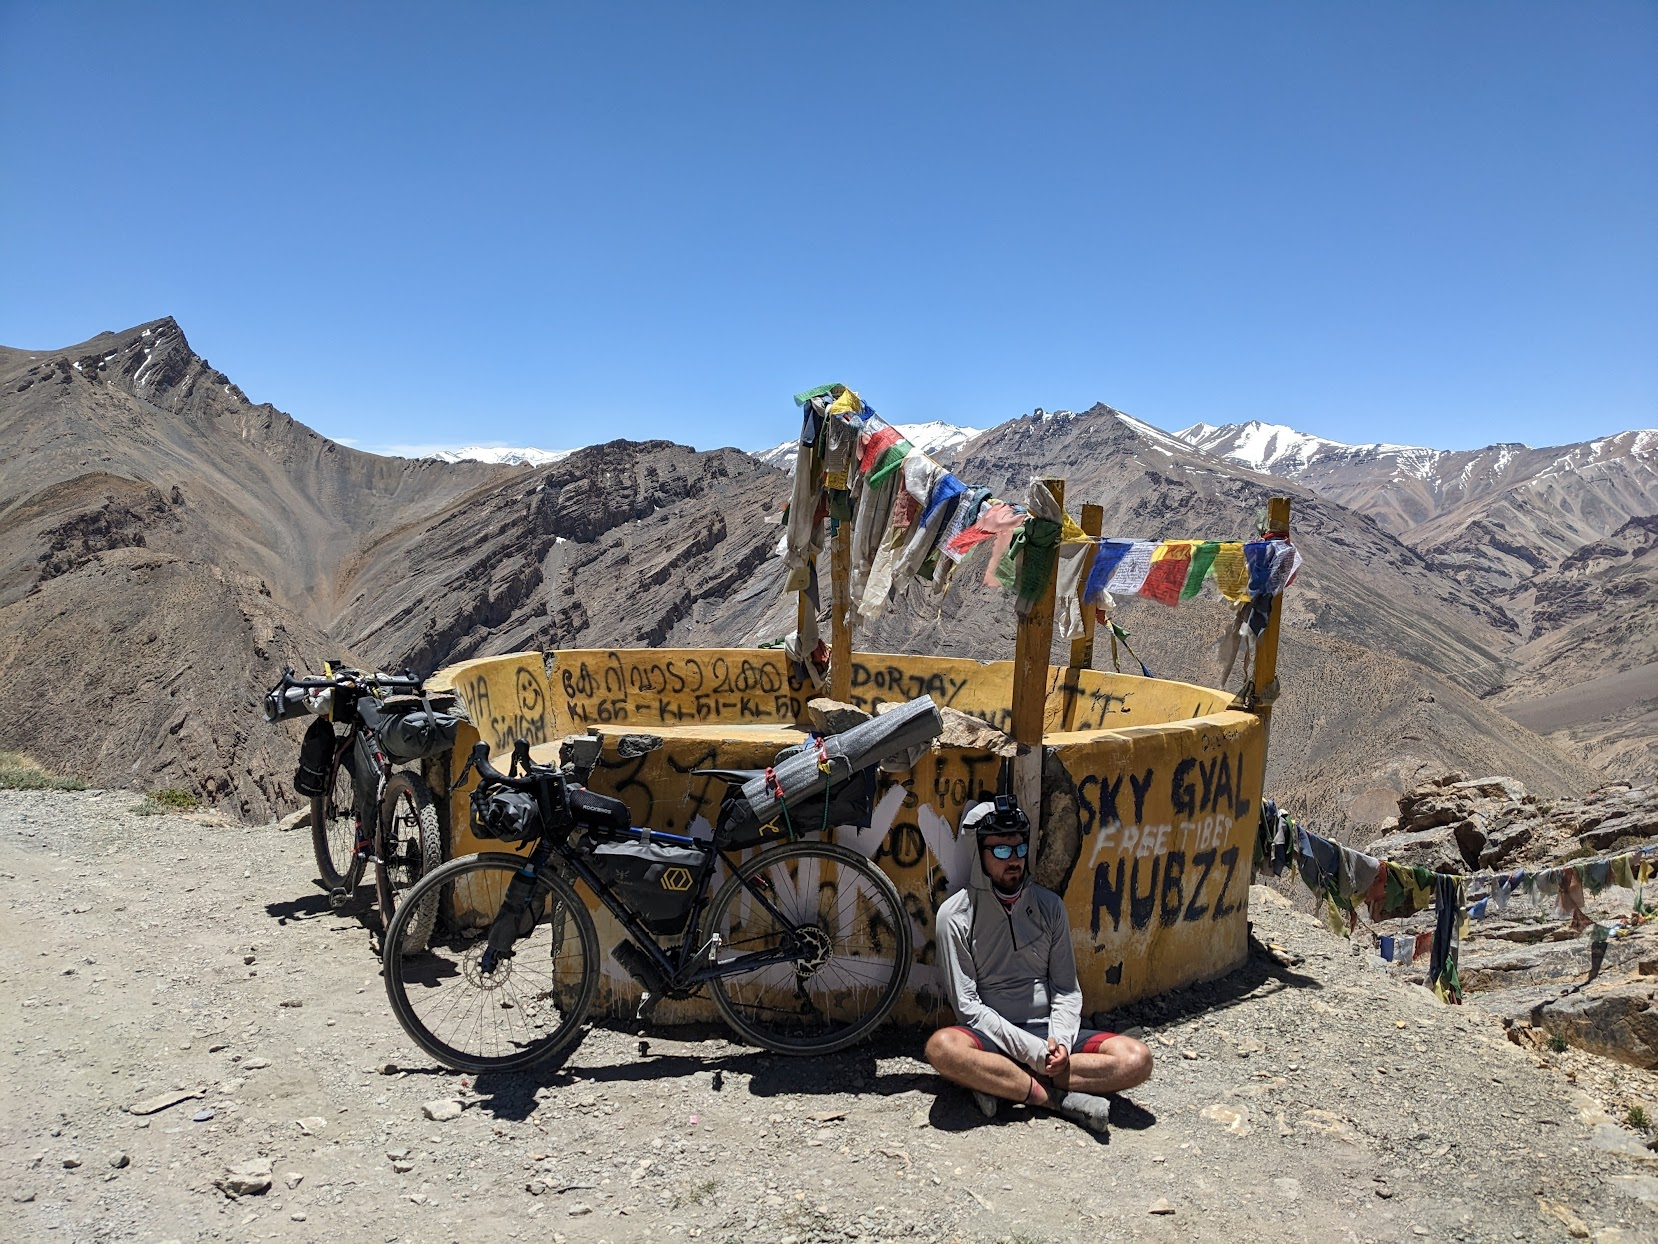
The top of the pass has a Stupa but there is no other shade. If it is hot, it is a bad place to rest. Continuing onwards down the next hill reaches a temporary settlement where you can rest and buy water and lunch. After the settlements, the road quality improves.
Baralacha La marks a significant drop in traffic. Day trippers from Manali do not continue past this pass, and from here the only traffic is typically military vehicles, goods trucks, and tourists travelling all the way to Leh. The riding is much more pleasant. Few people live here due to the closure of the road during winter.
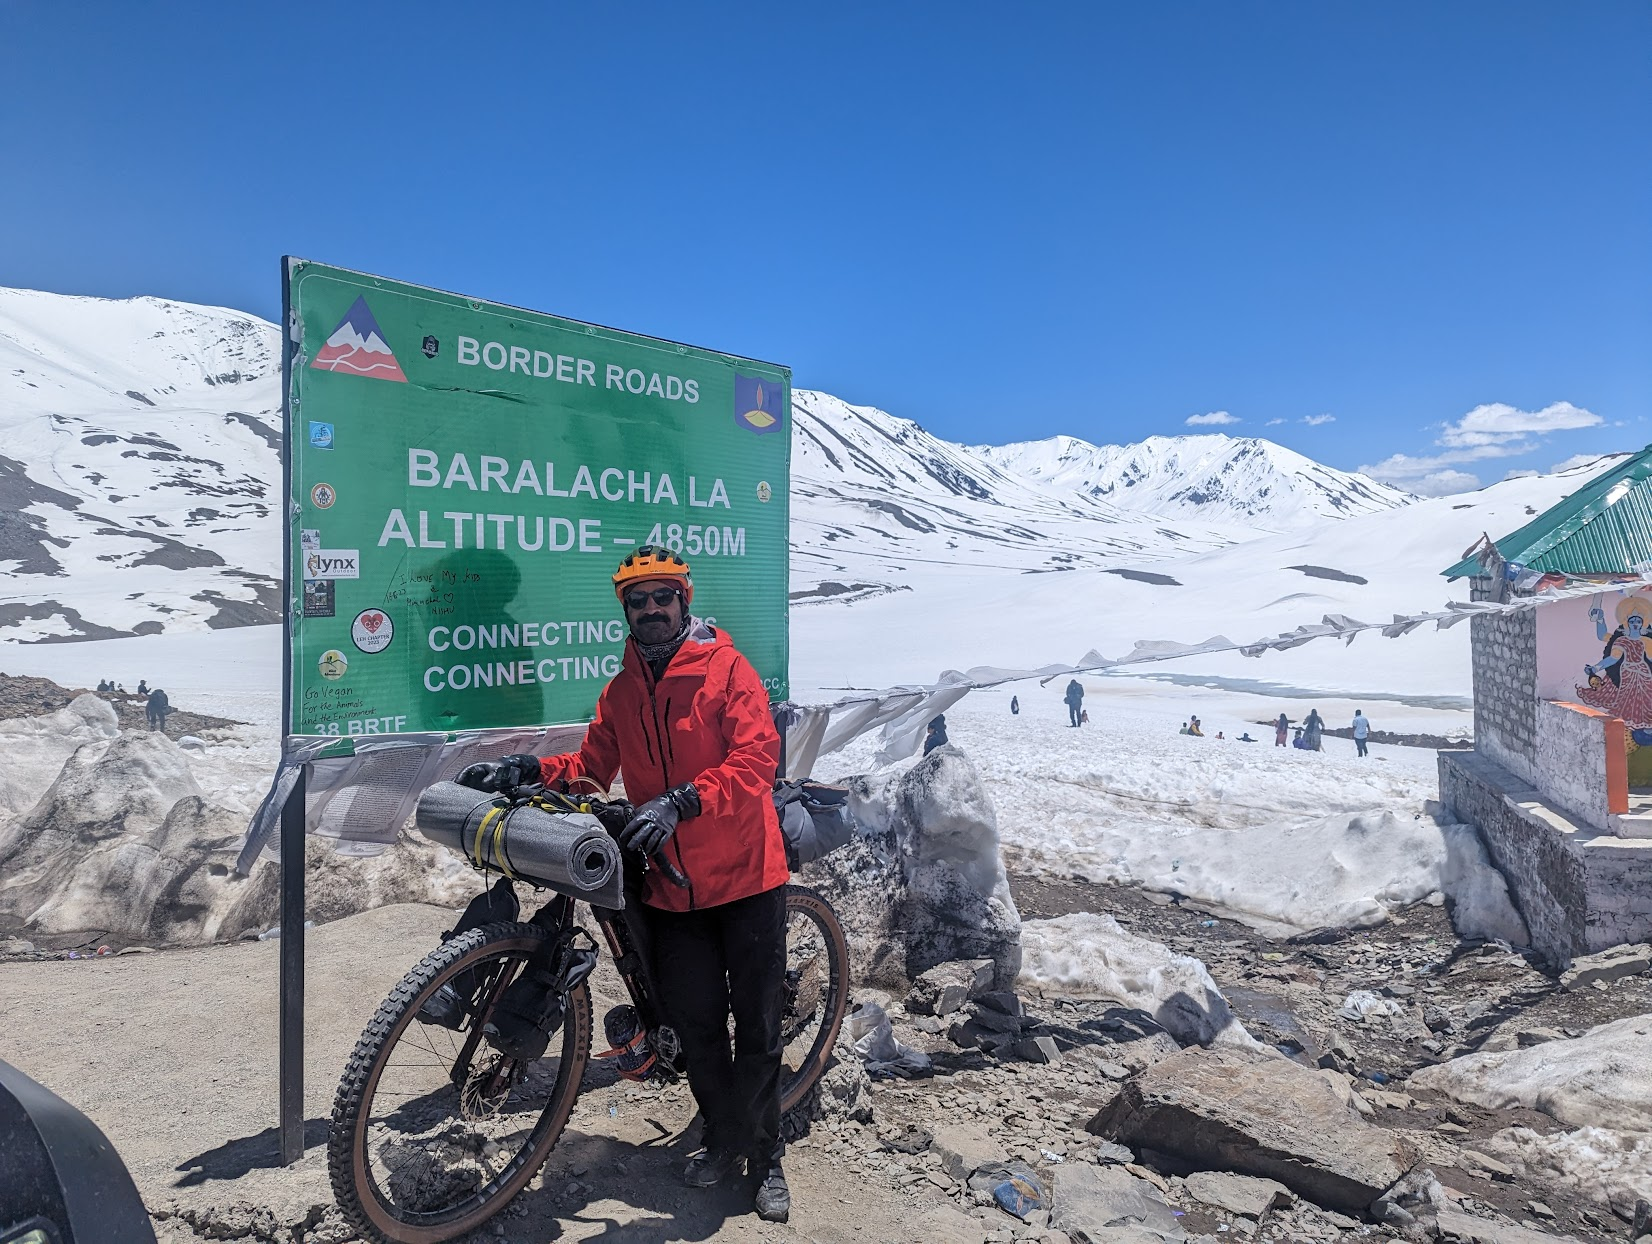
Baralacha La
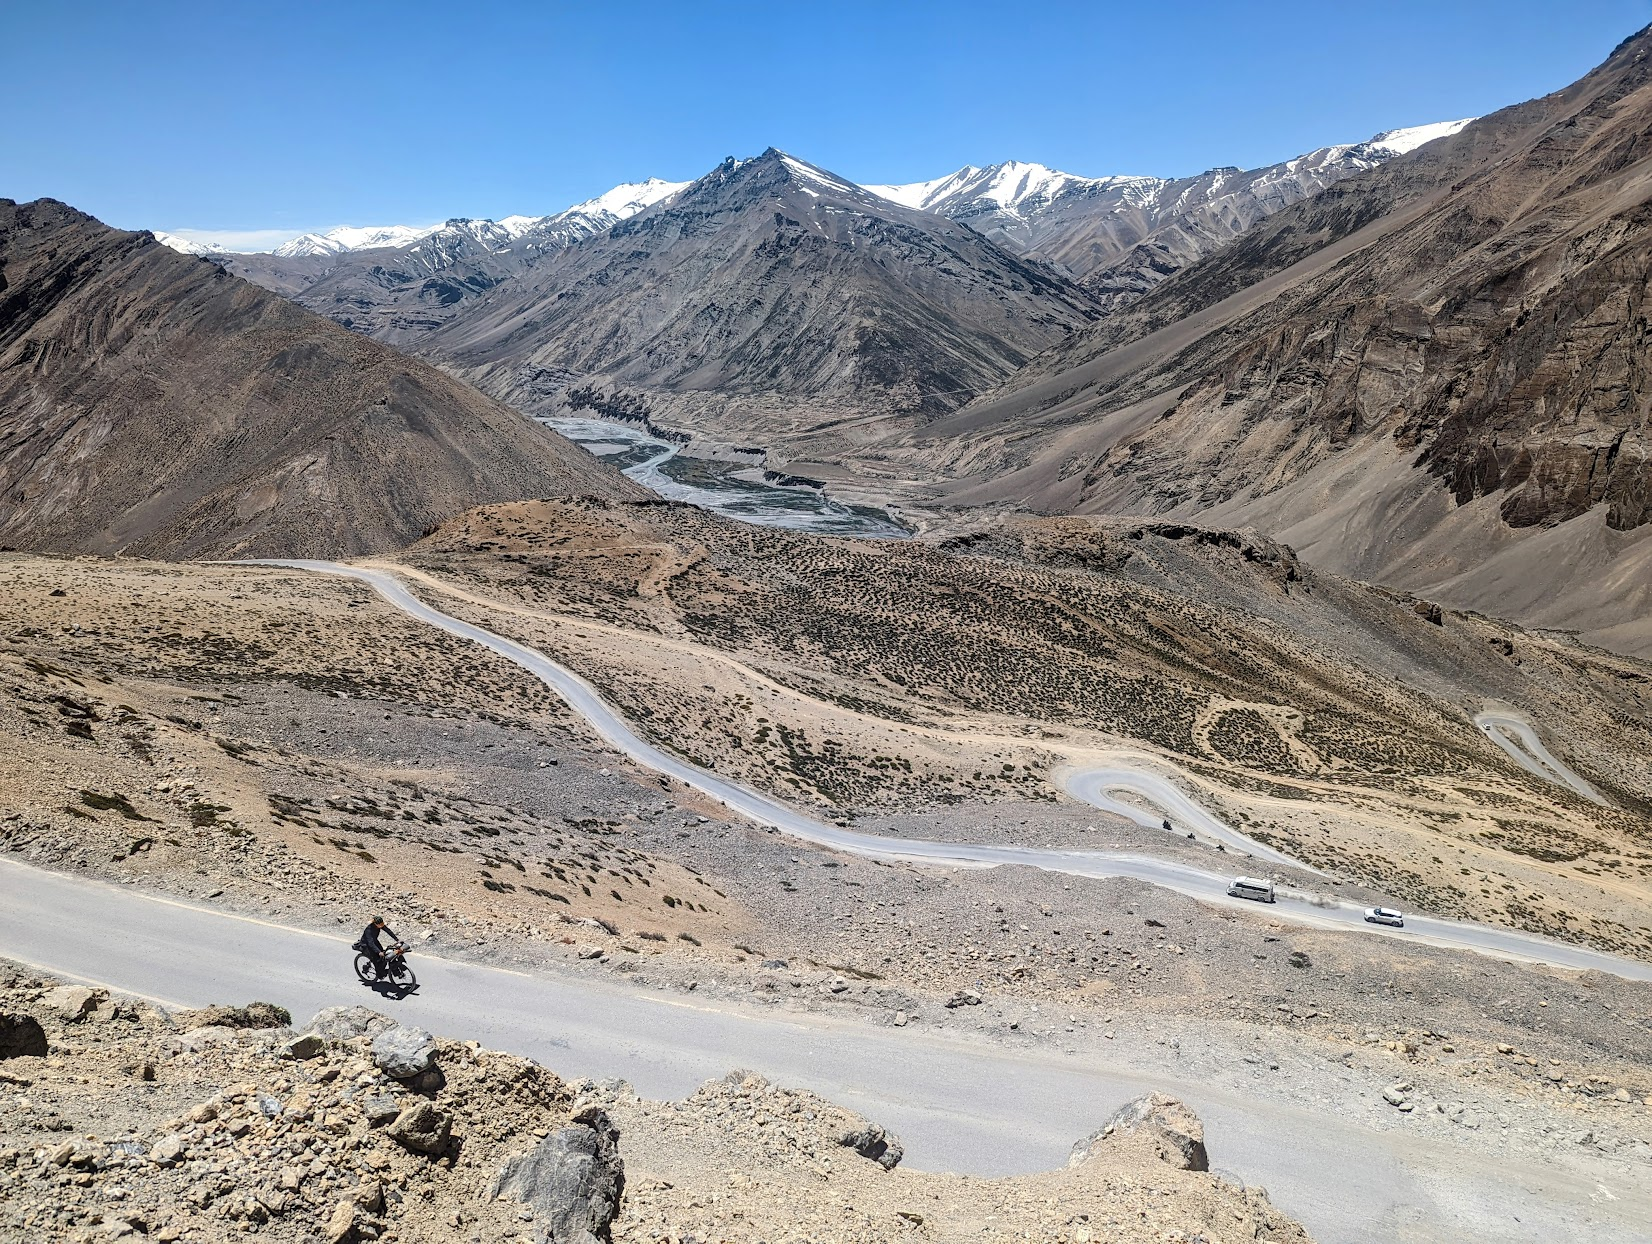
The road continues descending for about 30 km. It is a great ride with a brand new style of landscape. The road passes some camp sites which can be stopped at, but it makes more sense to roll all the way downhill to Sarchu. Sarchu is a major town, and is the last stop before a long empty stretch of road.
New landscape unlocked
Just before entering Sarchu there is a military checkpoint as you cross the border from Himachal Pradesh into Ladakh. You will need to show your passport and have your name marked down here.
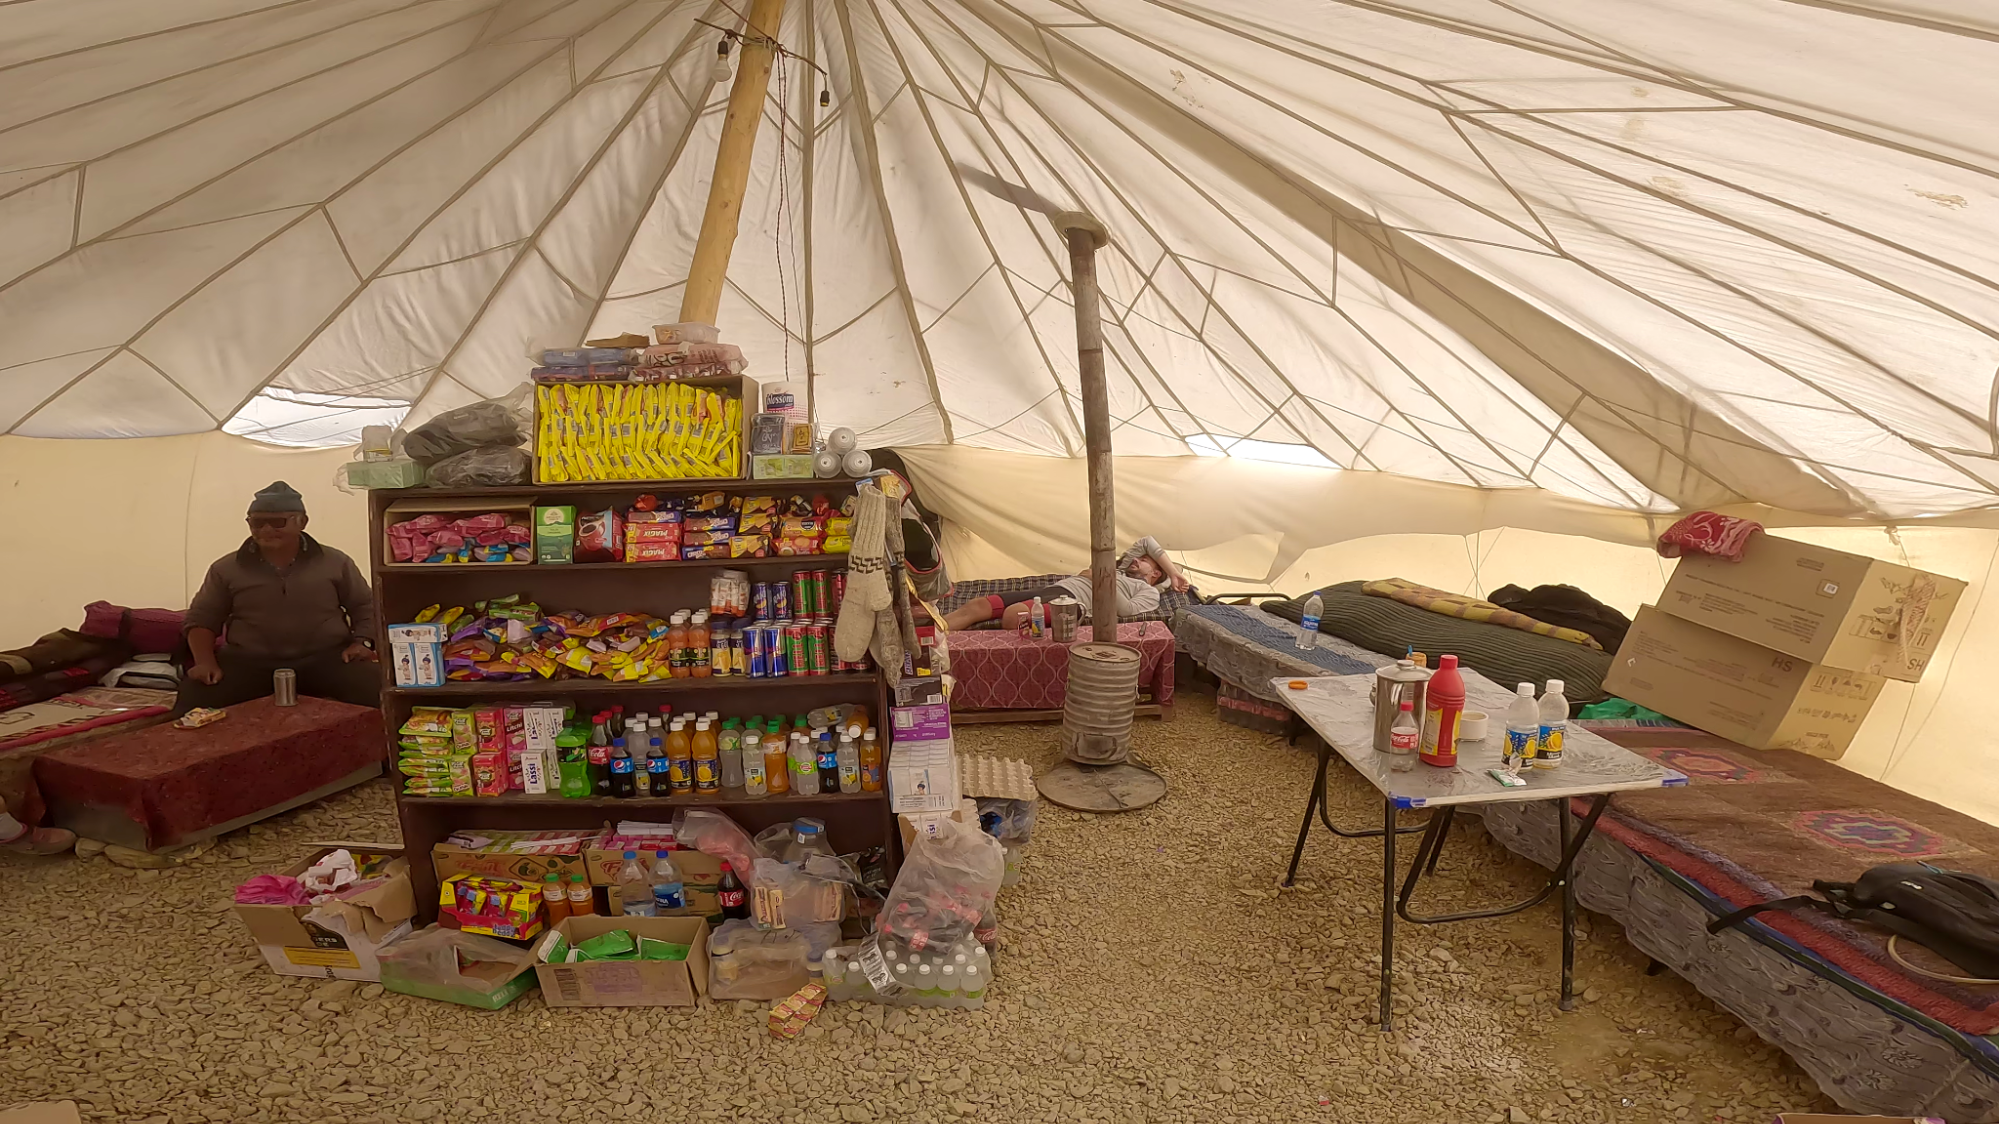
Sarchu has multiple accommodation options of varying price and quality. It is a good place to take a rest day. We took our second rest day here at the Friend Restaurant, a small tea house run by a kind local woman.
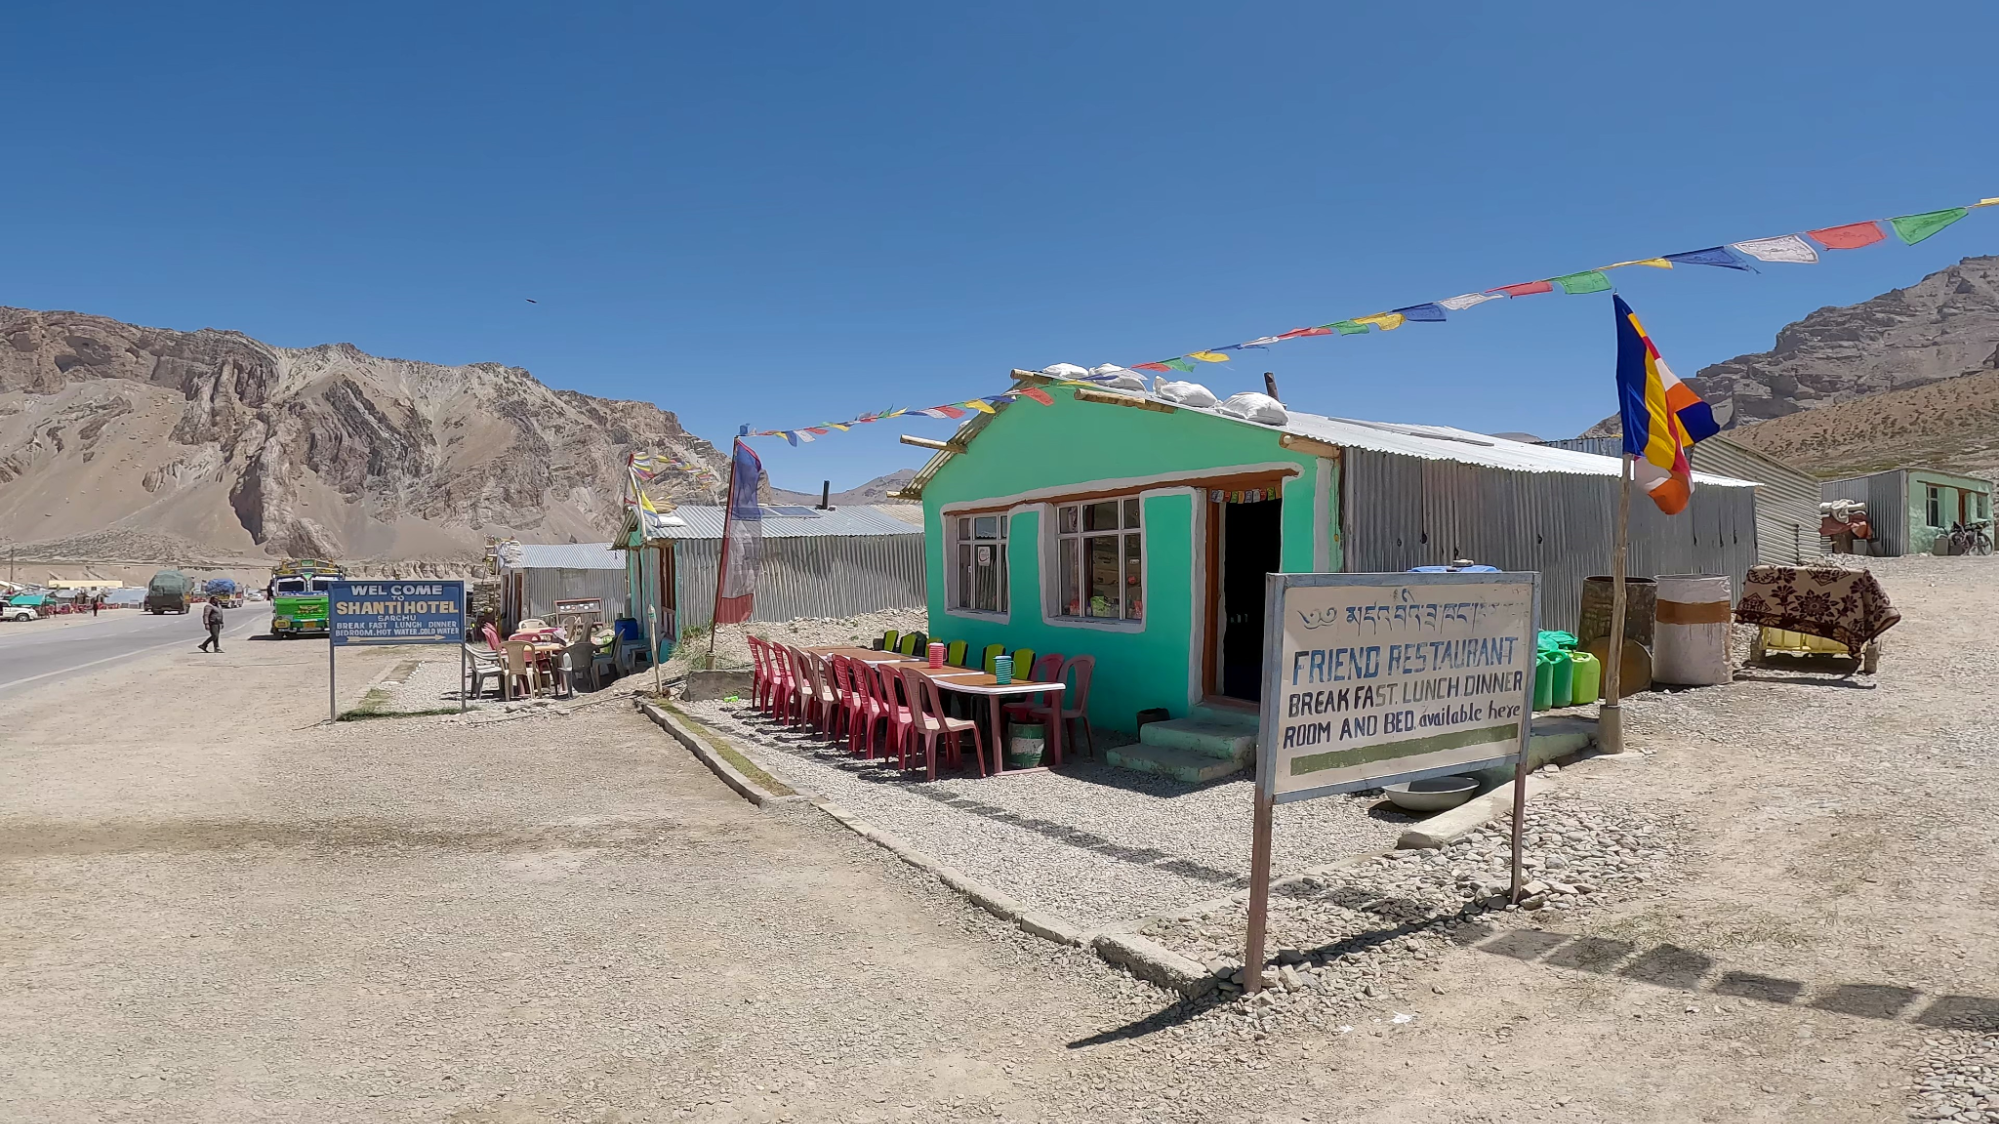
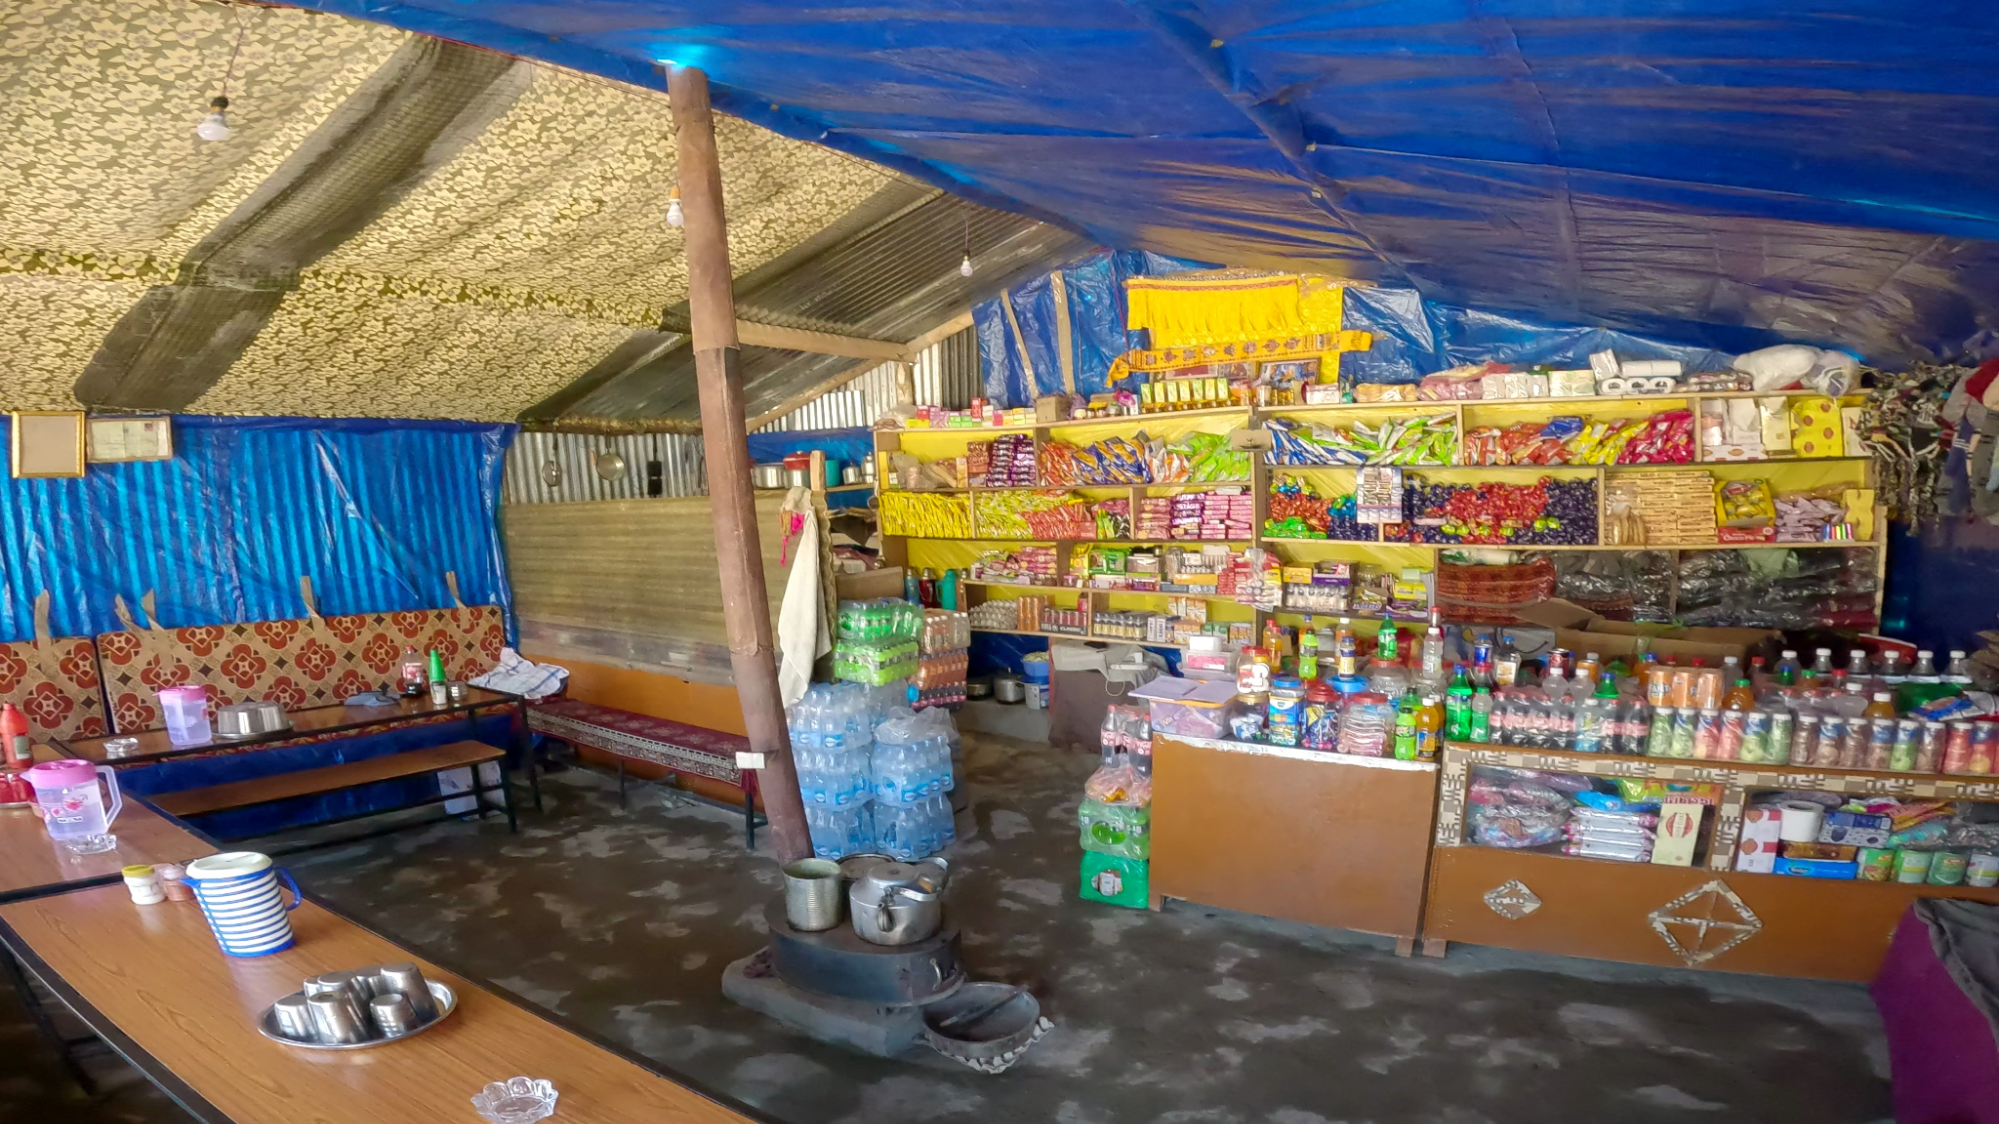
The Friend Restaurant was loaded with snacks and made a good rest day spot. The room even had a western toilet
Day 6) Sarchu to Whiskey Nala via Nakee La
https://www.strava.com/activities/9350050255
|
Distance |
48 km |
|
Ascent |
955 m |
|
High Point |
4900 m |
|
End Point |
4700 m |
|
My Time |
6 hours |

Route Data and Elevation Profile
There are no Dhabas between Sarchu and Whiskey Nala. All food and water must be stocked up in Sarchu. This section is very hot and exposed and will require 3 L + of water. I found this day to be the hardest of the trip due to the heat and the climbing.
The road out of Sarchu is mostly flat and rolling hills. It is a pleasant ride.
Eventually you reach the base of the Gata Loops. The Gata Loops are a mythological climb that is written about on every blog, but it is all a bit exaggerated. There are 21 switchbacks to reach ~ 4700 m elevation, and then another slow climb to reach the ~ 5000 m pass. It is spectacular, and very difficult at high altitude. There is no shade from the start of the Gata loops to Whiskey Nala, so be wary of dehydration.
The Gata Loops
Progressive at 5000 m
Desperate for shade
The road is good quality, and there is rarely traffic. However, towards the pass the road is narrow, and we reached a traffic jam where some trucks could not pass each other. It was manageable to ride around them.
From Nakee La, the road quality deteriorates as you descend into Whiskey Nala.
Whiskey Nala is a temporary tent encampment set up for tourists. Overnight, vehicles do not typically stay here, however there is accommodation available for cyclists in the tents. There is plenty of food and bottled water available. However there is no running water and the toileting situation is poorly managed.
Whiskey Nala does not have much amenity and was my least favourite place to camp. A route variation could be to continue over Lachung La and roll down to Pang at about 4500 m. This would add 4 + hours to the day and would be very difficult, but would be possible if you reached Whiskey Nala early and still had energy to continue. There are no settlements between Whiskey Nala and Pang, so do not continue unless you can make it there. Pang would be a much nicer place to stay.
Whiskey Nala Accommodation
Day 7) Whiskey Nala to Debring via Lachung La
https://www.strava.com/activities/9350061480
|
Distance |
72 km |
|
Ascent |
850 m |
|
High Point |
5100 m |
|
End Point |
4600 m |
|
My Time |
9 hours |

Route Data and Elevation Profile
There is no food or water available between Whiskey Nala and Pang.
The road between Whiskey Nala and Pang is the worst built road of the journey. However, once this section is completed, the road only improves. It was still easily doable on my 38 mm touring tires.
The day starts with an ascent up a dirt road to Lachung La, a 5100 m pass. This section has comparable traffic to the previous few days.

Lachung La
Once at the pass, the descent is one of the most spectacular sections of the trip. The road follows a river down a narrow valley, with the neighbouring mountains towering 1500 m overhead. The road winds its way through some strange cliffs and incredible terrain. The road is unpaved and potholed.

Can’t park there mate
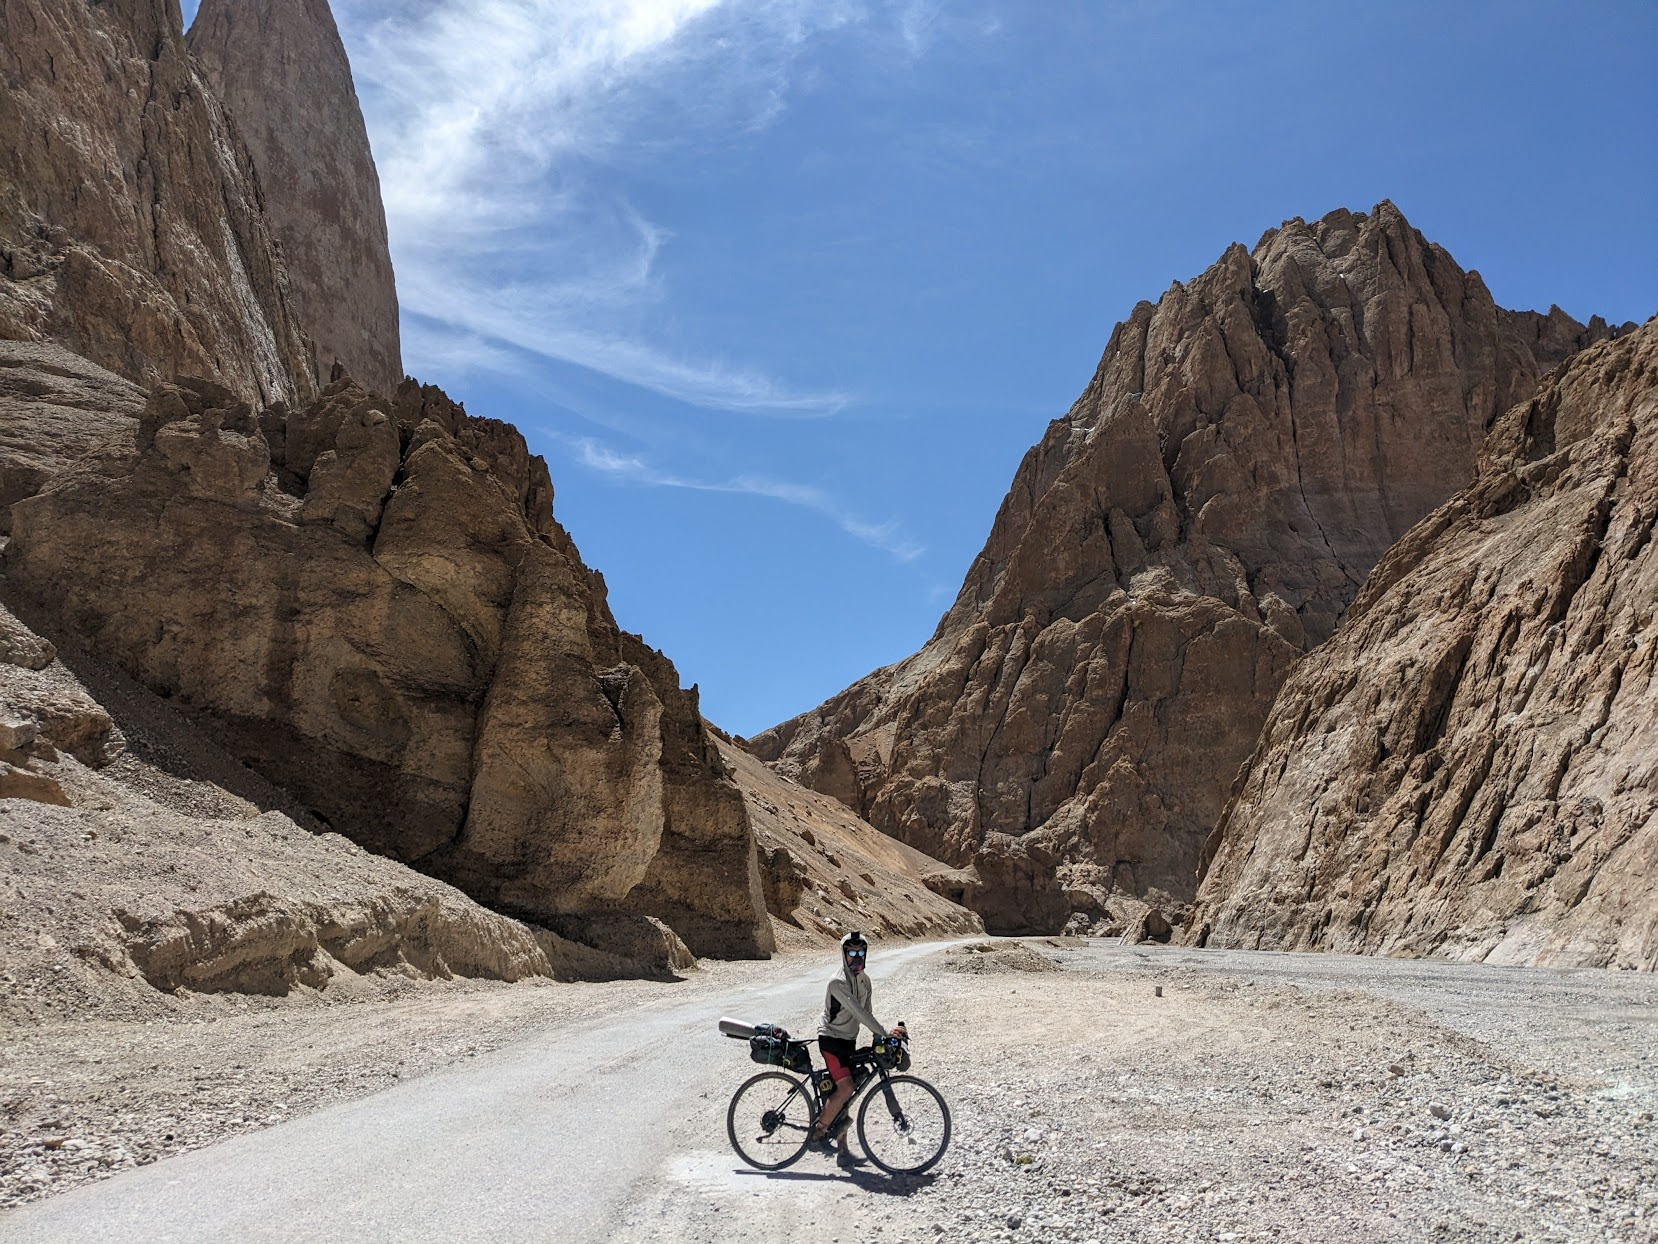
One of my favourite photos, capturing the hostile alien landscape
Eventually you reach Pang, near a military base. There are several Dhabas and accommodation available here, with the first permanent buildings since Sarchu.
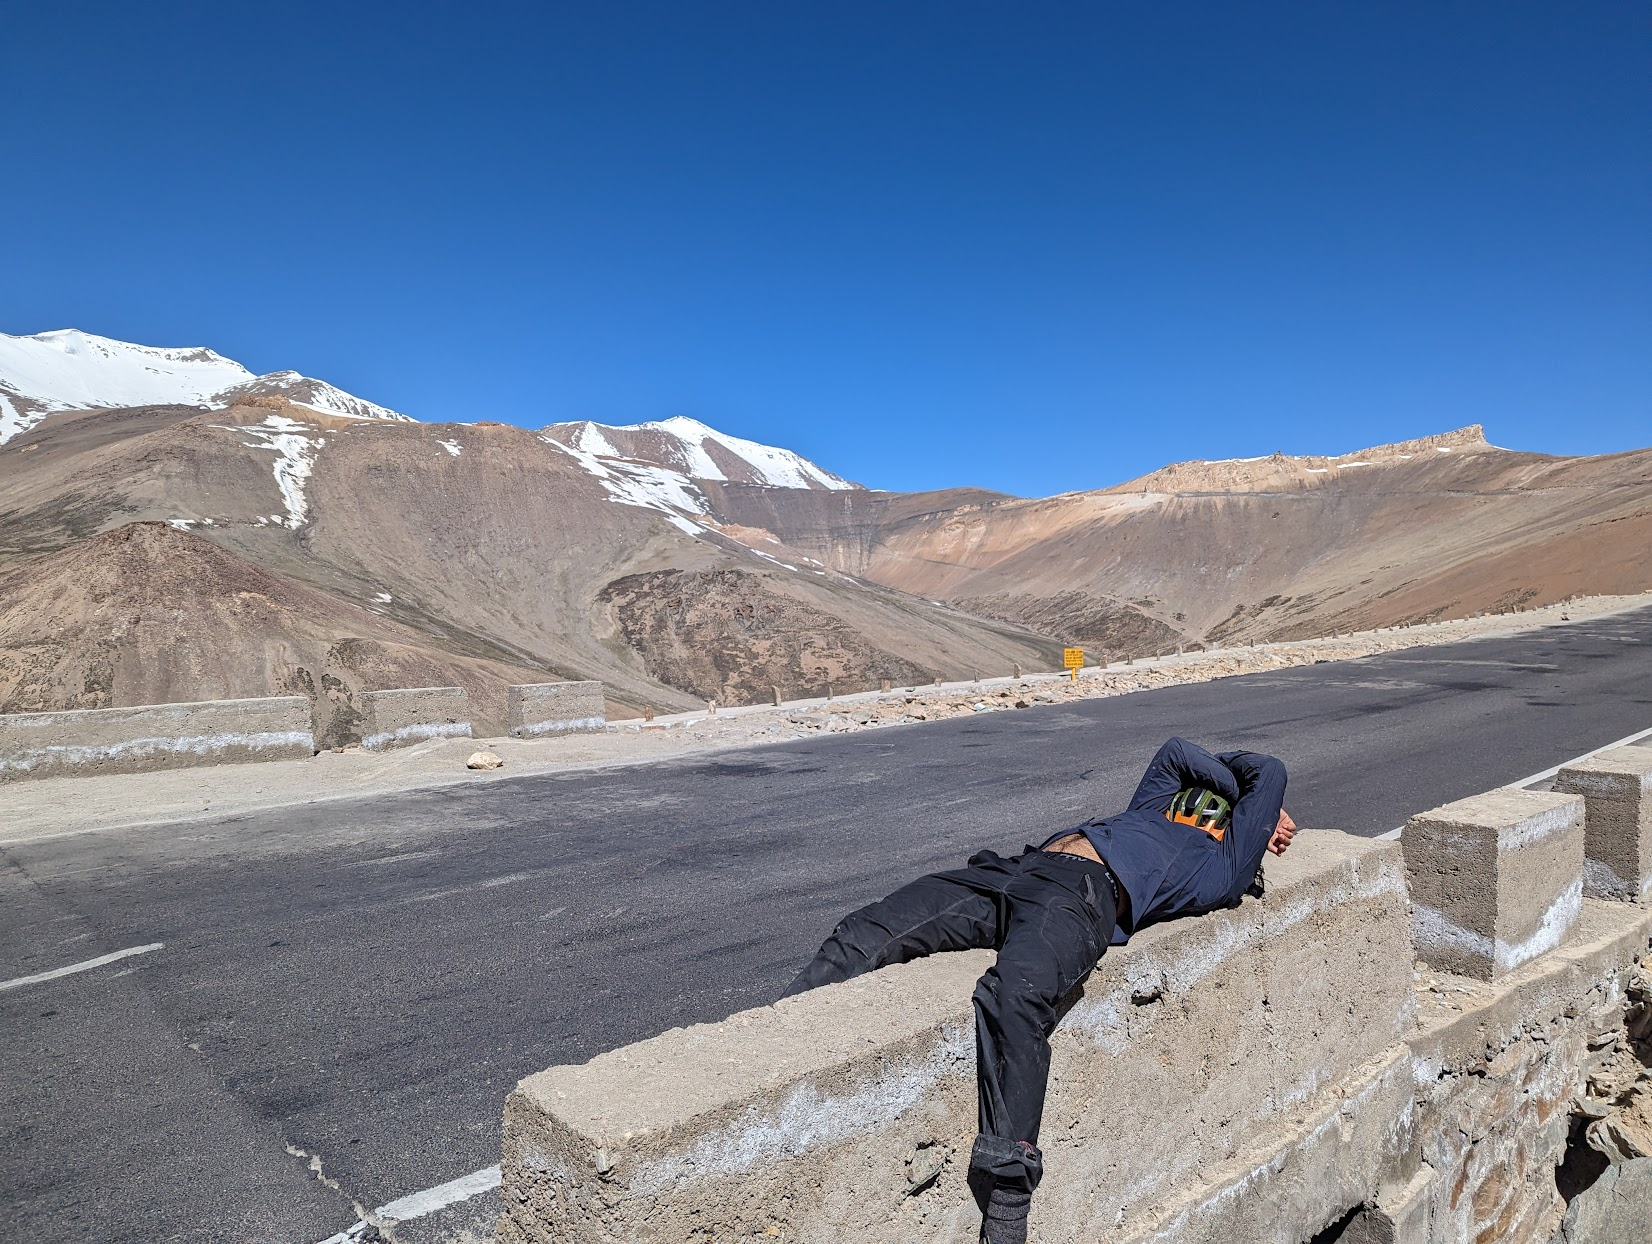
After Pang, there is a steep and hot climb, before reaching the More Plains. The road quality improves significantly here. The More Plains are a high altitude plateau, flanked by mountains on every side. I don’t think there are plains like this anywhere else in the Himalayas.
More plains. I am in this picture hiding from the sun
The wind can be quite strong on the plains, and my friend had issues cycling into the headwind. It can be slow. I was thankful for my slick tires here.
We found a Dhaba halfway between Pang and Debring, manned by a lone individual, and stocked up on water and snacks. I wouldn’t rely on this Dhaba being attended.
This road continues through some smaller settlements until reaching Debring, the largest settlement in the area and the closest to Tanglang La. There are a few permanent buildings, with a particularly nice hotel at the end of the town on the right.
Stay at this hotel
Day 8) Debring to Upshii / Lato via Tanglang La
https://www.strava.com/activities/9350071398
|
Distance |
84 km |
|
Ascent |
800 m |
|
High Point |
5300 m |
|
End Point |
3400 m |
|
My Time |
8 hours |

Route Data and Elevation Profile
We rode from Debring to Upshii, but if I could repeat the trip I would stop earlier at Lato. There appeared to be many nice guest house options at Lato, and it was quiet and away from the main road. Lato is in a very beautiful location, whereas Upshii is directly on the main road next to a military base, and is quite loud and busy.
Leaving Debring you immediately start the climb to the highest pass of the trip, Tanglang La at ~5300 m. There are no Dhabas between Debring and Tanglang La so make sure you have a few hours of food and water. This is quite a hard climb due to the thin air, even though the gradient is consistent and the road quality is good.
Feeling the altitude
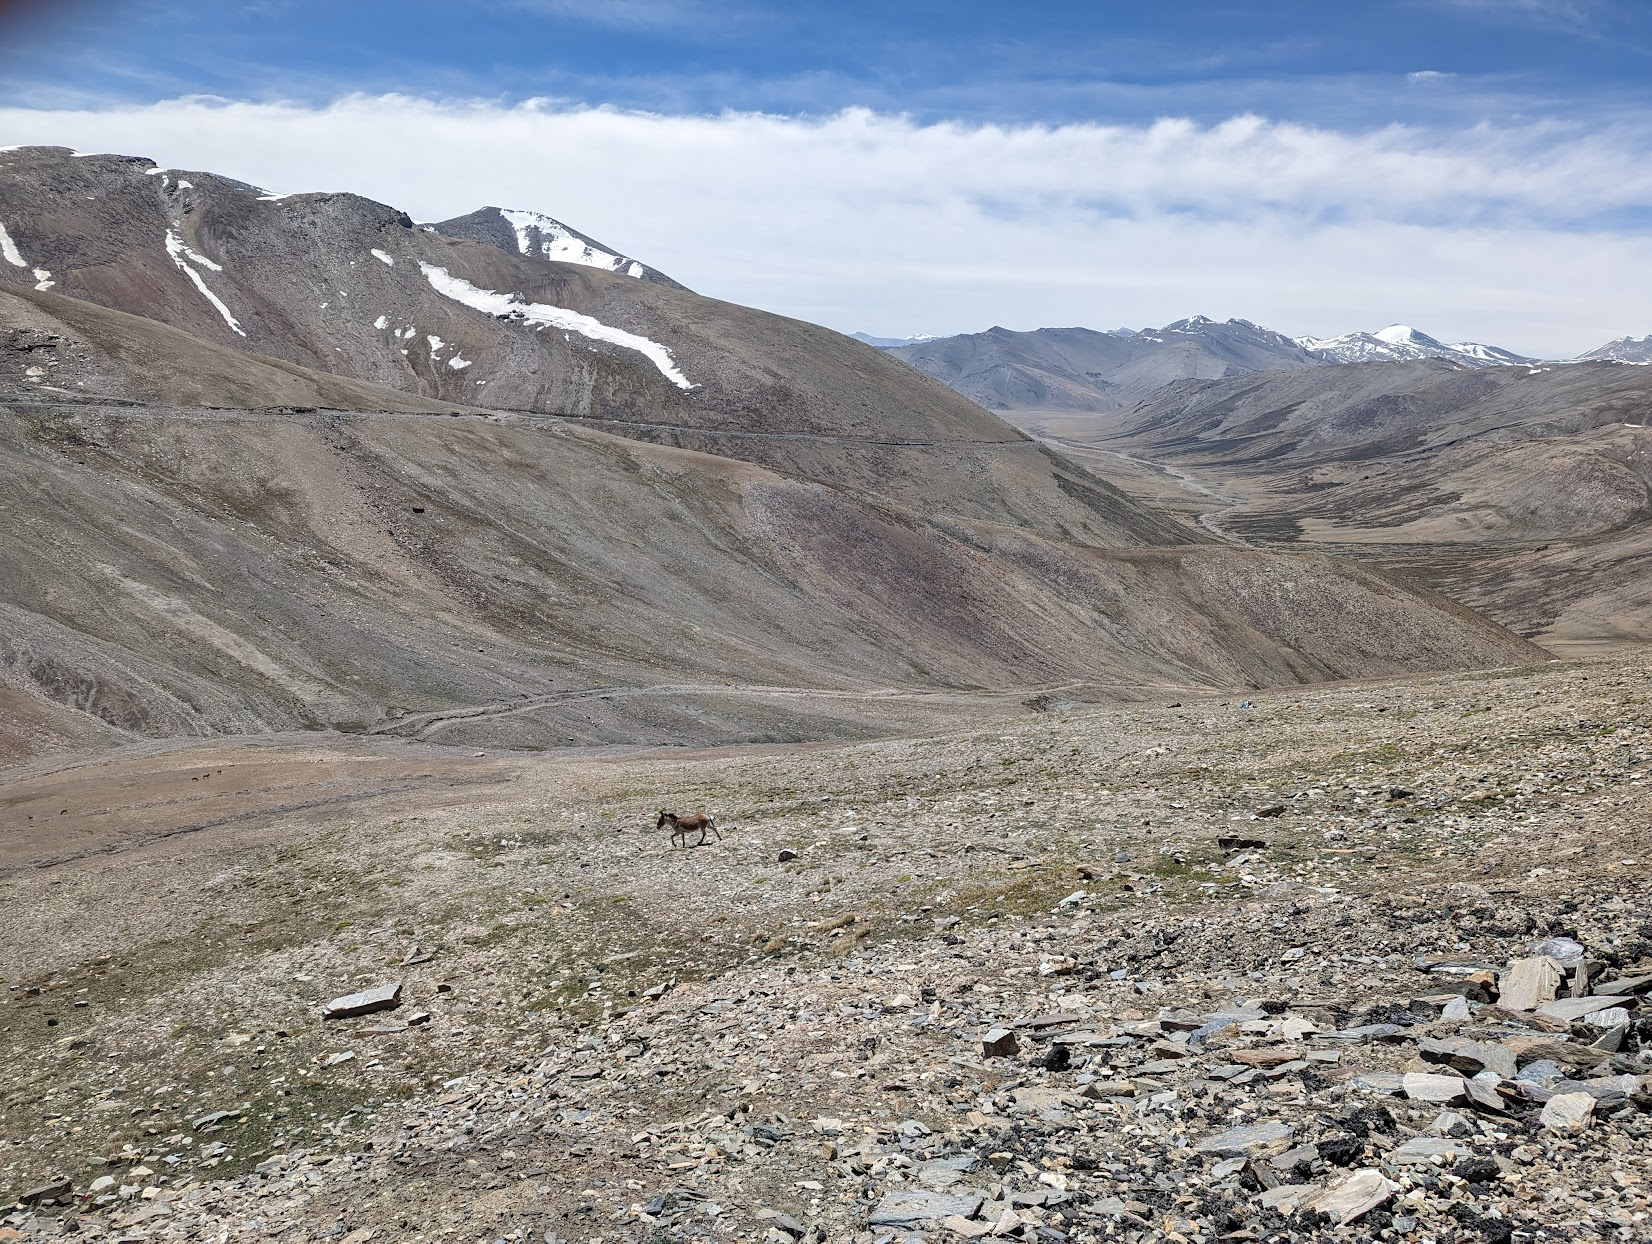
Wild donkey at 5000 m
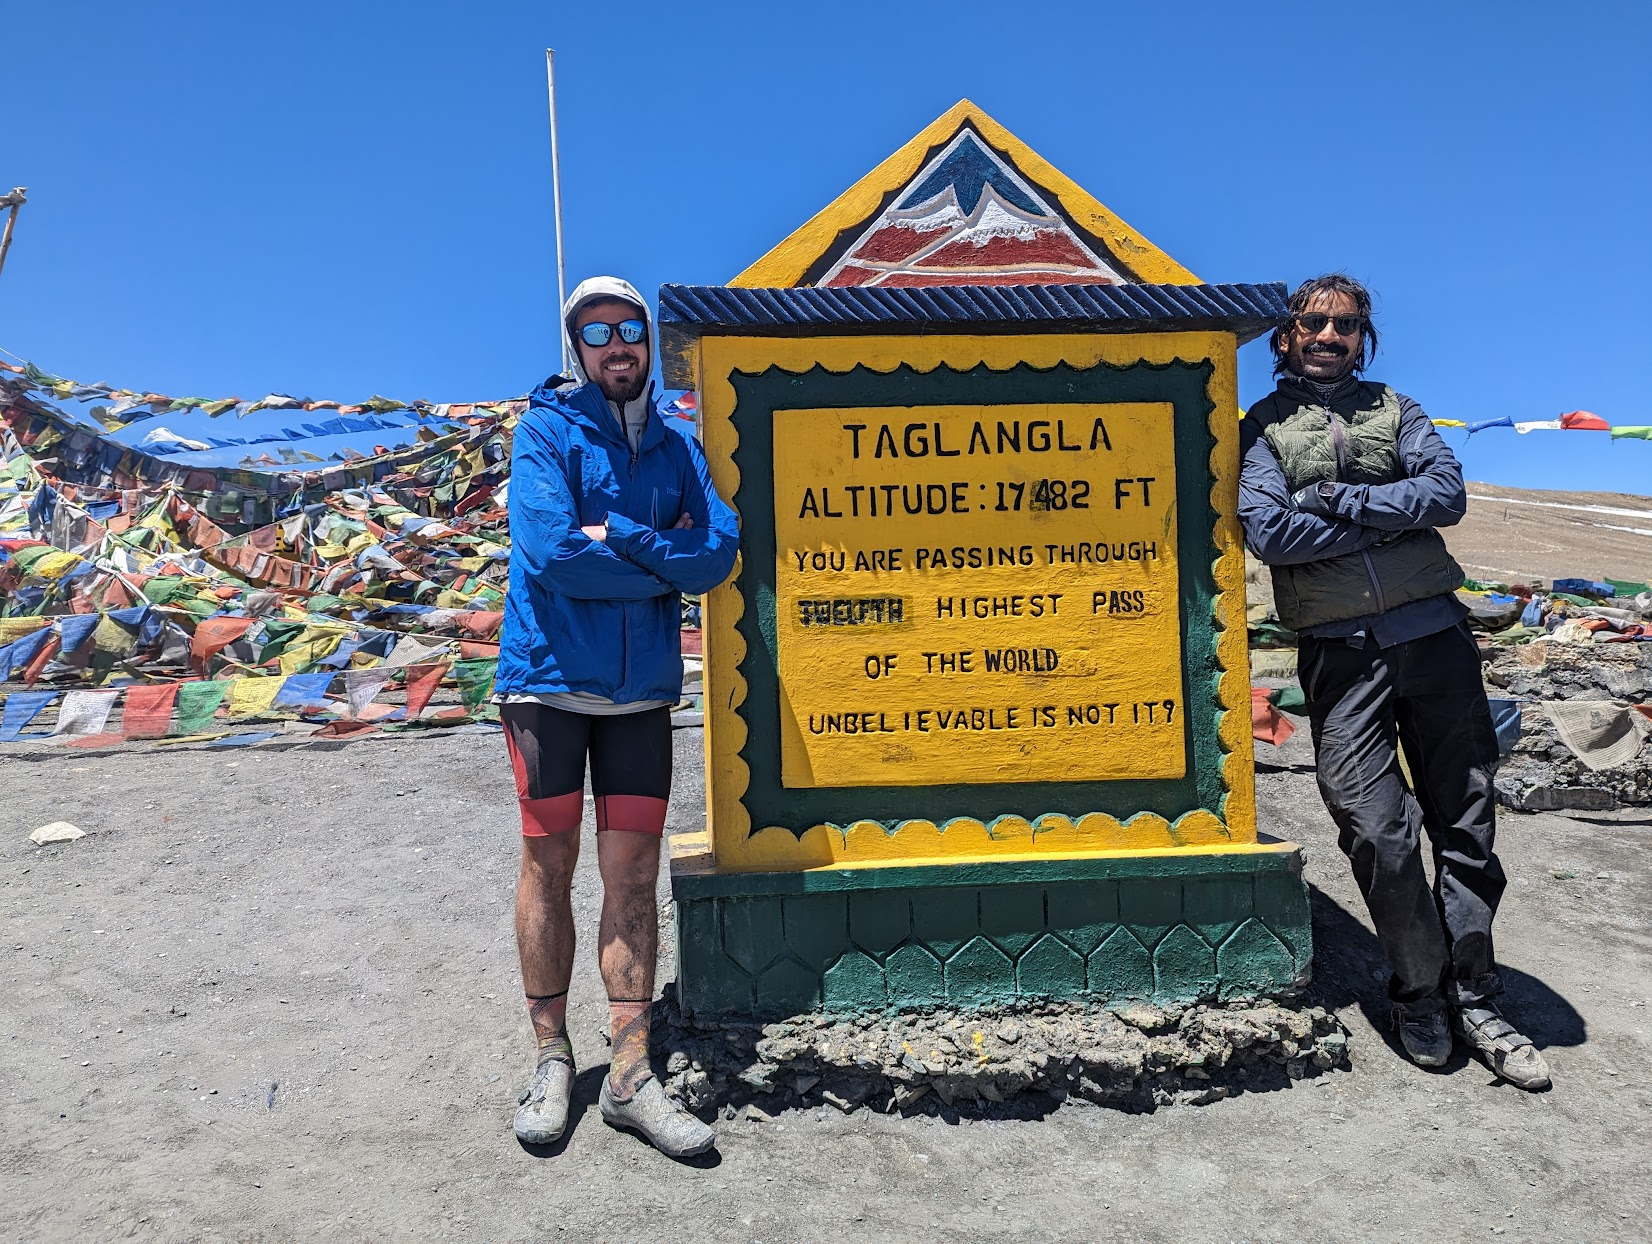
Unbelievable, is not it?
Once you reach Tanglang La, you roll downhill for the next 1800 m descent. Immediately over Tanglang La the road is a bit damaged by the snow and ice, but after a few km it becomes smooth, beautiful switchbacks. It is worth changing into warmer clothes at the top of Tanglang La to be prepared for the descent.
Eventually you reach civilization, and the first few villages will have running water and electricity for the first time in a week. Continue through these villages and decide where to stop. You will meet the Indus River and Upshii, which is a full sized town. Upshii did not have Wifi in 2023, but locals will get signal if you need it.
Back in civilization (Upshii)
Day 9) Upshii to Leh
https://www.strava.com/activities/9350074440
|
Distance |
50 km |
|
Ascent |
500 m |
|
High Point |
3550 m |
|
End Point |
3550 m |
|
My Time |
4 hours |

Route Data and Elevation Profile
Upshii to Leh is an easy day on good roads through towns. There are many places to stop for food and tea. However, the traffic can be very busy.
It is worth exploring some of the monasteries, however we found it easier to drop gear at Leh and then catch a taxi back the following day. Hemis Monastery is nice, but is on top of a large hill.
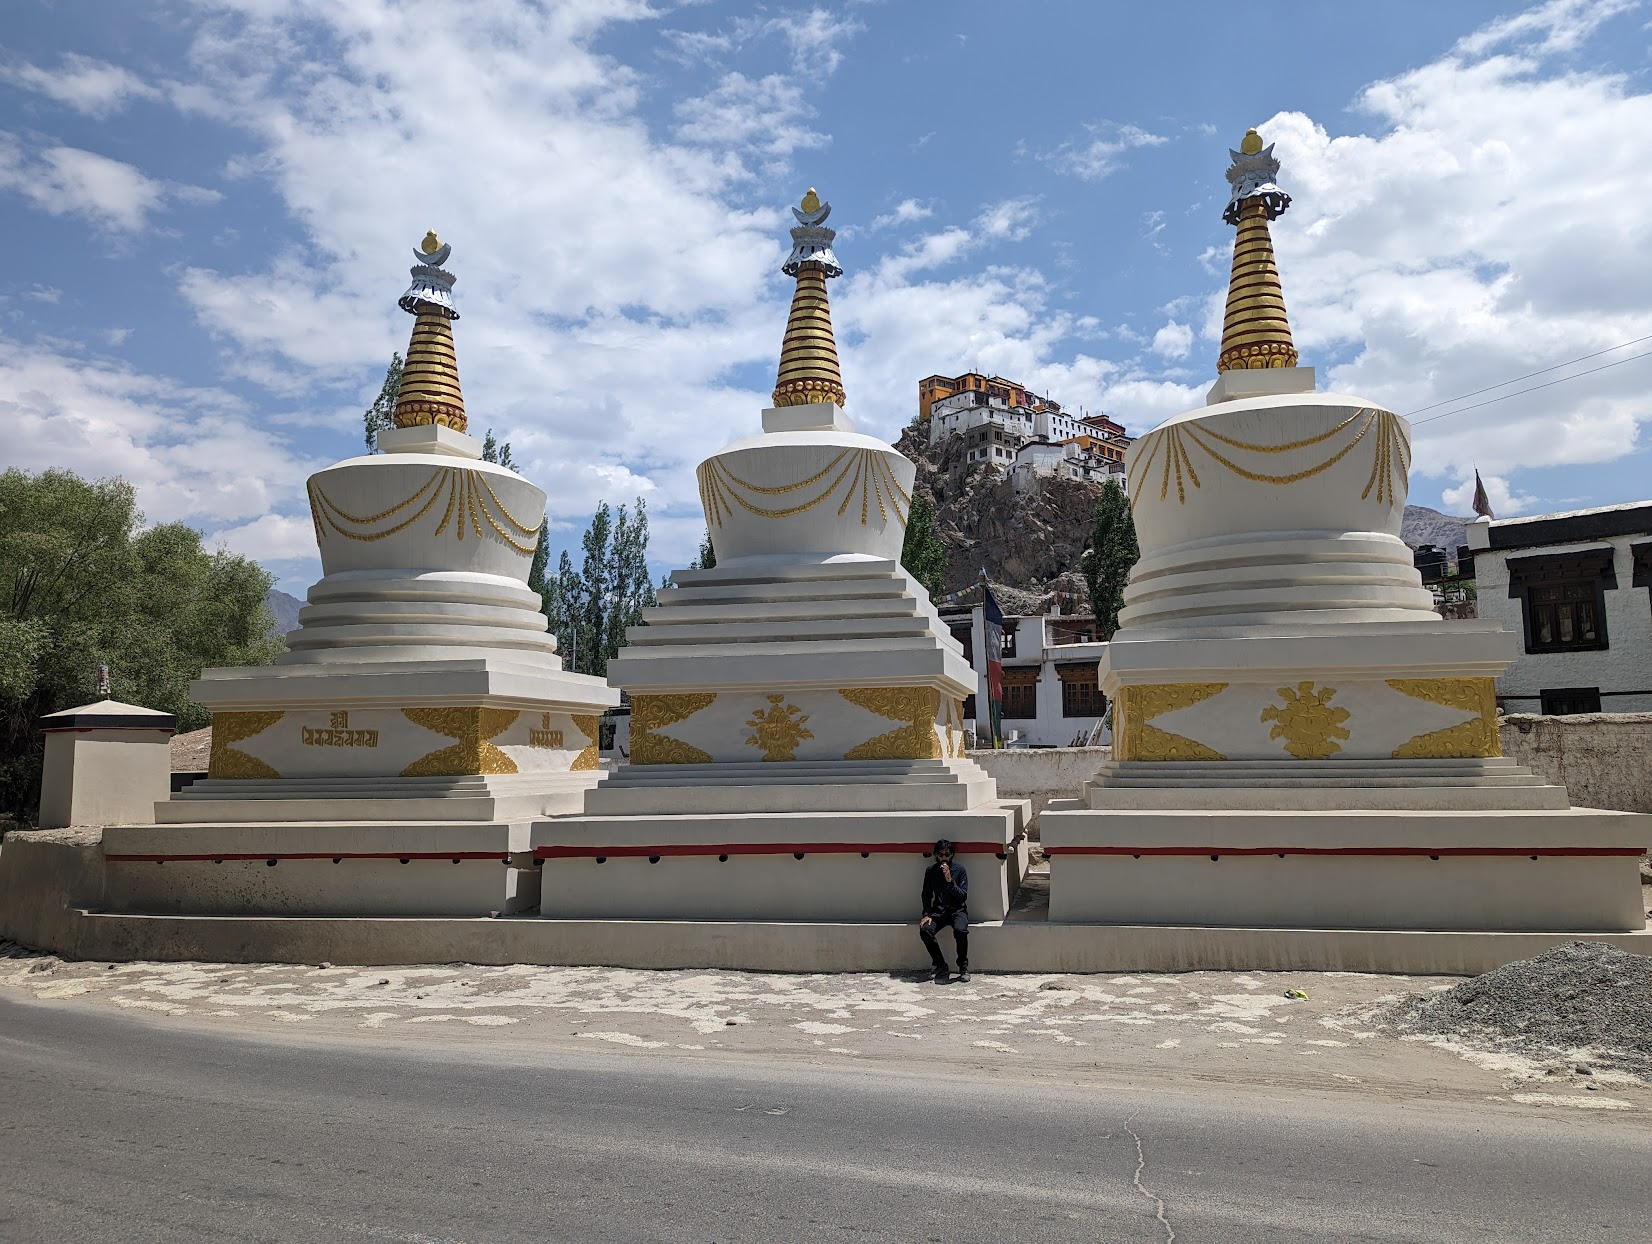
Monasteries and ice cream
Once in Leh you are back in a major tourist town and there are many accommodation options. We stayed at the Rover’s Den, and met many other bikepackers there. The owners were great and helped us get to the airport when we couldn’t fit our bike boxes in a taxi.
Leh, with Stok Kangri (6100 m) in the background (I have climbed it previously)
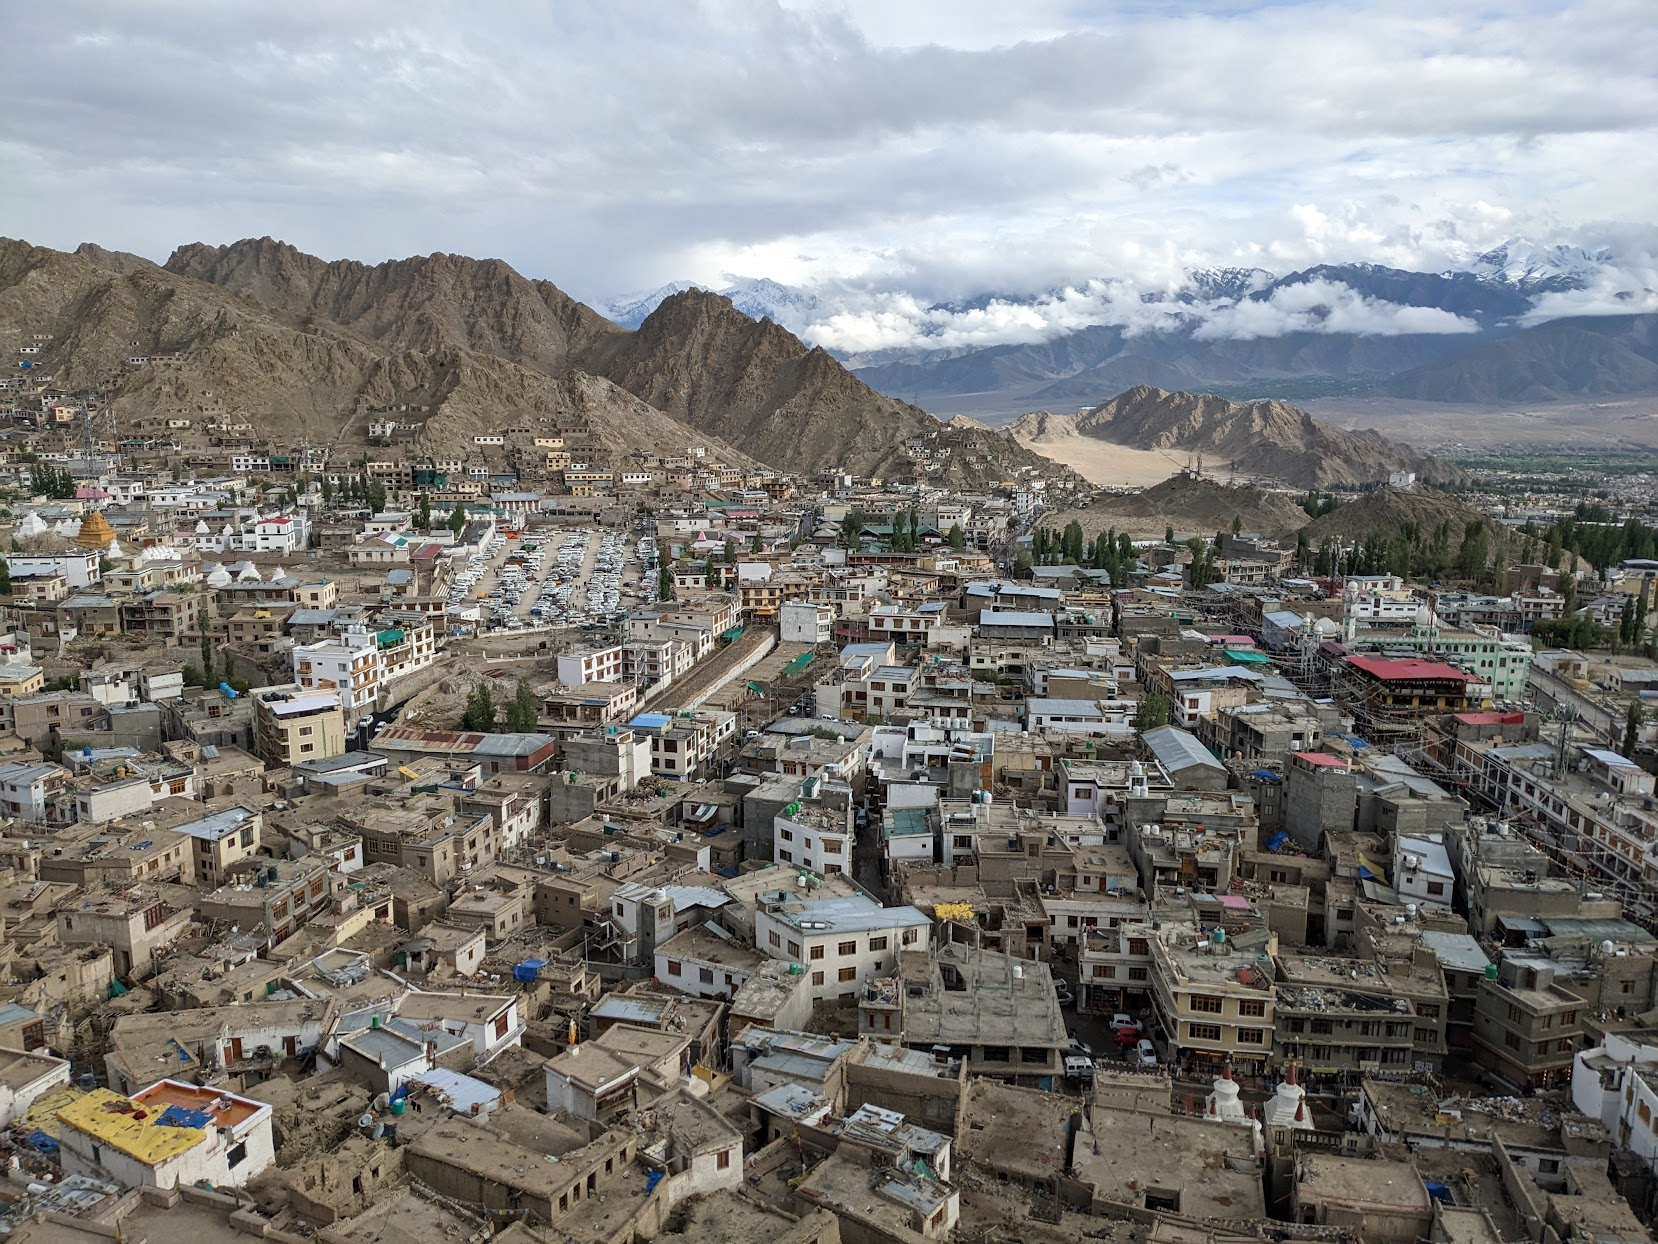
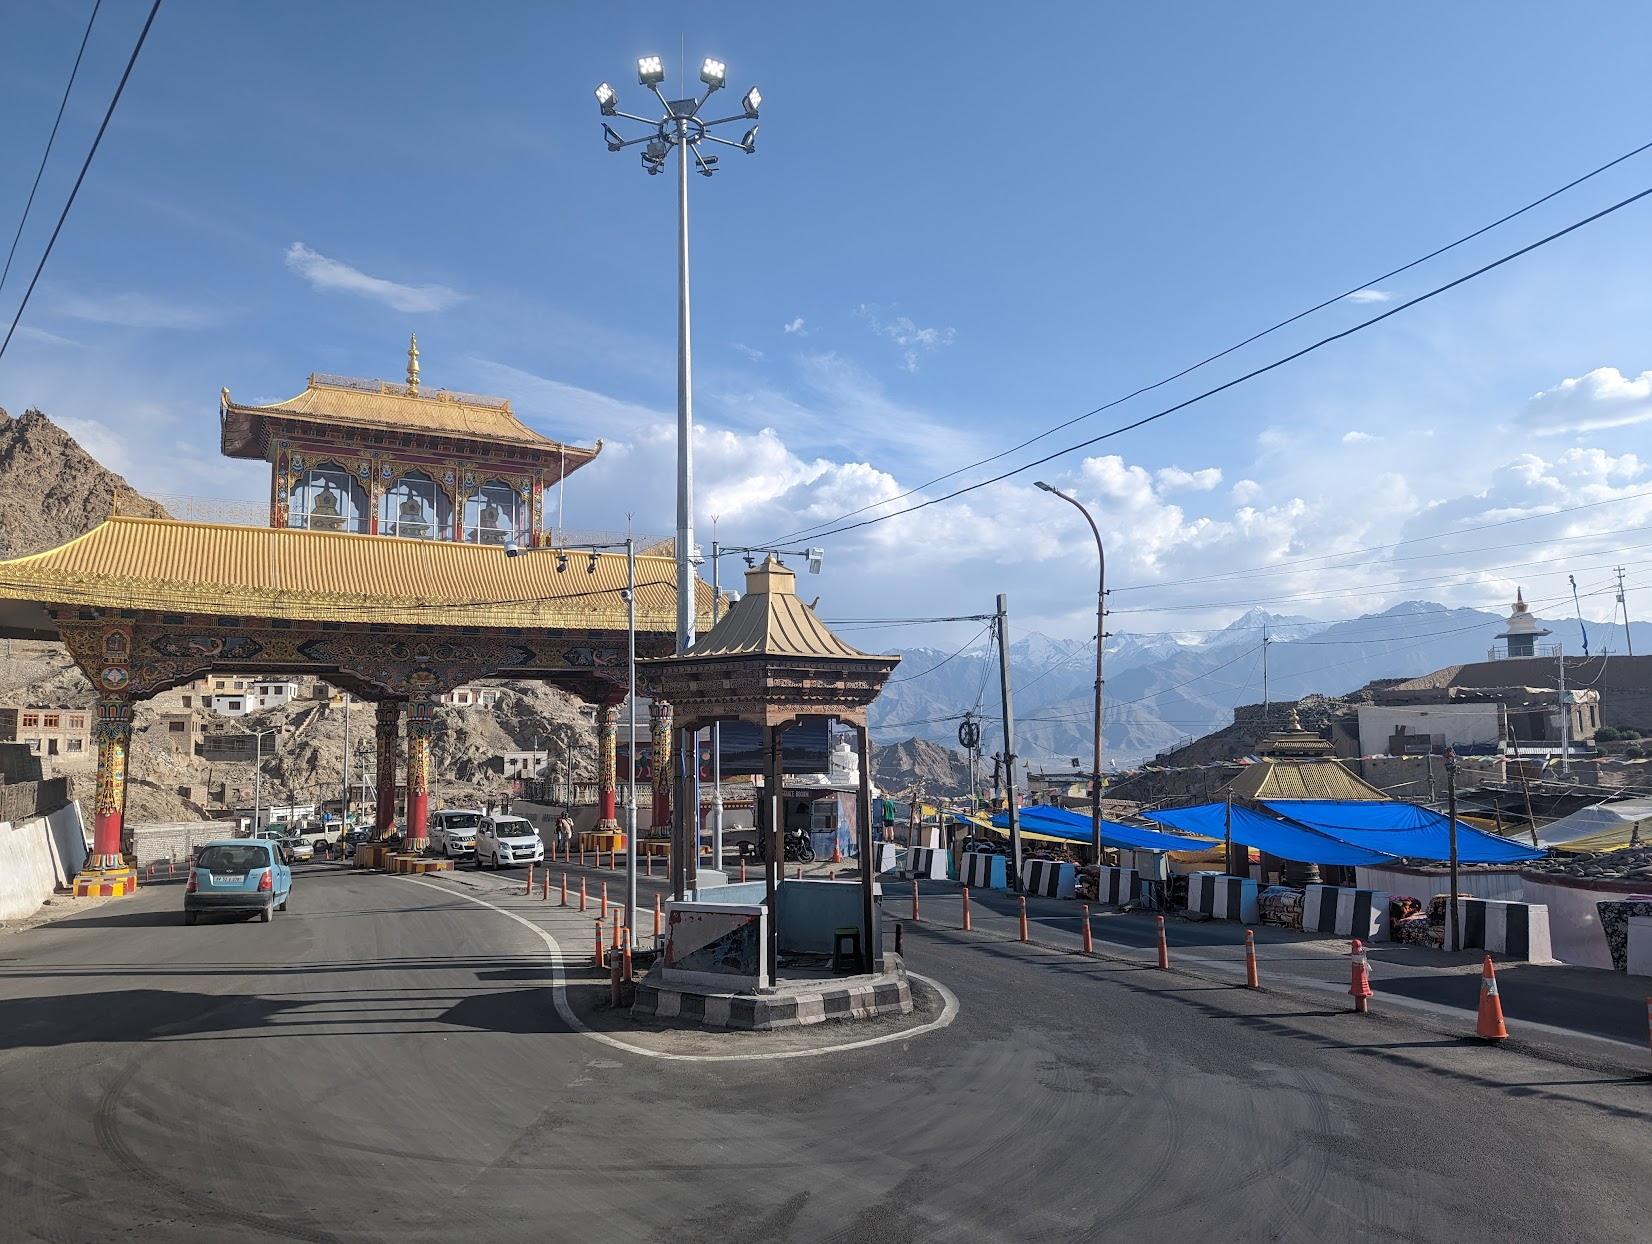
Leh
Day 10) Khardung La
https://www.strava.com/activities/9350082895
|
Distance |
73 km |
|
Ascent |
1850 m |
|
High Point |
5359 m |
|
End Point |
3550 m |
|
My Time |
- |

Route Data and Elevation Profile
PERMIT REQUIRED: before leaving Leh you need to get an Inner Line Permit. Ask your hotel where to get one. It should be about 500 INR.
Khardung La is an optional out and back day trip that can be completed after reaching Leh. Although it is a cool trip, if you only have a few days in Leh it would be much better to spend that time exploring the local monasteries and tourist attractions, rather than just biking another day up a hill. Leh is an incredible place with lots to do. It was my second time in Leh, so I was happy to do the Khardung La climb, whereas my friend had never been to the Himalayas and decided to explore the region instead.
I would recommend bringing a warm layering system. The descent is very long, and gets very cold, particularly if it starts to rain or snow. I brought a rainjacket and gloves and was very glad to have them. But it started to snow, and if it got much colder I was going to have to hitchhike a lift back down.
The climb is a consistent ~ 6 % gradient for +1800 m. The gradient is easier than most of the Manali Highway, but it continues relentlessly for the whole day.
At 4600 m elevation you will reach South Pullu, where there is a military checkpoint and should be somewhere to buy water and snacks. I got stuck here for several hours because I didn’t have the permit and refused to go down. Eventually after I was able to call some military contacts they let me through. Bring the permit and don’t make this mistake; without contacts you will not get through. They were very serious at this checkpoint.
From South Pullu the climb continues to the top, which was a traffic jam when I was there. The road quality also deteriorates in the last few kms. There is a sign on top that I was unable to get a picture with due to all the people pushing each other out of the way. A fight ended up breaking out and I decided it wasn’t worth waiting and went back down.
Once complete, layer up and roll back into Leh.
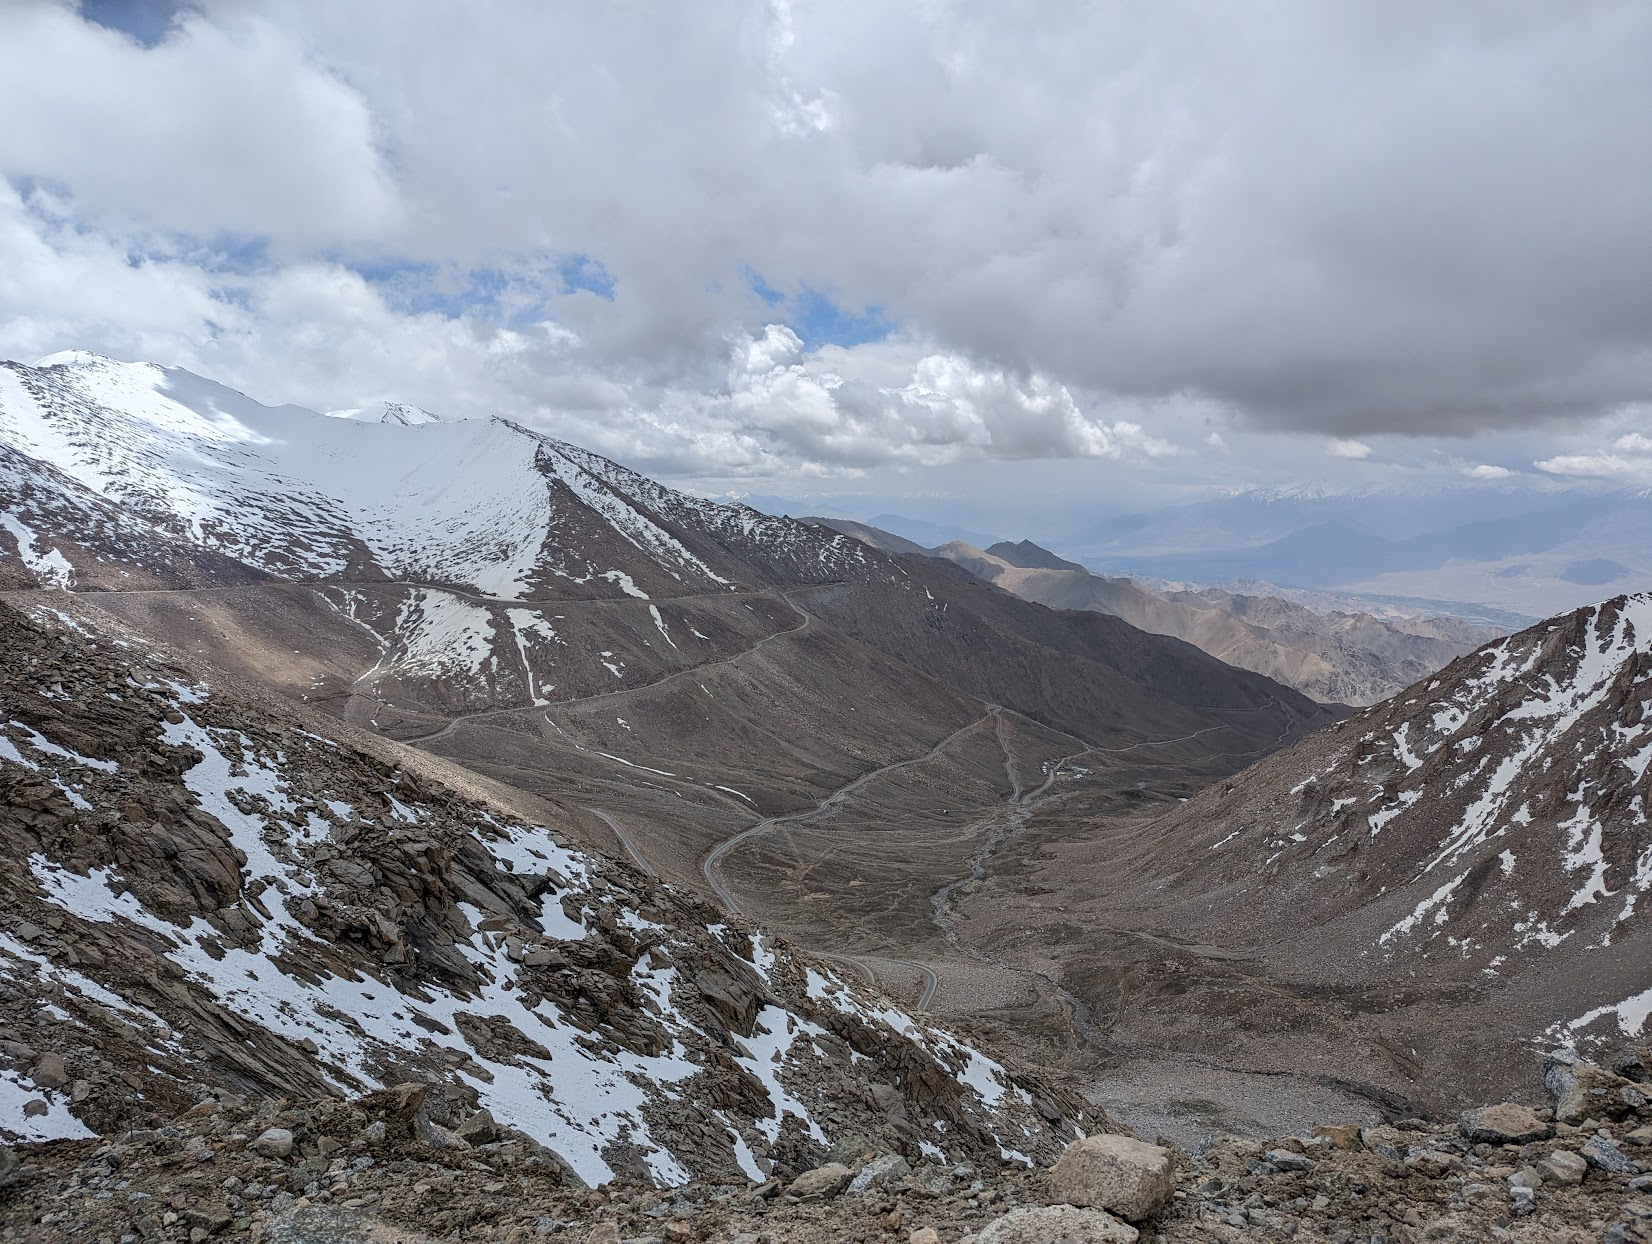
Looking down to Leh
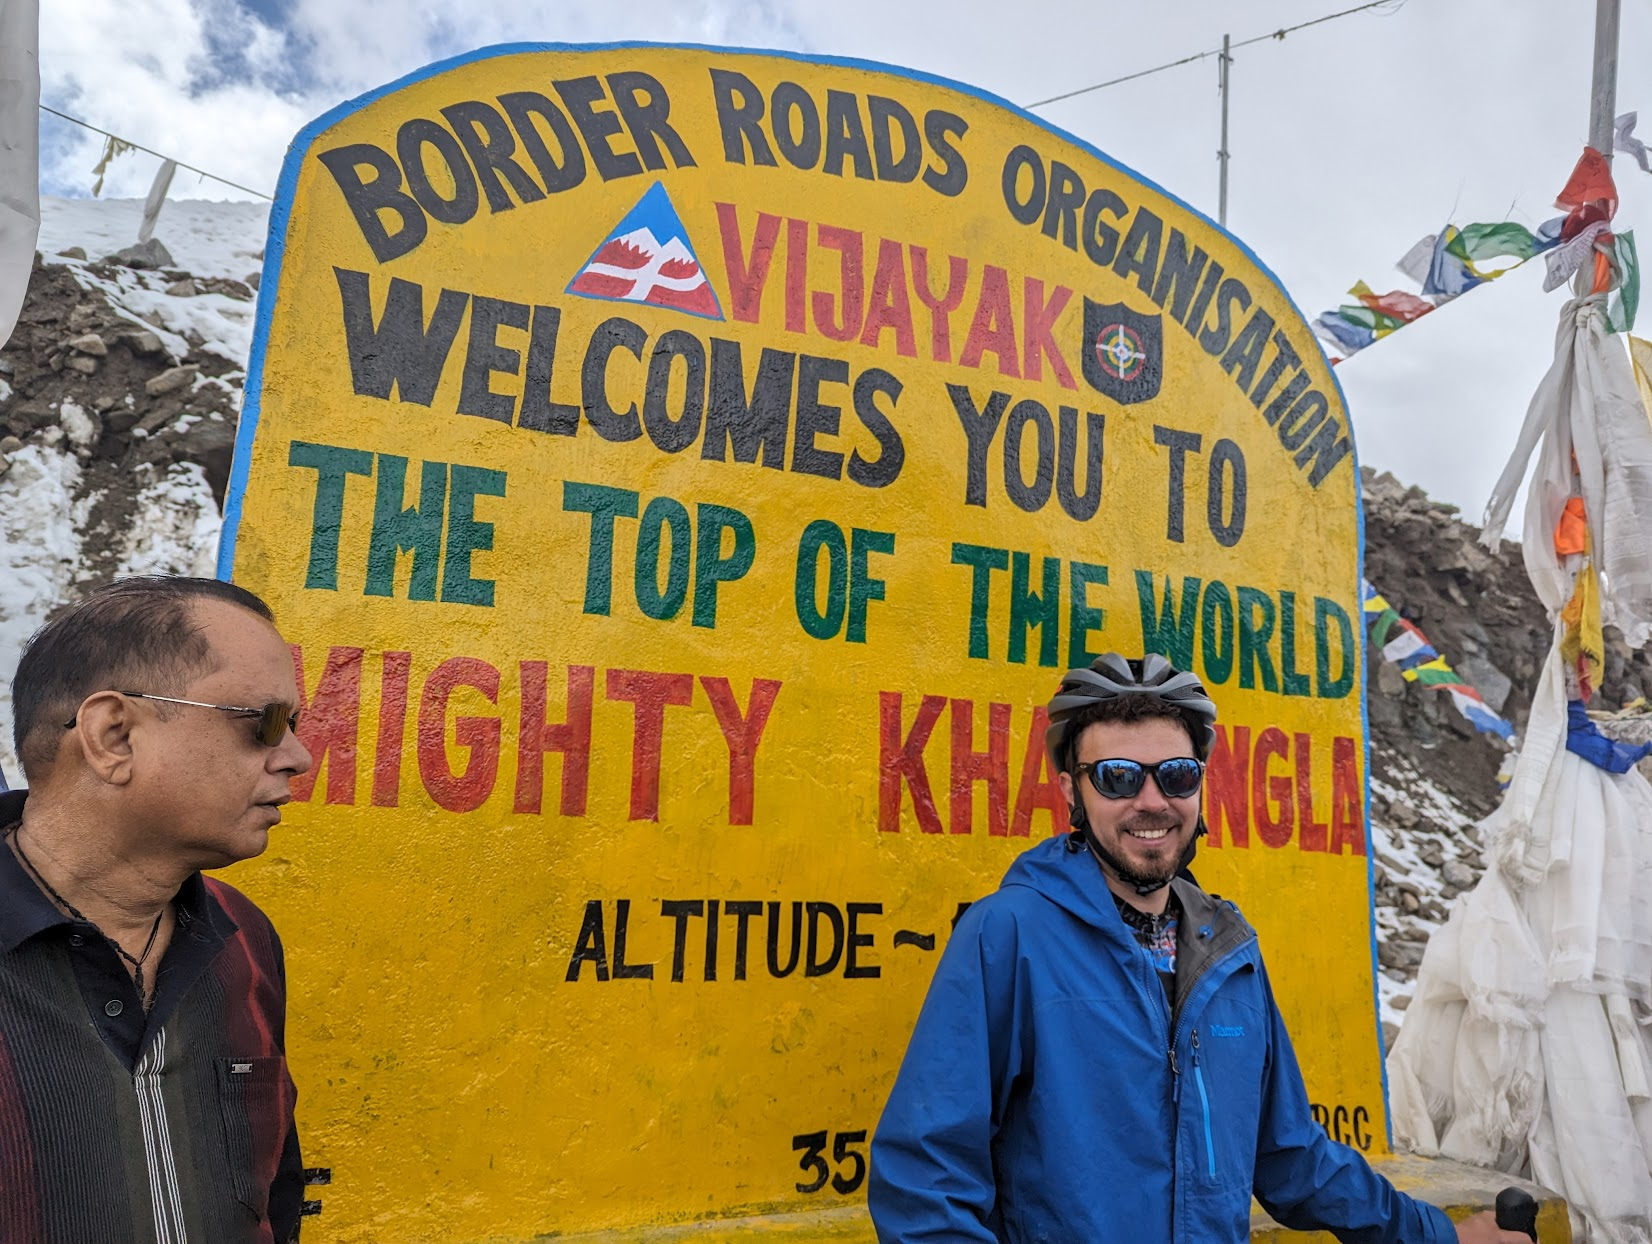
We did 20 takes and this was the best one. Fight occurring off screen

A lot of biking finished